
1.简介
Windows系统安装的软件如何自动化测试呢?Python的一个模块说是它可以实现Microsoft Windows GUI自动化测试,目前流行的自动化就是web,app,接口算是目前最主流的测试内容了,那么如果让做安装windows上的客户端自动化呢?是不是一脸懵?今天rebort就给大家讲解和分享一下啊!
2.pywinauto
pywinauto 是一个用于 **Windows **GUI **自动化的 **Python 库。它允许你编写脚本来自动化 Windows 应用程序的操作,如点击按钮、输入文本、选择菜单项等。pywinauto 基于 pywin32 和 comtypes,提供了更高级和更易用的接口。
官网地址:https://pywinauto.readthedocs.io/en/latest/index.html
中文文档地址:https://www.kancloud.cn/gnefnuy/pywinauto_doc/1193035
3.环境准备
3.1操作系统
1.rebort的环境是Windows 11版本 64位系统(32位的同学自己想办法哦,当然了现在32位的一般很少见),如下图所示:

Python版本:我的是这个,python:3.11.1,如下图所示:

4.环境搭建
Pywinauto是一个强大的Python库,用于自动化Windows应用程序的界面操作。无论是进行GUI测试、数据采集还是自动化任务,Pywinauto都能提供便捷的解决方案。
4.1安装Python
首先我们要安装好Python,然后才能安装Pywinauto,原因就不用我多说了吧!因为Pywinauto是Python的库,所有得现有父亲才有儿子。具体如何安装Python,在这里就不再赘述了,不会的小伙伴可以看rebort之前的博客文章 。
4.2安装Pywinauto
4.2.1方法一(推荐)
1.和安装其他依赖库一样,直接使用命令安装即可。可能要稍等一会….只需要一条命令,命令如下:
pip install pywinauto

4.2.2方法二(推荐)
1.确保你已经成功安装Python和Pycharm编辑器,点击”File” -> “Settings” -> “Project” -> “Python Interpreter”在”Project lnterpreter”下,点击”Add”并在搜索栏中输入要导入的模块名称搜索pywinauto,然后点击“install”即可
4.2.3方法三(不推荐)
在网站:https://github.com/pywinauto/pywinauto/releases 中下载最新的pywinauto,解压后,进入对应的目录中,cmd,然后运行命令如下:
python setup.py install
4.3验证是否安装成功Pywinauto
4.3.1导入对应库
1.Docs命令窗口
直接打开docs命令窗口输入python,进行导入对应的库,看是否报错,如下图所示:

2.Pycharm编辑器
打开Pycharm编辑器,在Python脚本中导入Pywinauto的必要模块,通常包括Application和findwindows,看是否报错,如下图所示:
安装前(红色报错),如下图所示:

安装后(红色报错消失),如下图所示:

4.3.2通过pip查看
通过pip list命令查看,如下图所示:

到此,环境就搭建好了
5.使用说明
安装好了之后,关于使用说明大家可以参照官方文档上的说明。
5.1可访问性技术(backend)
就是说在我们安装好Pywinauto之后,在启动应用程序之前,首先要确定哪种可访问性技术(pywinauto的backend)可以用于我们的应用程序,在windows上受支持的辅助功能技术有两种:
Win32 API (backend= “win32”) ,默认的backend, MFC、VB6、VCL、简单的 WinForms 控件和大多数旧的遗留应用程序
MS UI Automation (backend=”uia”) , WinForms、WPF、商店应用程序、Qt5、浏览器
那么如何知道程序到底适用于那种backend? 可以借助于GUI对象检查工具来确定程序到底适用于那种backend。如果使用 inspect 的uia模式,可见的控件和属性更多的话,backend可选uia,反之,backend可选win32。
5.2inspect 元素定位工具
常用的一些元素定位工具: SPY++,用于WIN32 API。当SPY++可以显示所有的控件时,访问技术应该选择”win32”。 Inspect.exe:如果Inspect.exe的模式设置为UIA模式,可以比SPY++显示更多的控件,则访问技术应该选择”uia”。 py_inspect:支持win32和uia两种访问技术,是SWAPY的替代。 UISPY:支持uia访问技术。 SWAPY:只支持win32访问技术。
1.inspect 教程:https://learn.microsoft.com/zh-cn/windows/win32/winauto/inspect-objects,如下图所示:

2.inspect.exe 是windows SDK 的一个内置工具,可以通过先安装Windows SDK,下载地址:https://developer.microsoft.com/en-us/windows/downloads/windows-sdk/ 如下图所示:

3.下载后在本机安装,Inspect.exe 位于 SDK 安装路径的 in文件夹中。通常不需要以管理员身份运行它。如下图所示:

4.它可以单独复制出来,放在桌面使用。
5.2.1“检查”窗口
“检查”窗口有多个主要部分:
标题栏。 显示“检查”窗口句柄 (HWND)。
菜单栏。 提供对“检查”功能的访问。
工具栏。 提供对“检查”功能的访问。
树状视图。 将 UI 元素的分层结构呈现为树视图控件,可用于在元素之间导航。
数据视图。 显示所选 UI 元素的所有公开辅助功能属性。
1.菜单栏中提供的命令也可以在工具栏中使用。 下图显示了“检查”查询记事本中的“编辑”菜单元素的 UI 自动化属性。如下图所示:

2.以下是操作微信时候,工具的一些展示和变化,如下图所示:

5.3一些类似的工具
5.3.1Python tools
PyAutoGui – 一个流行的跨平台库(具有基于图像的搜索,没有基于文本的控件操作)。
Lackey – Sikuli的纯Python替代品(基于图像模式匹配)。
AXUI – MS UI Automation API的一个包装器。
winGuiAuto – 另一个使用Win32 API的模块。
5.3.2其他脚本语言工具
(Perl) Win32::GuiTest
(Ruby) Win32-Autogui – Win32 API的包装器。
(Ruby) RAutomation – 有3个适配器:Win32 API,UIA,AutoIt。
5.3.3其他免费工具
(C#) Winium.Desktop – 一个年轻但很好的基于MS UI Automation的工具。
(C#) TestStack.White – 另一个很好的基于MS UI Automation的库,历史悠久。
AutoIt – 具有自己的类似Basic语言的免费工具(基于Win32 API,没有.NET计划)
AutoHotKey – 具有自己的脚本语言的原生C ++工具(.ahk)
5.3.4商业工具
WinRunner (http://www.mercury.com/us/products/quality-center/functional-testing/winrunner/)
SilkTest (http://www.segue.com/products/functional-regressional-testing/silktest.asp)
Many Others (http://www.testingfaqs.org/t-gui.html)
5.4gui inspect tool全家桶
1.官方文档中推荐使用spy++和inspect来检查。可自行下载:
2、下载解压后的各种工具,如下展示:

Spy++ (定位元素工具(win32))
Inspect(定位元素工具(uia))
UI Spy (定位元素工具)
Swapy(可简单生成pywinauto代码)
5.5如何判断程序的backend是’win32’还是’uia’呢?
目前大部分应用程序主窗口是“uia”,一般都是先用“uia',报错时再换成'win32'。这也是一种笨办法,二者选一,不是这个就是那个。
这里按官方推荐的介绍使用inspect来判断backend的类别,具体步骤如下:
1.下载上面github链接里的相关工具并打开,点击inspect左上角的下拉列表中切换到UI Automation,如下图所示:

2.然后鼠标点一下你需要测试的程序窗体,inspect就会显示相关信息。 上图为点击window文件夹下的微信的结果,inspect中显示了相关的信息,如下图所示。说明backend为uia。如上图所示:
3.相反,没有切换,点击任务管理器,拒绝访问,则为win32,如下图所示:

6.快速入门
这里以启动Windows自带的计算器为例,给各位小伙伴或者童鞋们来演示一下。
6.1代码设计
# 3.导入模块 from pywinauto import Application from pywinauto import findwindows #启动计算器 app = Application().start("calc.exe")
2.运行代码后电脑端的动作(启动计算器)
7.梳理
介绍了Pywinauto的基本使用方法,包括安装、导入模块、启动应用程序、如何判断程序的backend是’win32’还是’uia’。通过掌握这些基本概念和技巧,可以利用Pywinauto轻松实现自动化Windows界面操作,提高工作效率。
接下来我们看看使用其他方法打开计算器和非电脑自带的程序,pywinauto 可以启动电脑自带的应用程序,也可以启动电脑安装的应用程序。
8.运行指定的应用程序
运行指定的应用程序,顾名思义就是用户指定运行哪款程序,就运行哪款程序。这里将其分为两大类:电脑自带的应用程序,如:记事本、计算器等和电脑安装的应用程序,如:QQ、微信等。分好后,接下来看看是如何这两类应用程序的。
8.1启动电脑自带的应用程序
上面已经介绍启动计算器了,下面启动一下记事本,演示一下。
通过start() 方法指定exe应用程序的名称即可。start()方法用于启动一个可执行程序
def start(self, cmd_line, timeout=None, retry_interval=None, create_new_console=False, wait_for_idle=True, work_dir=None): """Start the application as specified by cmd_line""" # try to parse executable name and check it has correct bitness if'.exe'in cmd_line and self.backend.name == 'win32': exe_name = cmd_line.split('.exe')[0] + '.exe' _warn_incorrect_binary_bitness(exe_name) if timeout is None: timeout = Timings.app_start_timeout if retry_interval is None: retry_interval = Timings.app_start_retry start_info = win32process.STARTUPINFO() # we need to wrap the command line as it can be modified # by the function command_line = cmd_line # Actually create the process dw_creation_flags = 0 if create_new_console: dw_creation_flags = win32con.CREATE_NEW_CONSOLE try: (h_process, _, dw_process_id, _) = win32process.CreateProcess( None, # module name command_line, # command line None, # Process handle not inheritable. None, # Thread handle not inheritable. 0, # Set handle inheritance to FALSE. dw_creation_flags, # Creation flags. None, # Use parent's environment block. work_dir, # If None - use parent's starting directory. start_info) # STARTUPINFO structure. except Exception as exc: # if it failed for some reason message = ('Could not create the process "%s"

' 'Error returned by CreateProcess: %s') % (cmd_line, str(exc)) raise AppStartError(message) self.process = dw_process_id if self.backend.name == 'win32': self.__warn_incorrect_bitness() def app_idle(): """Return true when the application is ready to start""" result = win32event.WaitForInputIdle( h_process, int(timeout * 1000)) # wait completed successfully if result == 0: return True # the wait returned because it timed out if result == win32con.WAIT_TIMEOUT: return False return bool(self.windows()) # Wait until the application is ready after starting it if wait_for_idle and not app_idle(): warnings.warn('Application is not loaded correctly (WaitForInputIdle failed)', RuntimeWarning) self.actions.log("Started " + cmd_line + " application.") return self
相关参数:
cmd_line: 是包含路径的启动应用程序的命令以及启动参数
timeout: 启动程序的超时时钟设置,默认为5s
create_new_console: 创建新的控制台,默认不创建
wait_for_idle: 是否等待到程序的Idle状态
work_dir: 指定工作目录
8.1.1代码设计
# 3.导入模块 from pywinauto.application import Application # 启动记事本 app = Application(backend="uia").start("notepad.exe")
8.1.2运行代码
1.运行代码,右键Run'Test'
2.运行代码后电脑端的动作(启动记事本)。
8.2启动电脑安装的应用程序
这里以大家熟悉的微信为例,属性-查看快捷方式,如下图所示:

8.2.1代码设计
# 3.导入模块 from pywinauto.application import Application # 启动微信 app = Application(backend="uia").start(r"D:WeChatWeChat.exe")
8.1.3运行代码
1.运行代码,右键Run'Test',就可以看到控制台输出:
2.运行代码后电脑端的动作(启动微信)。
上文我们在次了解了电脑(PC端)系统自带的应用程序,如:记事本、计算器等等,以及电脑(PC端)系统安装的应用程序,如QQ、微信等等。如何启动以及启动的几种方法,非常简单。
如果在电脑中这个应用程序已经启用了,我如何去启动这个已经启动的应用程序呢?
接下来我们了解和分享如何启动PC端已经启动的应用程序。
9.启动已启动的应用程序
上面的例子细心的你相信会发现都是程序没有运行起来的,那么想要启动已经运行起来的程序应该怎么做?
connect() 在要启动自动化应用程序时使用。 要指定已在运行的应用程序,您需要指定以下之一:
process:应用程序的进程ID,例如app = Application().connect(process=2341)
handle:应用程序窗口的窗口句柄,例如,app = Application().connect(handle=0x010f0c)
path:进程的可执行文件的路径(GetModuleFileNameEx用于查找每个进程的路径并与传入的值进行比较),例如:app = Application().connect(path=r”c:windowssystem32
otepad.exe”)
或者指定窗口的参数的任意组合,这些都被传递给pywinauto.findwindows.find_elements() 函数。 例如:
app = Application().connect(title_re=".*Notepad", class_name="Notepad")
注意: 在使用connect*()之前,应用程序必须准备好(已启动)。
9.1通过进程号启动
这里以我们熟悉的大鹅QQ为例,进行演示!
1.如果我们想操作一个已经打开的应用程序,可以根据应用的进程号 PID 去操作,先查看应用进程PID,如下图所示:

2.通过connect()方法连接,process参数指定PID,PID是不固定的,每次启动都会变化。
9.1.1参考代码
from pywinauto.application import Application # 启动QQ app = Application(backend="uia").connect(process=19288) print(app)
9.1.2运行代码
1.运行代码,右键Run'Test',就可以看到控制台输出
9.2通过窗口句柄启动
通过窗口句柄的形式打开。问题来了?怎么查看窗口句柄?
1.通过Inspect.exe查看窗口句柄,如下图所示:

handle 句柄Inspect.exe查看是16进制的,每次启动也会变化。
因为进程PID和handle 句柄每次启动都会变化,所以我们应该用参数的组合。
2.还可以通过前面说的viewWizard工具进行查看(将放大镜拖到已启动的应用程序),通过下图可以看到窗口的句柄为133326,如下图所示:

9.2.2参考代码
from pywinauto.application import Application # 启动QQ app = Application(backend="uia").connect(process=10720,handle=0x1059C) print(app)
9.2.3运行代码
1.运行代码,右键Run'Test',就可以看到控制台输出
根据title 和 class 名称启动,根据title 和 class 名称连接也有缺点,必须窗口在桌面是开着的才行,挂后台的应用无法连上。

参考代码如下:
from pywinauto.application import Application # 启动QQ app = Application('uia').connect(title_re="QQ", class_name="TXGuiFoundation") print(app)
9.3应用程序路径
1.还可以根据exe应用程序的路径,路径是固定的,但是运行报错了。如下图所示:
9.3.2参考代码
from pywinauto.application import Application # 启动QQ app = Application('uia').connect(path=r'D:QQBinQQScLauncher.exe') print(app)
9.4Desktop() 方法
还有另外一种连接方式, 通过Desktop 方法更简单。通过标题的方式打开。以计算器为例演示,有兴趣的自己可以尝试QQ。
9.4.1代码设计
9.4.2参考代码
import pywinauto # 通过窗口打开 app = pywinauto.Desktop() win = app['计算器'] print(win)
9.4.3运行代码
1.运行代码,右键Run'Test',就可以看到控制台输出
PC端自带和安装的应用程序启动,以及已启动的自带和安装的应用程序启动,你学会了吗,可参照上文自行实践~
已经知道如何将PC端的应用程序启动,以及如何连接已启动的应用程序,那么启动和连接上之后呢?不用说当然是操作应用程序了,怎么操作呢?
10.什么是窗口
窗口就是应用软件上面的工具栏,操作栏,弹出菜单,对话框等,这些基本上为windows软件应用比较多的地方。它通常具有带有标题栏、 最小化和最大化按钮以及其他标准 UI 元素的框架。 有兴趣的可以看一下这里有详细的介绍:什么是窗口 – Win32 apps | Microsoft Learn
11.如何获取窗口信息
这里介绍和分享两种方法:一种是通过工具获取,另一种是通过代码获取。
11.1方法1-工具
1.直接通过inspect工具进行获取窗口信息,启动记事本,可以通过inspect.exe 查看窗口信息。如下图所示:


2.主要看2个属性,窗口的标题,也就是左上角我们看到的还有一个是查看的class属性,只能通过工具查看。如下图所示:
11.2方法2-代码
通过print_control_identifiers()方法,print_control_identifiers()方法进行获取该应用下的所有窗口或组件内容(这里由于是Windows11系统用这个方法打开获取记事本窗口信息会报错)。查了好多资料以及去pywinauto社区查找都没找到解决办法,而且网上好多人都遇到了这个问题,因此这里用notepad++这款编辑器给小伙伴或者童鞋们来演示一下。其实用notepad++这款编辑器按照Windows10系统代码的写法也会报错: pywinauto.findwindows.ElementNotFoundError: {'class_name': 'Notepad', 'visible_only': True, 'backend': 'uia'} 。 但是自己想了一种解决办法:手动调用connect()给予额外的时间缓冲,可能恰好让UI准备就绪。然后就可以了,试过记事本了,仍然不行。后边如想到解决办法,会写文章告知,要是没有解决方法,就不写相关文章,或者后期微软或者pywinauto社区会更新版本修复这一问题。
11.2.1代码设计
1.Windows10系统
from pywinauto import Application import time # 通过窗口打开 app = Application('uia').start("D:/software/Notepad/Notepad++/notepad++.exe") win = app['新文件 1 - Notepad++'] print(win) print(app.process) win.print_control_identifiers()
2.Windows11系统
from pywinauto import Application import time # 通过窗口打开 app = Application('uia').start("D:/software/Notepad/Notepad++/notepad++.exe") app = Application('uia').connect(class_name="Notepad++") win = app['新文件 1 - Notepad++'] print(win) print(app.process) win.print_control_identifiers()
11.3.3运行代码
1.运行代码,右键Run'Test',就可以看到控制台输出
2.运行代码后电脑端的动作(启动notepad++)
12.1如何选择窗口?
启动PC端的软件后,会出现软件的窗口界面,首先获取到窗口的信息,然后我们需要根据获取到的窗口信息连接到窗口,然后选择我们要测试的窗口,只有选择到要测试的窗口后,我们才能进行操作。如果你都无法选择到要测试窗口,何谈下一步的操作和自动化测试呢?因此接着介绍几种选择窗口的方法,其实之前的文章中已经或多或少的已经提及到,因为比较重要,因此在这里单独将其拎出来介绍和讲解一下。这里介绍和分享以下三种方法,通过选择notepad++的窗口,然后输入“rebort测试”。在Windows11系统演示,Windows10以下可以参考前边提到的代码,比Windows11简单多了。
12.1方法1-窗口属性值
通过窗口的属性值进行获取,代码如下:
win = app['属性值']
12.1.1代码设计
通过className属性值,代码如下:
from pywinauto import Application import time # 通过窗口打开 app = Application('uia').start("D:/software/Notepad/Notepad++/notepad++.exe") app = Application('uia').connect(class_name="Notepad++") # win = app['属性'] win = app['Notepad'] win.type_keys("rebort测试")
12.1.3运行代码
1.运行代码,右键Run'Test',就可以看到控制台输出
2.运行代码后电脑端的动作(启动notepad++,输入文本:rebort测试)
12.2方法2-窗口标题
通过窗口的标题获取,代码如下:
win = app['窗口的标题']
12.2.1代码设计
from pywinauto import Application import time # 通过窗口打开 app = Application('uia').start("D:/software/Notepad/Notepad++/notepad++.exe") app = Application('uia').connect(class_name="Notepad++") # win = app['窗口的标题'] win = app['新文件1 - Notepad++'] win.type_keys("rebort测试")
12.2.3运行代码
1.运行代码,右键Run'Test',就可以看到控制台输出
2.运行代码后电脑端的动作(启动notepad++,输入文本:rebort测试)
12.3方法3-窗口类名(不推荐)
这种点窗口名称的写法,只适合于一些英文的className属性,一些中文的标题,或者有特殊符号就会报语法错误。
通常用窗口的标题操作更稳定一些,用class名称有时候会报错找不到。
通过窗口的类名进行获取,代码如下:
win = app.类名
12.3.1代码设计
from pywinauto import Application import time # 通过窗口打开 app = Application('uia').start("D:/software/Notepad/Notepad++/notepad++.exe") app = Application('uia').connect(class_name="Notepad++") # win = app.类名 win = app.Notepad win.type_keys("rebort测试")
12.3.3运行代码
1.运行代码,右键Run'Test',就可以看到控制台输出
2.运行代码后电脑端的动作(启动notepad++,输入文本:rebort测试)
13.1遇到的问题
了解如何操作PC端应用程序的窗口、获取窗口信息、选择窗口,以及Windows10系统和Windows11系统代码的区别,主要是多了一段连接窗口的代码。如果缺少这一段代码就会报错: pywinauto.findwindows.ElementNotFoundError: {'best_match': '新文件 1 – Notepad++', 'backend': 'uia', 'process': 12464} 。如下图所示:

解决方法:上网和社区查了好多资料,都说没有解决办法,就自己试了一下,加上那段连接到窗口的代码就没有问题了,代码如下:
app = Application('uia').connect(class_name="Notepad++")
但是,试了记事本还是不可以,notepad++编辑器是可以了。真是奇怪了。
13.2环境变量
你如果想要像启动记事本一样启动notepad++,你只需要配置notepad++的环境变量即可,如何配置,就不在这里赘述了,自己网上找一下,特别多,都是一样套路,或者是换汤不换药。然后代码就可以按照如下方式写:
app = Application('uia').start("notepad++.exe")
PC端应用程序窗口信息和如何连接窗口对其进行操作的常用的几种方法。接着讲解和分享一下窗口的基本操作:最大化、最小化、恢复正常、关闭窗口、获取窗口状态和获取窗口坐标。以及窗口的其他打开方法和选择方法。
14.窗口的基本操作
窗口的一些基本操作方法:
最大化 :w.maximize()
最小化 :w.minimize()
恢复正常 :w.restore()
关闭窗口: w.close()
获取窗口状态: w.get_show_state() 返回1 最大化, 0正常,2最小化
获取窗口坐标: w.rectangle() 返回 (L35, T149, R1544, B913)
14.1代码设计
from pywinauto import Application import time # 通过窗口打开 app = Application('uia').start("D:/software/Notepad/Notepad++/notepad++.exe") app = Application('uia').connect(class_name="Notepad++") # win = app['窗口的标题'] win = app['新文件1 - Notepad++'] win.type_keys("rebort") time.sleep(2) win.maximize() # 最大化 time.sleep(2) win.restore() # 恢复 time.sleep(2) win.minimize() # 最小化 # win.close() # 关闭
14.2运行代码
1.运行代码,右键Run'Test',就可以看到控制台输出
2.运行代码后电脑端的动作(启动记事本)
15.窗口打开方法
前面是通过窗口的的标题操作打开的窗口,再介绍一个最简单的方法是top_window(),例如:这里还是演示打开notepad++编辑器。
15.1代码设计
from pywinauto import Application import time from pywinauto import Application import time app = Application('uia').start("D:/software/Notepad/Notepad++/notepad++.exe") # time.sleep(3) dlg = app.top_window() print(dlg)
15.2运行代码
1.运行代码,右键Run'Test',就可以看到控制台输出
2.运行代码后电脑端的动作(启动notepad++编辑器)
注意: 它返回的是是应用程序的顶级窗口,如果窗口有覆盖的情况,那么你可以使用与传递给findwindows.find_windows()相同的参数,例如:
dlg = app.window(title_re="Page Setup", class_name="#32770")
如果对话框的标题很长 – 那么输入的属性访问可能会很长,在这种情况下通常更容易使用
app.window(title_re=".*部分标题.*")
获取当前应用全部windows
dialogs = app.windows()
这将返回应用程序的所有可见,启用的顶级窗口的列表。
总结:推荐使用 app.window(title_re="xxx") 方法操作指定窗口。
遇到的坑
在操作的过程中,想必细心的你已经发现代码在窗口最小化之后,将窗口关闭的代码注释掉了,这是因为在擦做的时候,直接报错: pywinauto.findbestmatch.MatchError: Could not find '新文件1 – Notepad++' in 'dict_keys([])' ,本来觉得最小化之后,加上一段恢复窗口,再关闭就可以了,结果还是报一样的错误。因为一时没有好的解决办法,由于时间的关系,就将那段关闭窗口的代码注释掉了。
解决办法:经过查找资料和百度还是没有什么好的解决办法,突然想到之前文章中提到过的访问技术是否正确,uia报错,就换win32。否则就会报错找不到元素。因此抱着试一下心态,结果成功了。
from pywinauto import Application import time # 通过窗口打开 app = Application('win32').start("D:/software/Notepad/Notepad++/notepad++.exe") app = Application('win32').connect(class_name="Notepad++") # win = app['窗口的标题'] win = app['新文件1 - Notepad++'] win.type_keys("rebort测试") time.sleep(2) win.maximize() # 最大化 time.sleep(2) win.restore() # 恢复 time.sleep(2) win.minimize() # 最小化 win.restore() # 恢复 win.close() # 关闭
15.1.3运行代码
1.运行代码,右键Run'Test',就可以看到控制台输出
2.运行代码后电脑端的动作(正常运行,由告警是32位和64位python的告警)
pywinauto 中的uia是什么意思?
在pywinauto库中,uia指的是UI Automation,这是Windows操作系统提供的一种技术框架,用于实现用户界面(UI)的自动化测试和辅助功能访问。UI Automation是微软从Windows Vista开始引入的核心技术,旨在为所有UI元素提供一致的编程接口,无论这些元素是由何种技术(如Win32、WPF、UWP等)实现的。
在pywinauto中,通过指定backend=”uia”,用户可以选择使用UI Automation作为底层引擎来与应用程序的UI元素进行交互。这为自动化测试提供了更广泛的支持,尤其是在处理现代Windows应用(尤其是使用WPF和UWP技术构建的应用)时更为有效。UI Automation后端相比传统的win32后端,提供了更丰富和高级的元素属性、控制模式(Control Patterns)以及事件支持,使得自动化脚本可以更加灵活和强大。
使用UI Automation后端,开发者可以更容易地定位和操作UI元素,如获取元素的属性、模拟鼠标和键盘操作、监听UI事件等,这对于创建复杂的自动化测试场景尤其有用。
其实上边的文章已经在控制台打印过控件菜单树结构,只是没有将其保存到文件中。只需要一个方法即可。在pywinauto中可以使用 print_control_identifiers() 方法打印控件菜单树结构,这对我们查找控件非常方便。将其单独拎出来是因为Windows10系统和Windows11系统会有一个坑,而且我还掉里边了,查了好多资料都没有找到解决办法,最后还好通过自己各种尝试将坑填平,成功爬出来了。其实前边已经遇到了打开记事本最后替换成了notepad++。一步步入坑,然后再一步步填坑,最后成功解决。
16.控件操作
程序窗口中的内容,把它称之为控件,我们要对这个窗口的内容进行操作,就需要选择到对应的控件,获取所有控件我们可以通过print_control_identifiers()这个方法,来获取这个窗口下的直接子控件。因此我们为了清楚可以将控件的菜单结构树打印出来,一目了然。
17.起因
台式电脑是Windows10系统的,但是家里的笔记本却是Windows11系统的。在学习和演示打印控件菜单树结构的时候,首先是在台式电脑(Win10系统)上操作和演示(打印记事本控件结构树)的,但是文章就写了一半,没有写完。这时候刚好只能被迫背上笔记本电脑(Win11系统),于是想要完成剩下的文章就继续将Windows10系统运行成功的代码,直接在Windows11系统上拷贝运行演示操作,结果报错了。。。。运行失败了,一时很懵,不知道如何解决,查了好多资料发现好多人都遇到同样的问题,但是就是没有给出解决办法,有的是提一句如何如何做,都一一试过了,都不行。就是这样就调入坑中了,要是一直在Windows10系统上操作演示或许就不会有这一篇文章,这一回事了。一切都是命啊
18.Windows10系统
参考代码
from pywinauto import Application import time # 通过窗口打开 app = Application('uia').start("notepad.exe") win = app['Untitled - Notepad'] print(win) print(app.process) win.print_control_identifiers()
18.1运行代码
1.运行代码,右键Run'Test',就可以看到控制台输出

2.运行代码后电脑端的动作(启动记事本)
Windows11系统
然后想也没想就将上边在Windows10系统运行成功的代码拷贝到笔记本Windows11系统上的Pycharm中进行运行,结果报错了:pywinauto.findwindows.ElementNotFoundError: {'best_match': 'Untitled – Notepad', 'backend': 'uia', 'process': 31680}
报错分析
1.眼睁睁地看记事本启动了,报错却告诉我找不到元素。这不是前后矛盾啊。因为代码中打印了启动记事本进程号是:28192,如下图所示:

查看笔记本电脑的任务管理器的记事本的进程号是:24196 ,如下图所示:

再次用工具查看,进程号是:24196,如下图所示:

工具查看和任务管理器查看的进程号(24196)相同,但是代码运行启动的进程号(28192)与它们的进程号(24196)不一样,所有才会报错找不到元素,这就可以说通了为啥报这个错。
填坑实践
加等待
1.开始填坑,查了好多资料网上说,可能是由于代码运行的快,而PC端程序启动慢导致的,需要加等待,换句话说:应用程序可能需要一段时间才能完全初始化其窗口和UI元素。即便start()方法在内部尝试连接,但如果UI还未完全加载,后续立即进行窗口或控件查找可能失败。于是就加了等待的代码。
代码设计
from pywinauto import Application import time # 通过窗口打开 app = Application('uia').start("notepad.exe") time.sleep(3) win = app['无标题 - Notepad'] print(win) print(app.process) win.print_control_identifiers()
运行代码
1.运行代码,右键Run'Test',就可以看到控制台输出
2.运行代码后电脑端的动作(启动记事本)
改路径
1.从上边看到我们失败了,然后继续查资料,又发现说是将start括号里写成路径的格式就可以。结果仍然是报一样的错误。如下图所示:
from pywinauto import Application import time # 通过窗口打开 app = Application('uia').start("C:/Windows/notepad.exe") time.sleep(3) win = app['无标题 - Notepad'] print(win) print(app.process) win.print_control_identifiers()
connect()
手动调用connect()给予额外的时间缓冲,可能恰好让UI准备就绪。结果仍然是报一样的错误。
from pywinauto import Application import time # 通过窗口打开 app = Application('uia').start("notepad.exe") app = Application('uia').connect(class_name="Notepad") win = app['无标题 - Notepad'] print(win) print(app.process) win.print_control_identifiers()
connect()和visible_only参数
手动调用connect()给予额外的时间缓冲,然后加上visible_only参数,这是自己想到的,因为在上边的报错中看到了visible_only参数,于是决定加上参数试一下。如下图所示:

代码设计
from pywinauto import Application import time # 通过窗口打开 app = Application('uia').start("notepad.exe") app = Application('uia').connect(class_name="Notepad",visible_only=False) win = app['无标题 - Notepad'] print(win) print(app.process) win.print_control_identifiers()
运行代码
1.运行代码,右键Run'Test',就可以看到控制台输出
2.运行代码后电脑端的动作(启动记事本)
connect()和等待
这个也是在一次偶然运行代码中发现的,因为忘记将等待的代码段注释掉,结果运行代码成功!哈哈~~,坑一下子就这样跳出来了,要问是什么原因,也是一脸懵,一头问号,反正不管怎么说,问题就这样得到解决了。
代码设计
from pywinauto import Application import time # 通过窗口打开 app = Application('uia').start("notepad.exe") time.sleep(3) app = Application('uia').connect(class_name="Notepad") win = app['无标题 - Notepad'] print(win) print(app.process) win.print_control_identifiers()
运行代码
1.运行代码,右键Run'Test',就可以看到控制台输出
2.运行代码后电脑端的动作(启动记事本)
好了到此打印控件菜单结构树,就大功告成了,下一步我们只需要将其保存就可以了
保存控件菜单结构树
print_control_identifiers()源码
忙着解决问题,都没有来得及查看一下print_control_identifiers()的源码,如下:
def print_control_identifiers(self, depth=None, filename=None): """ Prints the 'identifiers' Prints identifiers for the control and for its descendants to a depth of **depth** (the whole subtree if **None**). .. note:: The identifiers printed by this method have been made unique. So if you have 2 edit boxes, they won't both have "Edit" listed in their identifiers. In fact the first one can be referred to as "Edit", "Edit0", "Edit1" and the 2nd should be referred to as "Edit2". """ if depth isNone: depth = sys.maxsize # Wrap this control this_ctrl = self.__resolve_control(self.criteria)[-1] # Create a list of this control and all its descendants all_ctrls = [this_ctrl, ] + this_ctrl.descendants() # Create a list of all visible text controls txt_ctrls = [ctrl for ctrl in all_ctrls if ctrl.can_be_label and ctrl.is_visible() and ctrl.window_text()] # Build a dictionary of disambiguated list of control names name_ctrl_id_map = findbestmatch.UniqueDict() for index, ctrl in enumerate(all_ctrls): ctrl_names = findbestmatch.get_control_names(ctrl, all_ctrls, txt_ctrls) for name in ctrl_names: name_ctrl_id_map[name] = index # Swap it around so that we are mapped off the control indices ctrl_id_name_map = {} for name, index in name_ctrl_id_map.items(): ctrl_id_name_map.setdefault(index, []).append(name) def print_identifiers(ctrls, current_depth=1, log_func=print): """Recursively print ids for ctrls and their descendants in a tree-like format""" if len(ctrls) == 0or current_depth > depth: return indent = (current_depth - 1) * u" | " for ctrl in ctrls: try: ctrl_id = all_ctrls.index(ctrl) except ValueError: continue ctrl_text = ctrl.window_text() if ctrl_text: # transform multi-line text to one liner ctrl_text = ctrl_text.replace('

', r'

').replace('

', r'

') output = indent + u'

' output += indent + u"{class_name} - '{text}' {rect}

" "".format(class_name=ctrl.friendly_class_name(), text=ctrl_text, rect=ctrl.rectangle()) output += indent + u'{}'.format(ctrl_id_name_map[ctrl_id]) title = ctrl_text class_name = ctrl.class_name() auto_id = None control_type = None if hasattr(ctrl.element_info, 'automation_id'): auto_id = ctrl.element_info.automation_id if hasattr(ctrl.element_info, 'control_type'): control_type = ctrl.element_info.control_type if control_type: class_name = None# no need for class_name if control_type exists else: control_type = None# if control_type is empty, still use class_name instead criteria_texts = [] if title: criteria_texts.append(u'title="{}"'.format(title)) if class_name: criteria_texts.append(u'class_name="{}"'.format(class_name)) if auto_id: criteria_texts.append(u'auto_id="{}"'.format(auto_id)) if control_type: criteria_texts.append(u'control_type="{}"'.format(control_type)) if title or class_name or auto_id: output += u'

' + indent + u'child_window(' + u', '.join(criteria_texts) + u')' if six.PY3: log_func(output) else: log_func(output.encode(locale.getpreferredencoding(), errors='backslashreplace')) print_identifiers(ctrl.children(), current_depth + 1, log_func) if filename isNone: print("Control Identifiers:") print_identifiers([this_ctrl, ]) else: log_file = codecs.open(filename, "w", locale.getpreferredencoding()) def log_func(msg): log_file.write(str(msg) + os.linesep) log_func("Control Identifiers:") print_identifiers([this_ctrl, ], log_func=log_func) log_file.close() print_ctrl_ids = print_control_identifiers dump_tree = print_control_identifiers
print_ctrl_ids 和 dump_tree 实现的功能与print_control_identifiers等价,都是调用的print_control_identifiers 方法。 用2个参数:
depth 查找框架深度,默认全部查找
filename 保存本地文件名称
保存到本地文件
1.我们把打印的控件结构树内容保存到本地txt,这样查看更方便,直接CTRL+F查找即可。
代码设计
from pywinauto import Application import time # 通过窗口打开 app = Application('uia').start("notepad.exe") time.sleep(3) app = Application('uia').connect(class_name="Notepad") win = app['无标题 - Notepad'] print(win) print(app.process) win.print_control_identifiers() win.print_ctrl_ids(filename="rebort.txt")
运行代码
1.运行代码,右键Run'Test',就可以看到控制台输出
2.运行代码后电脑端的动作(启动记事本)
3.在windows上运行后文件写入的中文内容有乱码,如下图所示:

重新设保存文件默认编码可以解决此问题。
代码设计
from pywinauto import Application import time import locale def getpreferredencoding(do_setlocale = True): return"utf-8" # 设置保存文件编码 "utf-8" locale.getpreferredencoding = getpreferredencoding print(locale.getpreferredencoding()) # 通过窗口打开 app = Application('uia').start("notepad.exe") time.sleep(3) app = Application('uia').connect(class_name="Notepad") win = app['无标题 - Notepad'] print(win) print(app.process) win.print_control_identifiers() win.print_ctrl_ids(filename="rebort.txt")
运行代码
1.运行代码,右键Run'Test',就可以看到控制台输出
2.运行代码后电脑端的动作(启动记事本)
梳理一下:
打印控件菜单结构树的方法:print_control_identifiers()在Windows10系统和Windows11系统上遇到的问题: pywinauto.findwindows.ElementNotFoundError: {'best_match': 'Untitled – Notepad', 'backend': 'uia', 'process': 31680} ,如何遇到,然后怎么一步一步解决的,但是其中的原理还是有点懵,好在是问题暂时解决了。其实回过头来看走过的路,其中有一些走弯路了,当时由于急于解决问题,没有仔细思考,第一步已经发现进程号都不一样了,什么等待啊、改路径等等全是白扯,根本解决不了问题。现在问题解决了,按照解决问题思路倒退一下是原理:PC端程序启动后,慢慢在后台加载界面程序,这时加了等待,然后等待程序加载完成,然后连接这个加载好的应用程序,这样就确保PC端启动的程序和连接的程序一样(进程号一致),然后执行控件结构树的打印,就不会找不到了。因此等待和连接二者缺一不可,前边也将而这分开实践了,解决不了问题,仍然报错。二者结合问题解决。
在start()后,加入适当的等待时间(如time.sleep()),让应用程序有足够的时间初始化窗口和UI元素。之前我们在做web和app的ui自动化过程中,常用到等待机制,那PC端自动化有这个方法吗?答案是肯定的,PC端自动化是如何等待的。应用程序行为通常不稳定,您的脚本需要等待,直到出现新窗口或关闭/隐藏现有窗口。 pywinauto可以隐式地(默认超时)灵活地等待对话框初始化,或者明确地使用专用方法/函数来帮助您使代码更容易和更可靠。
19.等待机制
将其分为三个大类(仅是自己的观点):窗口/元素等待、应用程序等待和全局等待时间Timings。
19.1窗口/元素等待
Pywinauto是一个用于自动化Windows GUI应用程序的模块,提供了两种等待函数:wait()和wait_not()。
wait() 等待窗口达到指定状态。
wait_not() 等待窗口不处于某种状态。
19.1.1wait()
wait()函数用于等待指定窗口达到指定状态,例如“最大化”或“最小化”状态。你可以通过设置超时时间和重试间隔来控制等待的时间和频率。
1.先来看一下wait()的源码,然后再进行下一步的学习。wait()的源码如下:
def wait(self, wait_for, timeout=None, retry_interval=None): """ Wait for the window to be in a particular state/states. :param wait_for: The state to wait for the window to be in. It can be any of the following states, also you may combine the states by space key. * 'exists' means that the window is a valid handle * 'visible' means that the window is not hidden * 'enabled' means that the window is not disabled * 'ready' means that the window is visible and enabled * 'active' means that the window is active :param timeout: Raise an :func:`pywinauto.timings.TimeoutError` if the window is not in the appropriate state after this number of seconds. Default: :py:attr:`pywinauto.timings.Timings.window_find_timeout`. :param retry_interval: How long to sleep between each retry. Default: :py:attr:`pywinauto.timings.Timings.window_find_retry`. An example to wait until the dialog exists, is ready, enabled and visible: :: self.Dlg.wait("exists enabled visible ready") .. seealso:: :func:`WindowSpecification.wait_not()` :func:`pywinauto.timings.TimeoutError` """ check_method_names, timeout, retry_interval = self.__parse_wait_args(wait_for, timeout, retry_interval) wait_until(timeout, retry_interval, lambda: self.__check_all_conditions(check_method_names, retry_interval)) # Return the wrapped control return self.wrapper_object()
2.参数说明:
wait_for 可选参数:
‘exists’ 表示窗口存在,是一个有效的句柄
‘visible’ 表示窗口可见(不隐藏)
‘enabled’ 表示窗口未被禁用
‘ready’ 表示窗口可见且已启用
‘active’ 表示窗口处于活动状态
timeout:表示超时时间
retry_interval:表示重试间隔
19.1.2wait_not()
其实和上面都是一样的,一种等待处于某种状态,一种等待不处于某种状态。wait_not()函数则用于等待指定窗口不处于某种状态,例如“关闭”状态。它的使用方式与wait()函数类似,但参数和返回值有所不同。
1.先来看一下wait_not()的源码,然后再进行下一步的学习。wait_not()的源码如下:
def wait_not(self, wait_for_not, timeout=None, retry_interval=None): """ Wait for the window to not be in a particular state/states. :param wait_for_not: The state to wait for the window to not be in. It can be any of the following states, also you may combine the states by space key. * 'exists' means that the window is a valid handle * 'visible' means that the window is not hidden * 'enabled' means that the window is not disabled * 'ready' means that the window is visible and enabled * 'active' means that the window is active :param timeout: Raise an :func:`pywinauto.timings.TimeoutError` if the window is sill in the state after this number of seconds. Default: :py:attr:`pywinauto.timings.Timings.window_find_timeout`. :param retry_interval: How long to sleep between each retry. Default: :py:attr:`pywinauto.timings.Timings.window_find_retry`. An example to wait until the dialog is not ready, enabled or visible: :: self.Dlg.wait_not("enabled visible ready") .. seealso:: :func:`WindowSpecification.wait()` :func:`pywinauto.timings.TimeoutError` """ check_method_names, timeout, retry_interval = self.__parse_wait_args(wait_for_not, timeout, retry_interval) wait_until(timeout, retry_interval, lambda: not self.__check_all_conditions(check_method_names, retry_interval)) # None return value, since we are waiting for a `negative` state of the control. # Expect that you will have nothing to do with the window closed, disabled, etc.
2.参数说明:
wait_not 可选参数:
‘exists’ 表示窗口存在,是一个有效的句柄
‘visible’ 表示窗口可见(不隐藏)
‘enabled’ 表示窗口未被禁用
‘ready’ 表示窗口可见且已启用
‘active’ 表示窗口处于活动状态
timeout:表示超时时间
retry_interval:表示重试间隔
20.应用程序等待
应用程序等待只是针对应用程序的。注意:此方法仅适用于整个应用程序进程,不适用于窗口/元素。
20.1CPU使用率
20.1.1wait_cpu_usage_lower()
wait_cpu_usage_lower(),等待该进程的cup的使用率低于某个阀值。
1.跟随先来看一下wait_cpu_usage_lower()的源码,然后再进行下一步的学习。wait_cpu_usage_lower()的源码如下:
def wait_cpu_usage_lower(self, threshold=2.5, timeout=None, usage_interval=None): """Wait until process CPU usage percentage is less than the specified threshold""" if usage_interval is None: usage_interval = Timings.cpu_usage_interval if timeout is None: timeout = Timings.cpu_usage_wait_timeout start_time = timings.timestamp() while self.cpu_usage(usage_interval) > threshold: if timings.timestamp() - start_time > timeout: raise RuntimeError('Waiting CPU load <= {}% timed out!'.format(threshold)) return self
2.参数说明:
threshold:表示该进程cup占用率
timeout:表示超时时间
retry_interval:表示重试间隔
20.2进程
20.2.1.wait_for_process_exit()
wait_for_process_exit(),等待进程退出,直到超时。
1.先来看一下wait_for_process_exit()的源码,然后再进行下一步的学习。wait_for_process_exit()的源码如下:
def wait_for_process_exit(self, timeout=None, retry_interval=None): """ Waits for process to exit until timeout reaches Raises TimeoutError exception if timeout was reached """ if timeout is None: timeout = Timings.app_exit_timeout if retry_interval is None: retry_interval = Timings.app_exit_retry wait_until(timeout, retry_interval, self.is_process_running, value=False)
2.参数说明:
timeout:表示超时时间
retry_interval:表示重试间隔
21.timings
pywinauto 查找窗口和控件时会有超时时间与轮询机制,可以通过timings 模块设置全局等待时间。
21.1timings模块
timings 模块有三个模式可以设置
timings.Timings.fast() 快速模式
timings.Timings.defaults() 默认模式
timings.Timings.slow() 慢速模式
以下是可以调整的各个时序设置:
window_find_timeout (default 5) window_find_retry (default .09) app_start_timeout (default 10) app_start_retry (default .90) app_connect_timeout (default 5.) app_connect_retry (default .1) cpu_usage_interval (default .5) cpu_usage_wait_timeout (default 20) exists_timeout (default .5) exists_retry (default .3) after_click_wait (default .09) after_clickinput_wait (default .09) after_menu_wait (default .1) after_sendkeys_key_wait (default .01) after_button_click_wait (default 0) before_closeclick_wait (default .1) closeclick_retry (default .05) closeclick_dialog_close_wait (default 2) after_closeclick_wait (default .2) after_windowclose_timeout (default 2) after_windowclose_retry (default .5) after_setfocus_wait (default .06) setfocus_timeout (default 2) setfocus_retry (default .1) after_setcursorpos_wait (default .01) sendmessagetimeout_timeout (default .01) after_tabselect_wait (default .05) after_listviewselect_wait (default .01) after_listviewcheck_wait default(.001) listviewitemcontrol_timeout default(1.5) after_treeviewselect_wait default(.1) after_toobarpressbutton_wait default(.01) after_updownchange_wait default(.1) after_movewindow_wait default(0) after_buttoncheck_wait default(0) after_comboboxselect_wait default(.001) after_listboxselect_wait default(0) after_listboxfocuschange_wait default(0) after_editsetedittext_wait default(0) after_editselect_wait default(.02) drag_n_drop_move_mouse_wait default(.1) before_drag_wait default(.2) before_drop_wait default(.1) after_drag_n_drop_wait default(.1) scroll_step_wait default(.1)
21.2设置模式
你想让操作更快一点,可以设置快速模式。你想让操作更慢一点,可以设置慢速模式。设置方法还是比较简单的,导入模块后,一行代码即可搞定。
21.2.1快速模式
快速模式的设置方式如下:
from pywinauto.application import Applicationfrom pywinauto.timings import Timings Timings.fast()
趁热打铁
经过上边的理论知识的介绍,想必已经对pywinauto的等待有了大致地了解和认识。理论讲的再好、再漂亮,也不如实践,毕竟伟人都说过,实践是检验真理的唯一标准。下边理论结合实际,实践一下。
测试场景
测试场景:大致的测试场景就是,启动电脑的notepadd++编辑器这款软件,然后输入内容:rebort测试,最后点击notepadd++编辑器左上角的【文件(F) -> 另存为(A)…】,然后等待另存为的窗口出现即可!
代码设计
from pywinauto import Application # 通过窗口打开 app = Application('uia').start("D:/software/Notepad/Notepad++/notepad++.exe") app = Application('uia').connect(class_name="Notepad++") # win = app['窗口的标题'] win = app['新文件1 - Notepad++'] #输入内容:rebort测试 win.type_keys("rebort测试") win. child_window(title="应用程序", auto_id="MenuBar", control_type="MenuBar") # 文件-另存为 win.menu_select('文件(F) -> 另存为(A)...') # 等待另存为窗口出现 win.child_window(title="另存为", control_type="Window").wait('ready', timeout=5)
运行代码
1.运行代码,右键Run'Test',就可以看到控制台输出
2.运行代码后电脑端的动作(启动记事本)
基础窗口状态等待方法
wait() 方法 支持等待窗口达到特定状态,包括: 'exists':窗口句柄有效 'visible':窗口未隐藏 'enabled':窗口未被禁用 'ready':窗口可见且已启用 'active':窗口处于活动状态 参数说明: timeout:超时时间(默认由全局配置决定) retry_interval:重试间隔(默认由全局配置决定)
高级场景等待方法
wait_cpu_usage_lower() 适用于多线程应用中延迟初始化的场景,通过监控进程的CPU使用率判断任务是否完成(如后台计算未结束前保持等待) wait_until_passes() 持续执行指定操作直至成功或超时,特别适用于动态加载的控件或异步操作后的状态检测
全局等待时间配置
通过 timings 模块设置默认超时和轮询间隔: Timings.Defaults.timeout:全局超时时间(默认30秒) Timings.Defaults.retry_interval:全局重试间隔(默认0.5秒)
使用建议
优先使用内置等待机制(如 wait() 和 wait_until_passes()),避免依赖 time.sleep(),以提高代码稳定性和执行效率 对于复杂界面,结合 print_control_identifiers() 输出控件信息以辅助定位目标元素
注:以上方法需根据具体场景选择,合理设置超时参数可避免因界面响应延迟导致的自动化失败。
应用程序窗口的控件怎么操作呢???其实这个知识点前边已经有所涉及?
22.常用定位控件方法
22.1通过层级查找控件相关方法
常用的定位控件的方法如下:
window(**kwargs) # 用于窗口的查找
child_window(**kwargs) # 可以无视层级的找后代中某个符合条件的元素===>【最常用】
parent() # 返回此元素的父元素,没有参数
children(**kwargs) # 返回符合条件的子元素列表,支持索引,是BaseWrapper对象(或子类)
iter_children(**kwargs) # 返回子元素的迭代器,是BaseWrapper对象(或子类)
descendants(**kwargs) # 返回符合条件的所有后代元素列表,是BaseWrapper对象(或子类)
iter_children(**kwargs) # 符合条件后代元素迭代器,是BaseWrapper对象(或子类)
22.2**kwargs 常用的一些参数
**kwargs 常用的一些参数如下:
class_name=None, # 类名 class_name_re=None, # 正则匹配类名 title=None, # 控件的标题文字,对应inspect中Name字段 title_re=None, # 正则匹配文字 control_type=None, # 控件类型,inspect界面LocalizedControlType字段的英文名 best_match=None, # 模糊匹配类似的title auto_id=None, # inspect界面AutomationId字段,但是很多控件没有这个属性 parent=None, process=None, # 这个基本不用,每次启动进程都会变化 top_level_only=True, visible_only=True, enabled_only=False, handle=None, ctrl_index=None, found_index=None, predicate_func=None, active_only=False, control_id=None, framework_id=None, backend=None,
查看窗口控件
要想操作窗口控件吗,我们需要先学会如何查看窗口框架,查看窗口的结构树。这里介绍两种比较常用的方法,而且这两种方法前边都有所介绍和讲解,这里简单演示一下即可。
方法一(工具)
可以用inspect.exe 查看窗口的层级结构树。
1.双击启动inspect.exe软件,然后点击窗口的箭头按钮,如下图所示:

2.然后鼠标再次点击你要查看的窗口(要查看记事本的编辑区域的窗口结构树,点击箭头,然后再点击记事本的编辑区域)。如下图所示:

方法二(代码)
可以通过print_ctrl_ids()方法 (另外一个print_control_identifiers() 功能一样,这个前边已经介绍过也用过,介绍没有用过的)查看当前窗口下的控件。
代码设计
from pywinauto import Application import time # 通过窗口打开 app = Application('uia').start("notepad.exe") time.sleep(10) app = Application('uia').connect(class_name="Notepad",visible_only=False) win = app['无标题 - Notepad'] win.print_ctrl_ids()
运行代码
1.运行代码,右键Run'Test',就可以看到控制台输出
2.运行代码后电脑端的动作(启动记事本,打印窗口结构树)
对比工具和代码查看的控件
因为要在记事本的编辑区域输入内容,所以我们需要操作编辑区域窗口的控件。但是此时发现工具查看的窗口结构树和代码打印的完全不一致,这难道因为是Windows11系统吗???
1.工具查看记事本编辑区域,如下图所示:

2.代码打印记事本结构树,如下图所示:
D:Pythonpython.exe D:/Demo/test.py Control Identifiers: Dialog - '无标题 - Notepad' (L0, T0, R0, B0) ['无标题 - NotepadDialog', 'Dialog', '无标题 - Notepad', 'Dialog0', 'Dialog1'] child_window(title="无标题 - Notepad", control_type="Window") | | Pane - '' (L-31992, T-31907, R-31297, B-31554) | ['无标题Pane', 'Pane', '无标题Pane0', '无标题Pane1', 'Pane0', 'Pane1'] | | | | Document - '' (L-31992, T-31907, R-31297, B-31554) | | ['无标题Document', 'Document'] | | Pane - '' (L-31942, T-31988, R-31655, B-31956) | ['无标题Pane2', 'Pane2'] | | | | TabControl - '' (L-31942, T-31988, R-31583, B-31948) | | ['TabControl添加新标签页', 'TabControl', '无标题TabControl'] | | child_window(auto_id="Tabs", control_type="Tab") | | | | | | ListBox - '' (L-31940, T-31988, R-31628, B-31948) | | | ['无标题ListBox', 'ListBox'] | | | child_window(auto_id="TabListView", control_type="List") | | | | | | | | TabItem - '无标题. 未修改。' (L-31937, T-31988, R-31630, B-31948) | | | | ['无标题. 未修改。', '无标题. 未修改。TabItem', 'TabItem'] | | | | child_window(title="无标题. 未修改。", control_type="TabItem") | | | | | | | | | | Static - '无标题' (L-31921, T-31978, R-31876, B-31959) | | | | | ['Static', '无标题', '无标题Static', 'Static0', 'Static1'] | | | | | child_window(title="无标题", control_type="Text") | | | | | | | | | | Button - '关闭标签页' (L-31681, T-31983, R-31641, B-31953) | | | | | ['Button', '关闭标签页', '关闭标签页Button', 'Button0', 'Button1'] | | | | | child_window(title="关闭标签页", auto_id="CloseButton", control_type="Button") | | | | | | Button - '添加新标签页' (L-31623, T-31982, R-31583, B-31952) | | | ['添加新标签页', 'Button2', '添加新标签页Button'] | | | child_window(title="添加新标签页", auto_id="AddButton", control_type="Button") | | | | Pane - '记事本自动保存进度。下次打开记事本时,你的所有内容都将可用。' (L0, T0, R0, B0) | | ['记事本自动保存进度。下次打开记事本时,你的所有内容都将可用。Pane', '记事本自动保存进度。下次打开记事本时,你的所有内容都将可用。', 'Pane3'] | | child_window(title="记事本自动保存进度。下次打开记事本时,你的所有内容都将可用。", auto_id="TeachingTip", control_type="Pane") | | Pane - '' (L-31992, T-31948, R-31436, B-31916) | ['无标题Pane3', 'Pane4'] | | | | Menu - '' (L-31992, T-31948, R-31782, B-31908) | | ['Menu', '无标题Menu', 'Menu0', 'Menu1'] | | child_window(auto_id="MenuBar", control_type="MenuBar") | | | | | | MenuItem - '文件' (L-31987, T-31948, R-31927, B-31908) | | | ['MenuItem', '文件MenuItem', '文件', 'MenuItem0', 'MenuItem1'] | | | child_window(title="文件", auto_id="File", control_type="MenuItem") | | | | | | MenuItem - '编辑' (L-31917, T-31948, R-31857, B-31908) | | | ['编辑', 'MenuItem2', '编辑MenuItem'] | | | child_window(title="编辑", auto_id="Edit", control_type="MenuItem") | | | | | | MenuItem - '查看' (L-31847, T-31948, R-31787, B-31908) | | | ['MenuItem3', '查看', '查看MenuItem'] | | | child_window(title="查看", auto_id="View", control_type="MenuItem") | | | | Button - '设置' (L-31345, T-31948, R-31307, B-31908) | | ['设置Button', 'Button3', '设置'] | | child_window(title="设置", auto_id="SettingsButton", control_type="Button") | | | | Dialog - '' (L0, T0, R0, B0) | | ['Dialog2'] | | child_window(auto_id="CowriterTeachingTip", control_type="Window") | | Pane - '' (L-31992, T-31554, R-31436, B-31522) | [' 行 1,列 1Pane', 'Pane5'] | | | | Static - ' 行 1,列 1' (L-31972, T-31544, R-31893, B-31524) | | ['Static2', ' 行 1,列 1', ' 行 1,列 1Static'] | | child_window(title=" 行 1,列 1", auto_id="ContentTextBlock", control_type="Text") | | | | Static - '0 个字符' (L-31861, T-31544, R-31803, B-31524) | | ['Static3', '0 个字符', '0 个字符Static'] | | child_window(title="0 个字符", auto_id="ContentTextBlock", control_type="Text") | | | | Static - ' 100%' (L-31700, T-31544, R-31659, B-31524) | | ['Static4', ' 100%', ' 100%Static'] | | child_window(title=" 100%", auto_id="ContentTextBlock", control_type="Text") | | | | Static - ' Windows (CRLF)' (L-31616, T-31544, R-31505, B-31524) | | ['Static5', ' Windows (CRLF)Static', ' Windows (CRLF)'] | | child_window(title=" Windows (CRLF)", auto_id="ContentTextBlock", control_type="Text") | | | | Static - ' UTF-8' (L-31456, T-31544, R-31412, B-31524) | | ['Static6', ' UTF-8Static', ' UTF-8'] | | child_window(title=" UTF-8", auto_id="ContentTextBlock", control_type="Text") | | TitleBar - '' (L0, T0, R0, B0) | [' UTF-8TitleBar', 'TitleBar'] | | | | Menu - '系统' (L-31991, T-31991, R-31963, B-31963) | | ['系统', 'Menu2', '系统Menu', '系统0', '系统1'] | | child_window(title="系统", auto_id="MenuBar", control_type="MenuBar") | | | | | | MenuItem - '系统' (L-31991, T-31991, R-31963, B-31963) | | | ['系统2', 'MenuItem4', '系统MenuItem'] | | | child_window(title="系统", control_type="MenuItem") | | | | Button - '还原' (L-31987, T-31999, R-31927, B-31973) | | ['Button4', '还原Button', '还原'] | | child_window(title="还原", control_type="Button") | | | | Button - '最大化' (L-31927, T-31999, R-31868, B-31973) | | ['Button5', '最大化', '最大化Button'] | | child_window(title="最大化", control_type="Button") | | | | Button - '关闭' (L-31868, T-31999, R-31808, B-31973) | | ['关闭', 'Button6', '关闭Button'] | | child_window(title="关闭", control_type="Button") Process finished with exit code 0
看了代码打印的根本没有工具查看的“文本编辑器”和Classname是“RichEditD2DPT”。这怎么搞……查了好几天资料也没有查到有用的或者能解决问题的方法。然后就打算放弃了…最后突然想到要不把那个“uia”换成“win32”试一下,但是总感觉不靠谱,因为工具查看的记事本是uia。不管了先试一下吧
参考代码
from pywinauto import Application import time # 通过窗口打开 app = Application('win32').start("notepad.exe") time.sleep(10) app = Application('win32').connect(class_name="Notepad",visible_only=False) win = app['无标题 - Notepad'] win.print_ctrl_ids()
运行代码
1.运行代码,右键Run'Test',就可以看到控制台输出

2.出乎意料啊,从上图的控制台,竟然看到了工具查看的classname。不管三七二十一,觉得离胜利更进一步了。接着就要尝试能不能操作这个记事本编辑窗口的控件然后输入内容,如果可以就大功告成了。打印结构树如下:
D:Pythonpython.exe D:/Demo/test.py D:Pythonlibsite-packagespywinautoapplication.py:1076: RuntimeWarning: Application is not loaded correctly (WaitForInputIdle failed) warnings.warn('Application is not loaded correctly (WaitForInputIdle failed)', RuntimeWarning) Control Identifiers: Notepad - '无标题 - Notepad' (L1011, T190, R1722, B684) ['Notepad', '无标题 - Notepad', '无标题 - NotepadNotepad'] child_window(title="无标题 - Notepad", class_name="Notepad") | | Windows.UI.Composition.DesktopWindowContentBridge - 'DesktopWindowXamlSource' (L1019, T615, R1696, B633) | ['Windows.UI.Composition.DesktopWindowContentBridge', 'DesktopWindowXamlSourceWindows.UI.Composition.DesktopWindowContentBridge', 'DesktopWindowXamlSource', 'Windows.UI.Composition.DesktopWindowContentBridge0', 'Windows.UI.Composition.DesktopWindowContentBridge1', 'DesktopWindowXamlSourceWindows.UI.Composition.DesktopWindowContentBridge0', 'DesktopWindowXamlSourceWindows.UI.Composition.DesktopWindowContentBridge1', 'DesktopWindowXamlSource0', 'DesktopWindowXamlSource1'] | child_window(title="DesktopWindowXamlSource", class_name="Windows.UI.Composition.DesktopWindowContentBridge") | | | | Windows.UI.Input.InputSite.WindowClass - '' (L1019, T615, R1019, B615) | | ['Windows.UI.Input.InputSite.WindowClass', '无标题 - NotepadWindows.UI.Input.InputSite.WindowClass', 'Windows.UI.Input.InputSite.WindowClass0', 'Windows.UI.Input.InputSite.WindowClass1', '无标题 - NotepadWindows.UI.Input.InputSite.WindowClass0', '无标题 - NotepadWindows.UI.Input.InputSite.WindowClass1'] | | child_window(class_name="Windows.UI.Input.InputSite.WindowClass") | | Windows.UI.Input.InputSite.WindowClass - '' (L1019, T615, R1019, B615) | ['Windows.UI.Input.InputSite.WindowClass', '无标题 - NotepadWindows.UI.Input.InputSite.WindowClass', 'Windows.UI.Input.InputSite.WindowClass0', 'Windows.UI.Input.InputSite.WindowClass1', '无标题 - NotepadWindows.UI.Input.InputSite.WindowClass0', '无标题 - NotepadWindows.UI.Input.InputSite.WindowClass1'] | child_window(class_name="Windows.UI.Input.InputSite.WindowClass") | | Windows.UI.Composition.DesktopWindowContentBridge - 'DesktopWindowXamlSource' (L1693, T283, R1711, B636) | ['Windows.UI.Composition.DesktopWindowContentBridge2', 'DesktopWindowXamlSourceWindows.UI.Composition.DesktopWindowContentBridge2', 'DesktopWindowXamlSource2'] | child_window(title="DesktopWindowXamlSource", class_name="Windows.UI.Composition.DesktopWindowContentBridge") | | | | Windows.UI.Input.InputSite.WindowClass - '' (L1693, T283, R1693, B283) | | ['Windows.UI.Input.InputSite.WindowClass2', '无标题 - NotepadWindows.UI.Input.InputSite.WindowClass2'] | | child_window(class_name="Windows.UI.Input.InputSite.WindowClass") | | Windows.UI.Input.InputSite.WindowClass - '' (L1693, T283, R1693, B283) | ['Windows.UI.Input.InputSite.WindowClass2', '无标题 - NotepadWindows.UI.Input.InputSite.WindowClass2'] | child_window(class_name="Windows.UI.Input.InputSite.WindowClass") | | NotepadTextBox - '' (L1019, T283, R1714, B636) | ['无标题 - NotepadNotepadTextBox', 'NotepadTextBox'] | child_window(class_name="NotepadTextBox") | | | | Edit - '' (L1019, T283, R1714, B636) | | ['Edit', '无标题 - NotepadEdit'] | | child_window(class_name="RichEditD2DPT") | | Edit - '' (L1019, T283, R1714, B636) | ['Edit', '无标题 - NotepadEdit'] | child_window(class_name="RichEditD2DPT") | | Windows.UI.Core.CoreWindow - 'DesktopWindowXamlSource' (L1019, T190, R1020, B191) | ['DesktopWindowXamlSourceWindows.UI.Core.CoreWindow', 'Windows.UI.Core.CoreWindow', 'DesktopWindowXamlSource3'] | child_window(title="DesktopWindowXamlSource", class_name="Windows.UI.Core.CoreWindow") | | Windows.UI.Composition.DesktopWindowContentBridge - 'DesktopWindowXamlSource' (L1069, T202, R1428, B242) | ['Windows.UI.Composition.DesktopWindowContentBridge3', 'DesktopWindowXamlSourceWindows.UI.Composition.DesktopWindowContentBridge3', 'DesktopWindowXamlSource4'] | child_window(title="DesktopWindowXamlSource", class_name="Windows.UI.Composition.DesktopWindowContentBridge") | | | | Windows.UI.Input.InputSite.WindowClass - '' (L1069, T202, R1069, B202) | | ['Windows.UI.Input.InputSite.WindowClass3', '无标题 - NotepadWindows.UI.Input.InputSite.WindowClass3'] | | child_window(class_name="Windows.UI.Input.InputSite.WindowClass") | | Windows.UI.Input.InputSite.WindowClass - '' (L1069, T202, R1069, B202) | ['Windows.UI.Input.InputSite.WindowClass3', '无标题 - NotepadWindows.UI.Input.InputSite.WindowClass3'] | child_window(class_name="Windows.UI.Input.InputSite.WindowClass") | | Windows.UI.Composition.DesktopWindowContentBridge - 'DesktopWindowXamlSource' (L1019, T242, R1714, B283) | ['Windows.UI.Composition.DesktopWindowContentBridge4', 'DesktopWindowXamlSourceWindows.UI.Composition.DesktopWindowContentBridge4', 'DesktopWindowXamlSource5'] | child_window(title="DesktopWindowXamlSource", class_name="Windows.UI.Composition.DesktopWindowContentBridge") | | | | Windows.UI.Input.InputSite.WindowClass - '' (L1019, T242, R1019, B242) | | ['Windows.UI.Input.InputSite.WindowClass4', '无标题 - NotepadWindows.UI.Input.InputSite.WindowClass4'] | | child_window(class_name="Windows.UI.Input.InputSite.WindowClass") | | Windows.UI.Input.InputSite.WindowClass - '' (L1019, T242, R1019, B242) | ['Windows.UI.Input.InputSite.WindowClass4', '无标题 - NotepadWindows.UI.Input.InputSite.WindowClass4'] | child_window(class_name="Windows.UI.Input.InputSite.WindowClass") | | Windows.UI.Composition.DesktopWindowContentBridge - 'DesktopWindowXamlSource' (L1019, T636, R1714, B676) | ['Windows.UI.Composition.DesktopWindowContentBridge5', 'DesktopWindowXamlSourceWindows.UI.Composition.DesktopWindowContentBridge5', 'DesktopWindowXamlSource6'] | child_window(title="DesktopWindowXamlSource", class_name="Windows.UI.Composition.DesktopWindowContentBridge") | | | | Windows.UI.Input.InputSite.WindowClass - '' (L1019, T636, R1019, B636) | | ['Windows.UI.Input.InputSite.WindowClass5', '无标题 - NotepadWindows.UI.Input.InputSite.WindowClass5'] | | child_window(class_name="Windows.UI.Input.InputSite.WindowClass") | | Windows.UI.Input.InputSite.WindowClass - '' (L1019, T636, R1019, B636) | ['Windows.UI.Input.InputSite.WindowClass5', '无标题 - NotepadWindows.UI.Input.InputSite.WindowClass5'] | child_window(class_name="Windows.UI.Input.InputSite.WindowClass") Process finished with exit code 0
记事本编辑区域输入内容
上边已经大致解决了代码和工具查看窗口控件结构树不一致的情况,接下来要趁热打铁看看能不能输入内容。
测试场景
测试场景:大致的测试场景就是,启动电脑的记事本这款软件,然后操作记事本编辑区域的窗口控件,输入内容:rebort测试,
代码设计
from pywinauto import Application import time # 通过窗口打开 app = Application('win32').start("notepad.exe") time.sleep(10) app = Application('win32').connect(class_name="Notepad",visible_only=False) win = app['无标题 - Notepad'] # win.print_ctrl_ids() # 输入内容 win.child_window(class_name="RichEditD2DPT").type_keys("rebort测试")
运行代码
1.运行代码,右键Run'Test',就可以看到控制台输出

2.运行代码后电脑端的动作(成功启动记事本,然后操作记事本的编辑区域窗口控件,最后在记事本的编辑区域输入内容:rebort测试)
其他方法
都试过了,可以成功输入内容。
中括号定位控件输入内容的其他方法如下:
win["Edit"].type_keys("rebort测试") win["Edit"].set_text("rebort测试")
点窗口定位控件输入内容的其他方法如下:
win.Edit.type_keys("rebort测试") win.Edit.set_text("rebort测试")
以下是pywinauto操作应用程序窗口控件的核心方法总结:
控件定位方法
基础定位
通过窗口标题或类名获取窗口对象:
win = app.window(title="窗口标题", class_name="窗口类名") # :ml-citation{

            ref="2,5" data="citationList"}
使用child_window()定位子控件,支持参数包括title、auto_id、control_type等:
edit_box = win.child_window(title="文本编辑器", control_type="Edit") # :ml-citation{

            ref="3,6" data="citationList"}
层级遍历
通过print_control_identifiers()或print_ctrl_ids()打印窗口层级结构,快速查看控件属性及层级关系 。 结合descendants()或children()方法遍历子控件:
all_buttons = win.descendants(control_type="Button") # :ml-citation{

            ref="6,8" data="citationList"}
常用控件操作
控件类型 操作方法示例 说明
按钮 button.click_input() 模拟鼠标点击
编辑框 edit.set_text(“内容”) 输入文本
复选框 checkbox.check() 或 checkbox.uncheck() 勾选/取消勾选
下拉框 combo.select(“选项名”) 选择指定选项
列表项 list_view.select(“项名”) 选中指定项
菜单 menu.item(“文件”).click() 点击级联菜单项
复杂控件处理
动态控件
使用wait()方法等待控件出现,避免操作超时:
popup = win.child_window(title="提示").wait("visible", timeout=10) # :ml-citation{

            ref="3,6" data="citationList"}
嵌套控件
通过多级child_window()逐层定位:
sub_control = win.child_window(title="父控件").child_window(auto_id="子控件ID") # :ml-citation{

            ref="3,6" data="citationList"}
工具辅助
Inspect工具:查看窗口控件的title、class_name、control_type等属性,辅助编写定位逻辑 。
Spy++:获取窗口句柄及层级结构,验证控件属性 。
注意事项
优先使用control_type和auto_id定位控件,避免因标题动态变化导致脚本失效 。
对现代应用(如WPF/UWP)使用backend=”uia”,传统Win32应用可选用backend=”win32″ 。
结合send_keys()模拟键盘操作(如快捷键Ctrl+S),增强脚本兼容性 。
通过以上方法可覆盖大多数Windows应用程序的控件自动化操作场景。
23.什么是级联菜单?
23.1级联菜单的定义与特点
级联菜单(Cascade Menu)是一种多层级嵌套的菜单结构,通过逐级展开的方式呈现选项。其核心特点包括:
层级结构
主菜单项触发后展开子菜单,子菜单可继续延伸更深层级(如 文件->另存为->PDF格式)。
通过符号 -> 表示层级路径(例如 帮助->关于记事本)。
交互方式
用户需逐级点击或悬停触发下一级菜单显示。
在自动化操作中,需按层级路径精准定位控件(如 menu_select("一级->二级->三级"))。
控件类型
常见控件类型为 MenuBar(菜单栏)、MenuItem(菜单项)和 Menu(子菜单)。
通过 child_window() 方法可逐层定位到具体控件(例如先定位“编辑”再找“时间/日期”)。
典型应用场景
应用程序主菜单栏(如记事本的“文件”“编辑”“帮助”等)。
右键上下文菜单(如桌面右键菜单的“新建->文件夹”)。
23.2与普通菜单的差异
| 特性 | 级联菜单 | 普通菜单 |
| 层级结构 | 多级嵌套 | 单层平铺 |
| 交互复杂度 | 需逐级展开 | 直接点击选项 |
| 典型控件类型 | MenuBar+MenuItem | Button或ListBox |
操作方法
pywinauto提供了操作级联菜单的方法,使用menu_select()方法就可以操作级联菜单控件。
项目实战
因为系统是Windows11,所以这里为了减少不必要的麻烦主要还是通过Windows安装的Notepad++编辑器进行演示和实践。这里介绍两种常见的定位级联菜单控件的方法。
多级路径定位(menu_select())
1.这种用 ->分隔多级菜单项,适用于静态菜单。Notepad++编辑器:文件(F)->新建(N),然后新建一个标签页
代码设计
from pywinauto import Application import time app = Application('uia').start("D:/software/Notepad/Notepad++/notepad++.exe") win = app.window(title='新文件 1 - Notepad++') # win.print_ctrl_ids() win.menu_select('文件(F) -> 新建(N)')
运行代码
1.运行代码,右键Run'Test',就可以看到控制台输出
2.运行代码后电脑端的动作(启动Notepad++编辑器,然后新建了一个Notepad++编辑器标签页【新文件2】)
逐层点击控件(动态菜单处理)
1.使用 child_window() 逐级定位。同样的操作不同的定位方法,Notepad++编辑器:文件(F)->新建(N),然后新建一个标签页
2.按照前边讲解的方法,查看控件的结构树,这里为了让大家看清楚使用代码打印出来,然后找到 文件(F) ,这就是我们要定位的

代码设计
from pywinauto import Application import time app = Application('uia').start("D:/software/Notepad/Notepad++/notepad++.exe") win = app.window(title='新文件 1 - Notepad++') # win.print_ctrl_ids() # 点击一级菜单并选择子项 win.child_window(title="文件(F)", control_type="MenuItem") # 操作动态加载的菜单 win.menu_select('文件(F) -> 新建(N)')
运行代码
1.运行代码,右键Run'Test',就可以看到控制台输出
2.运行代码后电脑端的动作(启动otepad++编辑器:文件(F)->新建(N),然后新建一个标签页)
注意事项
控件识别 使用 Inspect.exe 或 Accessibility Insights 工具确认菜单项的 title 和 control_type 属性。
延迟处理 部分菜单加载需要时间,可通过 time.sleep(0.5) 或 wait() 方法增加等待。
Backend选择 传统 Win32 应用使用 backend="win32",现代应用(如 WPF、UWP)使用 backend="uia"。
通过上述方法,可灵活实现多层级联菜单的自动化操作。实际应用中需结合控件属性调试,确保路径准确。
接下来我们看看主要是修改文件名,然后点击“保存”按钮,操作弹出文件选择框的这个知识点。
什么是弹出文件选择框?
弹出文件选择框是一种用户界面组件,允许用户从文件系统中选择一个或多个文件。这种对话框通常包含一个路径框、文件名、文件类型等元素,用户可以通过图形界面方便地浏览文件夹、选择文件。如下图所示(主要讲解的是操作:①文件名和②保存按钮):

项目实战
因为系统是Windows11,所以这里为了减少不必要的麻烦主要还是通过Windows安装的Notepad++编辑器进行演示和实践。
测试场景
大致测试场景:启动电脑安装的Notepad++编辑器,然后在编辑器中输入“rebort测试”内容后,点击编辑器的“文件->另存为…”后,弹出文件选择框,修改文件名为:rebort测试,最后点击“保存”按钮,保存文件。
查看窗口的结构树
1.为了看的清楚,以及方便演示,这里还是采用前边两种方法的代码打印,如下图所示:

打印内容,如下:
D:Pythonpython.exe D:/Demo/test.py Control Identifiers: Dialog - '*新文件 1 - Notepad++' (L-9, T-9, R1929, B1029) ['Dialog', '*新文件 1 - Notepad++', '*新文件 1 - Notepad++Dialog', 'Dialog0', 'Dialog1'] child_window(title="*新文件 1 - Notepad++", control_type="Window") | | Dialog - '另存为' (L745, T135, R1705, B735) | ['Dialog2', '另存为', '另存为Dialog'] | child_window(title="另存为", control_type="Window") | | | | Pane - '' (L754, T238, R1696, B649) | | ['文件名:Pane', 'Pane', 'Pane0', 'Pane1'] | | | | | | Toolbar - '命令模块' (L754, T238, R1696, B277) | | | ['命令模块', '命令模块Toolbar', 'Toolbar', 'Toolbar0', 'Toolbar1'] | | | child_window(title="命令模块", auto_id="FolderBandModuleInner", control_type="ToolBar") | | | | | | | | Button - '帮助(&H)' (L1649, T241, R1685, B273) | | | | ['帮助(&H)Button', 'Button', '帮助(&H)', 'Button0', 'Button1'] | | | | child_window(title="帮助(&H)", auto_id="HelpButton", control_type="Button") | | | | | | | | SplitButton - '详细信息' (L1571, T241, R1639, B273) | | | | ['详细信息', 'SplitButton', '详细信息SplitButton', 'SplitButton0', 'SplitButton1'] | | | | child_window(title="详细信息", auto_id="ViewControl", control_type="SplitButton") | | | | | | | | | | Button - '视图滑块' (L1606, T241, R1626, B273) | | | | | ['视图滑块', 'Button2', '视图滑块Button'] | | | | | child_window(title="视图滑块", auto_id="SplitMenuButton", control_type="Button") | | | | | | | | Button - '组织' (L758, T241, R838, B273) | | | | ['组织u200bu200bButton', 'Button3', '组织u200bu200b'] | | | | child_window(title="组织", auto_id="{7DDC1264-7E4D-4F74-BBC0-D191987C8D0F}", control_type="Button") | | | | | | | | Button - '新建文件夹' (L838, T241, R949, B273) | | | | ['新建u200bu200b文件夹u200bu200b', 'Button4', '新建u200bu200b文件夹u200bu200bButton'] | | | | child_window(title="新建文件夹", auto_id="{E44616AD-6DF1-4B94-85A4-E465AE8A19DB}", control_type="Button") | | | | | | Pane - '控制项宿主' (L757, T277, R949, B524) | | | ['控制项宿主', 'Pane2', '控制项宿主Pane'] | | | child_window(title="控制项宿主", auto_id="ProperTreeHost", control_type="Pane") | | | | | | | | TreeView - '导航窗格' (L757, T277, R949, B524) | | | | ['导航窗格', 'TreeView', '导航窗格TreeView', 'TreeView0', 'TreeView1'] | | | | child_window(title="导航窗格", auto_id="100", control_type="Tree") | | | | | | | | | | ScrollBar - '垂直滚动条' (L928, T277, R949, B524) | | | | | ['垂直滚动条', '垂直滚动条ScrollBar', 'ScrollBar', 'ScrollBar0', 'ScrollBar1'] | | | | | child_window(title="垂直滚动条", auto_id="NonClientVerticalScrollBar", control_type="ScrollBar") | | | | | | | | | | | | Button - '上一行' (L928, T277, R949, B298) | | | | | | ['上一行', '上一行Button', 'Button5', '上一行0', '上一行1', '上一行Button0', '上一行Button1'] | | | | | | child_window(title="上一行", auto_id="UpButton", control_type="Button") | | | | | | | | | | | | Button - '向上翻页' (L928, T298, R949, B438) | | | | | | ['向上翻页', '向上翻页Button', 'Button6'] | | | | | | child_window(title="向上翻页", auto_id="UpPageButton", control_type="Button") | | | | | | | | | | | | Thumb - '位置' (L928, T438, R949, B492) | | | | | | ['位置Thumb', 'Thumb', '位置', '位置Thumb0', '位置Thumb1', 'Thumb0', 'Thumb1', '位置0', '位置1'] | | | | | | child_window(title="位置", auto_id="ScrollbarThumb", control_type="Thumb") | | | | | | | | | | | | Button - '向下翻页' (L928, T492, R949, B503) | | | | | | ['向下翻页', 'Button7', '向下翻页Button', '向下翻页0', '向下翻页1', '向下翻页Button0', '向下翻页Button1'] | | | | | | child_window(title="向下翻页", auto_id="DownPageButton", control_type="Button") | | | | | | | | | | | | Button - '下一行' (L928, T503, R949, B524) | | | | | | ['下一行', 'Button8', '下一行Button', '下一行0', '下一行1', '下一行Button0', '下一行Button1'] | | | | | | child_window(title="下一行", auto_id="DownButton", control_type="Button") | | | | | | | | | | TreeItem - '桌面' (L0, T0, R0, B0) | | | | | ['桌面TreeItem', '桌面', 'TreeItem', 'TreeItem0', 'TreeItem1'] | | | | | child_window(title="桌面", control_type="TreeItem") | | | | | | | | | | | | TreeItem - '主文件夹' (L0, T0, R0, B0) | | | | | | ['主文件夹TreeItem', '主文件夹', 'TreeItem2'] | | | | | | child_window(title="主文件夹", control_type="TreeItem") | | | | | | | | | | | | TreeItem - '图库' (L0, T0, R0, B0) | | | | | | ['图库', '图库TreeItem', 'TreeItem3'] | | | | | | child_window(title="图库", control_type="TreeItem") | | | | | | | | | | | | TreeItem - '快速访问开始 - 桌面 (已固定)' (L0, T0, R0, B0) | | | | | | ['快速访问开始 - 桌面 (已固定)', 'TreeItem4', '快速访问开始 - 桌面 (已固定)TreeItem'] | | | | | | child_window(title="快速访问开始 - 桌面 (已固定)", control_type="TreeItem") | | | | | | | | | | | | TreeItem - '下载 (已固定)' (L0, T0, R0, B0) | | | | | | ['下载 (已固定)TreeItem', 'TreeItem5', '下载 (已固定)'] | | | | | | child_window(title="下载 (已固定)", control_type="TreeItem") | | | | | | | | | | | | TreeItem - '文档 (已固定)' (L0, T0, R0, B0) | | | | | | ['文档 (已固定)TreeItem', '文档 (已固定)', 'TreeItem6'] | | | | | | child_window(title="文档 (已固定)", control_type="TreeItem") | | | | | | | | | | | | TreeItem - '图片 (已固定)' (L0, T0, R0, B0) | | | | | | ['图片 (已固定)TreeItem', '图片 (已固定)', 'TreeItem7'] | | | | | | child_window(title="图片 (已固定)", control_type="TreeItem") | | | | | | | | | | | | TreeItem - '音乐 (已固定)' (L0, T0, R0, B0) | | | | | | ['音乐 (已固定)', '音乐 (已固定)TreeItem', 'TreeItem8'] | | | | | | child_window(title="音乐 (已固定)", control_type="TreeItem") | | | | | | | | | | | | TreeItem - '视频 (已固定)' (L0, T0, R0, B0) | | | | | | ['视频 (已固定)', '视频 (已固定)TreeItem', 'TreeItem9'] | | | | | | child_window(title="视频 (已固定)", control_type="TreeItem") | | | | | | | | | | | | TreeItem - '算法测试数据' (L0, T0, R0, B0) | | | | | | ['算法测试数据', '算法测试数据TreeItem', 'TreeItem10'] | | | | | | child_window(title="算法测试数据", control_type="TreeItem") | | | | | | | | | | | | TreeItem - '福田' (L0, T0, R0, B0) | | | | | | ['福田', '福田TreeItem', 'TreeItem11'] | | | | | | child_window(title="福田", control_type="TreeItem") | | | | | | | | | | | | TreeItem - '恩龙' (L0, T0, R0, B0) | | | | | | ['TreeItem12', '恩龙TreeItem', '恩龙'] | | | | | | child_window(title="恩龙", control_type="TreeItem") | | | | | | | | | | | | TreeItem - '快速访问结束 - Demo' (L0, T0, R0, B0) | | | | | | ['快速访问结束 - Demo', '快速访问结束 - DemoTreeItem', 'TreeItem13'] | | | | | | child_window(title="快速访问结束 - Demo", control_type="TreeItem") | | | | | | | | | | | | TreeItem - 'WPS云盘' (L820, T317, R887, B357) | | | | | | ['WPS云盘TreeItem', 'WPS云盘', 'TreeItem14'] | | | | | | child_window(title="WPS云盘", control_type="TreeItem") | | | | | | | | | | | | TreeItem - '此电脑' (L820, T357, R869, B397) | | | | | | ['此电脑', '此电脑TreeItem', 'TreeItem15', '此电脑0', '此电脑1'] | | | | | | child_window(title="此电脑", control_type="TreeItem") | | | | | | | | | | | | | | TreeItem - 'Windows (C:)' (L830, T397, R928, B437) | | | | | | | ['TreeItem16', 'Windows (C:)TreeItem', 'Windows (C:)'] | | | | | | | child_window(title="Windows (C:)", control_type="TreeItem") | | | | | | | | | | | | | | TreeItem - 'Data (D:)' (L830, T437, R896, B477) | | | | | | | ['Data (D:)TreeItem', 'Data (D:)', 'TreeItem17', 'Data (D:)0', 'Data (D:)1'] | | | | | | | child_window(title="Data (D:)", control_type="TreeItem") | | | | | | | | | | | | TreeItem - '网络' (L820, T477, R854, B517) | | | | | | ['网络', '网络TreeItem', 'TreeItem18'] | | | | | | child_window(title="网络", control_type="TreeItem") | | | | | | Pane - 'Shell 文件夹视图' (L954, T277, R1696, B524) | | | ['Shell 文件夹视图', 'Shell 文件夹视图Pane', 'Pane3'] | | | child_window(title="Shell 文件夹视图", auto_id="listview", control_type="Pane") | | | | | | | | ListBox - '项目视图' (L954, T277, R1696, B524) | | | | ['ListBox', '项目视图ListBox', '项目视图'] | | | | child_window(title="项目视图", control_type="List") | | | | | | | | | | ScrollBar - '水平' (L954, T503, R1675, B524) | | | | | ['水平', 'ScrollBar2', '水平ScrollBar'] | | | | | child_window(title="水平", auto_id="HorizontalScrollBar", control_type="ScrollBar") | | | | | | | | | | | | Button - '左移一列' (L954, T503, R975, B524) | | | | | | ['Button9', '左移一列Button', '左移一列'] | | | | | | child_window(title="左移一列", auto_id="UpButton", control_type="Button") | | | | | | | | | | | | Thumb - '位置' (L975, T503, R1600, B524) | | | | | | ['位置Thumb2', 'Thumb2', '位置2'] | | | | | | child_window(title="位置", auto_id="ScrollbarThumb", control_type="Thumb") | | | | | | | | | | | | Button - '向右翻页' (L1600, T503, R1654, B524) | | | | | | ['向右翻页', '向右翻页Button', 'Button10'] | | | | | | child_window(title="向右翻页", auto_id="DownPageButton", control_type="Button") | | | | | | | | | | | | Button - '右移一列' (L1654, T503, R1675, B524) | | | | | | ['右移一列Button', 'Button11', '右移一列'] | | | | | | child_window(title="右移一列", auto_id="DownButton", control_type="Button") | | | | | | | | | | ScrollBar - '垂直' (L1675, T277, R1696, B503) | | | | | ['垂直', '垂直ScrollBar', 'ScrollBar3'] | | | | | child_window(title="垂直", auto_id="VerticalScrollBar", control_type="ScrollBar") | | | | | | | | | | | | Button - '上一行' (L1675, T277, R1696, B298) | | | | | | ['上一行2', '上一行Button2', 'Button12'] | | | | | | child_window(title="上一行", auto_id="UpButton", control_type="Button") | | | | | | | | | | | | Thumb - '位置' (L1675, T298, R1696, B365) | | | | | | ['位置Thumb3', 'Thumb3', '位置3'] | | | | | | child_window(title="位置", auto_id="ScrollbarThumb", control_type="Thumb") | | | | | | | | | | | | Button - '向下翻页' (L1675, T365, R1696, B482) | | | | | | ['向下翻页2', 'Button13', '向下翻页Button2'] | | | | | | child_window(title="向下翻页", auto_id="DownPageButton", control_type="Button") | | | | | | | | | | | | Button - '下一行' (L1675, T482, R1696, B503) | | | | | | ['下一行2', 'Button14', '下一行Button2'] | | | | | | child_window(title="下一行", auto_id="DownButton", control_type="Button") | | | | | | | | | | Header - '标题' (L954, T277, R1737, B309) | | | | | ['标题', 'Header', '标题Header'] | | | | | child_window(title="标题", control_type="Header") | | | | | | | | | | | | SplitButton - '名称' (L954, T277, R1294, B309) | | | | | | ['名称', '名称SplitButton', 'SplitButton2'] | | | | | | child_window(title="名称", auto_id="System.ItemNameDisplay", control_type="SplitButton") | | | | | | | | | | | | | | Button - '筛选器下拉列表' (L1274, T277, R1293, B309) | | | | | | | ['筛选器下拉列表Button', 'Button15', '筛选器下拉列表', '筛选器下拉列表Button0', '筛选器下拉列表Button1', '筛选器下拉列表0', '筛选器下拉列表1'] | | | | | | | child_window(title="筛选器下拉列表", auto_id="DropDown", control_type="Button") | | | | | | | | | | | | SplitButton - '修改日期' (L1294, T277, R1474, B309) | | | | | | ['修改日期', 'SplitButton3', '修改日期SplitButton'] | | | | | | child_window(title="修改日期", auto_id="System.DateModified", control_type="SplitButton") | | | | | | | | | | | | | | Button - '筛选器下拉列表' (L1454, T277, R1473, B309) | | | | | | | ['筛选器下拉列表Button2', 'Button16', '筛选器下拉列表2'] | | | | | | | child_window(title="筛选器下拉列表", auto_id="DropDown", control_type="Button") | | | | | | | | | | | | SplitButton - '类型' (L1474, T277, R1624, B309) | | | | | | ['类型SplitButton', '类型', 'SplitButton4'] | | | | | | child_window(title="类型", auto_id="System.ItemTypeText", control_type="SplitButton") | | | | | | | | | | | | | | Button - '筛选器下拉列表' (L1604, T277, R1623, B309) | | | | | | | ['筛选器下拉列表Button3', 'Button17', '筛选器下拉列表3'] | | | | | | | child_window(title="筛选器下拉列表", auto_id="DropDown", control_type="Button") | | | | | | | | | | | | SplitButton - '大小' (L1624, T277, R1724, B309) | | | | | | ['SplitButton5', '大小SplitButton', '大小'] | | | | | | child_window(title="大小", auto_id="System.Size", control_type="SplitButton") | | | | | | | | | | | | | | Button - '筛选器下拉列表' (L1704, T277, R1723, B309) | | | | | | | ['筛选器下拉列表Button4', 'Button18', '筛选器下拉列表4'] | | | | | | | child_window(title="筛选器下拉列表", auto_id="DropDown", control_type="Button") | | | | | | | | | | ListItem - '.idea' (L972, T317, R1719, B348) | | | | | ['ListItem', '.idea', '.ideaListItem', 'ListItem0', 'ListItem1'] | | | | | child_window(title=".idea", auto_id="0", control_type="ListItem") | | | | | | | | | | | | Edit - '名称' (L1000, T321, R1294, B345) | | | | | | ['Edit', 'Edit0', 'Edit1'] | | | | | | child_window(title="名称", auto_id="System.ItemNameDisplay", control_type="Edit") | | | | | | | | | | | | Edit - '修改日期' (L1294, T321, R1474, B345) | | | | | | ['Edit2'] | | | | | | child_window(title="修改日期", auto_id="System.DateModified", control_type="Edit") | | | | | | | | | | | | Edit - '类型' (L1474, T321, R1624, B345) | | | | | | ['Edit3'] | | | | | | child_window(title="类型", auto_id="System.ItemTypeText", control_type="Edit") | | | | | | | | | | | | Edit - '大小' (L1624, T321, R1724, B345) | | | | | | ['Edit4'] | | | | | | child_window(title="大小", auto_id="System.Size", control_type="Edit") | | | | | | | | | | ListItem - '.lingma' (L972, T354, R1719, B385) | | | | | ['.lingma', 'ListItem2', '.lingmaListItem'] | | | | | child_window(title=".lingma", auto_id="1", control_type="ListItem") | | | | | | | | | | | | Edit - '名称' (L1000, T358, R1294, B382) | | | | | | ['Edit5'] | | | | | | child_window(title="名称", auto_id="System.ItemNameDisplay", control_type="Edit") | | | | | | | | | | | | Edit - '修改日期' (L1294, T358, R1474, B382) | | | | | | ['Edit6'] | | | | | | child_window(title="修改日期", auto_id="System.DateModified", control_type="Edit") | | | | | | | | | | | | Edit - '类型' (L1474, T358, R1624, B382) | | | | | | ['Edit7'] | | | | | | child_window(title="类型", auto_id="System.ItemTypeText", control_type="Edit") | | | | | | | | | | | | Edit - '大小' (L1624, T358, R1724, B382) | | | | | | ['Edit8'] | | | | | | child_window(title="大小", auto_id="System.Size", control_type="Edit") | | | | | | | | | | ListItem - '__pycache__' (L972, T391, R1719, B422) | | | | | ['ListItem3', '__pycache__ListItem', '__pycache__'] | | | | | child_window(title="__pycache__", auto_id="2", control_type="ListItem") | | | | | | | | | | | | Edit - '名称' (L1000, T395, R1294, B419) | | | | | | ['Edit9'] | | | | | | child_window(title="名称", auto_id="System.ItemNameDisplay", control_type="Edit") | | | | | | | | | | | | Edit - '修改日期' (L1294, T395, R1474, B419) | | | | | | ['Edit10'] | | | | | | child_window(title="修改日期", auto_id="System.DateModified", control_type="Edit") | | | | | | | | | | | | Edit - '类型' (L1474, T395, R1624, B419) | | | | | | ['Edit11'] | | | | | | child_window(title="类型", auto_id="System.ItemTypeText", control_type="Edit") | | | | | | | | | | | | Edit - '大小' (L1624, T395, R1724, B419) | | | | | | ['Edit12'] | | | | | | child_window(title="大小", auto_id="System.Size", control_type="Edit") | | | | | | | | | | ListItem - 'config' (L972, T428, R1719, B459) | | | | | ['ListItem4', 'configListItem', 'config'] | | | | | child_window(title="config", auto_id="3", control_type="ListItem") | | | | | | | | | | | | Edit - '名称' (L1000, T432, R1294, B456) | | | | | | ['Edit13'] | | | | | | child_window(title="名称", auto_id="System.ItemNameDisplay", control_type="Edit") | | | | | | | | | | | | Edit - '修改日期' (L1294, T432, R1474, B456) | | | | | | ['Edit14'] | | | | | | child_window(title="修改日期", auto_id="System.DateModified", control_type="Edit") | | | | | | | | | | | | Edit - '类型' (L1474, T432, R1624, B456) | | | | | | ['Edit15'] | | | | | | child_window(title="类型", auto_id="System.ItemTypeText", control_type="Edit") | | | | | | | | | | | | Edit - '大小' (L1624, T432, R1724, B456) | | | | | | ['Edit16'] | | | | | | child_window(title="大小", auto_id="System.Size", control_type="Edit") | | | | | | | | | | ListItem - 'framework' (L972, T465, R1719, B496) | | | | | ['ListItem5', 'frameworkListItem', 'framework'] | | | | | child_window(title="framework", auto_id="4", control_type="ListItem") | | | | | | | | | | | | Edit - '名称' (L1000, T469, R1294, B493) | | | | | | ['Edit17'] | | | | | | child_window(title="名称", auto_id="System.ItemNameDisplay", control_type="Edit") | | | | | | | | | | | | Edit - '修改日期' (L1294, T469, R1474, B493) | | | | | | ['Edit18'] | | | | | | child_window(title="修改日期", auto_id="System.DateModified", control_type="Edit") | | | | | | | | | | | | Edit - '类型' (L1474, T469, R1624, B493) | | | | | | ['Edit19'] | | | | | | child_window(title="类型", auto_id="System.ItemTypeText", control_type="Edit") | | | | | | | | | | | | Edit - '大小' (L1624, T469, R1724, B493) | | | | | | ['Edit20'] | | | | | | child_window(title="大小", auto_id="System.Size", control_type="Edit") | | | | | | | | | | ListItem - 'games' (L972, T502, R1719, B533) | | | | | ['gamesListItem', 'ListItem6', 'games'] | | | | | child_window(title="games", auto_id="5", control_type="ListItem") | | | | | | | | | | | | Edit - '名称' (L1000, T506, R1294, B530) | | | | | | ['Edit21'] | | | | | | child_window(title="名称", auto_id="System.ItemNameDisplay", control_type="Edit") | | | | | | | | | | | | Edit - '修改日期' (L1294, T506, R1474, B530) | | | | | | ['Edit22'] | | | | | | child_window(title="修改日期", auto_id="System.DateModified", control_type="Edit") | | | | | | | | | | | | Edit - '类型' (L1474, T506, R1624, B530) | | | | | | ['Edit23'] | | | | | | child_window(title="类型", auto_id="System.ItemTypeText", control_type="Edit") | | | | | | | | | | | | Edit - '大小' (L1624, T506, R1724, B530) | | | | | | ['Edit24'] | | | | | | child_window(title="大小", auto_id="System.Size", control_type="Edit") | | | | | | Static - '文件名:' (L767, T537, R911, B565) | | | ['Static', '文件名:Static', '文件名:', '文件名:0', '文件名:1', 'Static0', 'Static1'] | | | child_window(title="文件名:", auto_id="SaveDialogLabel", control_type="Text") | | | | | | ComboBox - '文件名:' (L911, T537, R1690, B565) | | | ['文件名:2', 'ComboBox', '文件名:ComboBox', 'ComboBox0', 'ComboBox1'] | | | child_window(title="文件名:", auto_id="FileNameControlHost", control_type="ComboBox") | | | | | | | | Edit - '文件名:' (L914, T540, R1666, B562) | | | | ['Edit25', '文件名:Edit'] | | | | child_window(title="文件名:", auto_id="1001", control_type="Edit") | | | | | | | | Button - '打开' (L1670, T538, R1689, B564) | | | | ['打开Button', 'Button19', '打开', '打开Button0', '打开Button1', '打开0', '打开1'] | | | | child_window(title="打开", auto_id="DropDown", control_type="Button") | | | | | | Static - '保存类型:' (L767, T568, R911, B596) | | | ['Static2', '保存类型:Static', '保存类型:', '保存类型:0', '保存类型:1'] | | | child_window(title="保存类型:", auto_id="SaveDialogLabel", control_type="Text") | | | | | | ComboBox - '保存类型:' (L911, T568, R1690, B596) | | | ['保存类型:ComboBox', '保存类型:2', 'ComboBox2'] | | | child_window(title="保存类型:", auto_id="FileTypeControlHost", control_type="ComboBox") | | | | | | | | Static - '' (L3, T3, R755, B25) | | | | ['Static3'] | | | | | | | | Button - '打开' (L1670, T569, R1689, B595) | | | | ['打开Button2', 'Button20', '打开2'] | | | | child_window(title="打开", auto_id="DropDown", control_type="Button") | | | | | | TreeView - '保存字段' (L767, T604, R1683, B643) | | | ['保存字段', '保存字段TreeView', 'TreeView2'] | | | child_window(title="保存字段", auto_id="SaveDialogPreviewMetadataInner", control_type="Tree") | | | | | | TreeView - '应用程序控件' (L0, T0, R0, B0) | | | ['应用程序控件TreeView', '应用程序控件', 'TreeView3'] | | | child_window(title="应用程序控件", auto_id="AppControlsModuleInner", control_type="Tree") | | | | Toolbar - '' (L764, T679, R879, B705) | | ['保存类型:Toolbar', 'Toolbar2'] | | | | | | Button - '隐藏文件夹' (L764, T679, R867, B705) | | | ['隐藏文件夹Button', 'Button21', '隐藏文件夹'] | | | child_window(title="隐藏文件夹", control_type="Button") | | | | CheckBox - '追加扩展名' (L1235, T677, R1423, B700) | | ['追加扩展名CheckBox', 'CheckBox', '追加扩展名'] | | child_window(title="追加扩展名", control_type="CheckBox") | | | | Button - '保存(S)' (L1438, T672, R1548, B705) | | ['保存(S)', '保存(S)Button', 'Button22'] | | child_window(title="保存(S)", auto_id="1", control_type="Button") | | | | Button - '取消' (L1563, T672, R1673, B705) | | ['取消Button', '取消', 'Button23'] | | child_window(title="取消", auto_id="2", control_type="Button") | | | | Thumb - '' (L1675, T705, R1696, B726) | | ['Thumb4', '保存类型:Thumb'] | | | | Pane - '' (L754, T173, R1696, B238) | | ['Pane4'] | | child_window(auto_id="40965", control_type="Pane") | | | | | | Pane - '' (L754, T182, R880, B226) | | | ['Pane5'] | | | | | | | | Toolbar - '导航按钮' (L759, T185, R880, B226) | | | | ['导航按钮', '导航按钮Toolbar', 'Toolbar3'] | | | | child_window(title="导航按钮", control_type="ToolBar") | | | | | | | | | | Button - '后退 (Alt + 向左键)' (L759, T185, R803, B226) | | | | | ['后退 (Alt + 向左键)Button', '后退 (Alt + 向左键)', 'Button24'] | | | | | child_window(title="后退 (Alt + 向左键)", control_type="Button") | | | | | | | | | | Button - '前进 (Alt + 向右键)' (L803, T185, R847, B226) | | | | | ['前进 (Alt + 向右键)Button', 'Button25', '前进 (Alt + 向右键)'] | | | | | child_window(title="前进 (Alt + 向右键)", control_type="Button") | | | | | | | | | | Button - '最近浏览的位置' (L847, T185, R873, B226) | | | | | ['最近浏览的位置Button', '最近浏览的位置', 'Button26'] | | | | | child_window(title="最近浏览的位置", control_type="Button") | | | | | | Pane - '' (L880, T181, R925, B226) | | | ['Pane6'] | | | | | | | | Toolbar - '上区段' (L880, T185, R925, B230) | | | | ['上区段', 'Toolbar4', '上区段Toolbar'] | | | | child_window(title="上区段", control_type="ToolBar") | | | | | | | | | | Button - '上移到“Data (D:)”(Alt + 向上键)' (L880, T185, R921, B226) | | | | | ['上移到“Data (D:)”(Alt + 向上键)', '上移到“Data (D:)”(Alt + 向上键)Button', 'Button27'] | | | | | child_window(title="上移到“Data (D:)”(Alt + 向上键)", control_type="Button") | | | | | | Pane - '' (L925, T173, R1420, B235) | | | ['Pane7'] | | | child_window(auto_id="41477", control_type="Pane") | | | | | | | | Progress - '正在加载' (L927, T183, R1418, B227) | | | | ['正在加载', 'Progress', '正在加载Progress'] | | | | child_window(title="正在加载", control_type="ProgressBar") | | | | | | | | | | Pane - '' (L927, T183, R1324, B227) | | | | | ['Pane8'] | | | | | | | | | | | | Toolbar - '地址: D:Demo' (L935, T183, R1324, B227) | | | | | | ['地址: D:\Demo', 'Toolbar5', '地址: D:\DemoToolbar'] | | | | | | child_window(title="地址: D:Demo", auto_id="1001", control_type="ToolBar") | | | | | | | | | | | | | | SplitButton - '所有位置' (L935, T183, R978, B226) | | | | | | | ['所有位置SplitButton', 'SplitButton6', '所有位置'] | | | | | | | child_window(title="所有位置", control_type="SplitButton") | | | | | | | | | | | | | | SplitButton - '此电脑' (L978, T183, R1050, B226) | | | | | | | ['此电脑2', '此电脑SplitButton', 'SplitButton7'] | | | | | | | child_window(title="此电脑", control_type="SplitButton") | | | | | | | | | | | | | | SplitButton - 'Data (D:)' (L1050, T183, R1139, B226) | | | | | | | ['SplitButton8', 'Data (D:)SplitButton', 'Data (D:)2'] | | | | | | | child_window(title="Data (D:)", control_type="SplitButton") | | | | | | | | | | | | | | SplitButton - 'Demo' (L1139, T183, R1210, B226) | | | | | | | ['u200eDemoSplitButton', 'SplitButton9', 'u200eDemo'] | | | | | | | child_window(title="Demo", control_type="SplitButton") | | | | | | | | | | Toolbar - '地址区段' (L1324, T183, R1418, B227) | | | | | ['地址区段Toolbar', '地址区段', 'Toolbar6'] | | | | | child_window(title="地址区段", control_type="ToolBar") | | | | | | | | | | | | Button - '上一个位置' (L1324, T183, R1371, B230) | | | | | | ['上一个位置Button', 'Button28', '上一个位置'] | | | | | | child_window(title="上一个位置", control_type="Button") | | | | | | | | | | | | Button - '刷新“Demo”(F5)' (L1371, T183, R1418, B230) | | | | | | ['刷新“Demo”(F5)', 'Button29', '刷新“Demo”(F5)Button'] | | | | | | child_window(title="刷新“Demo”(F5)", control_type="Button") | | | | | | Pane - '' (L1424, T203, R1430, B204) | | | ['Pane9'] | | | | | | Pane - '' (L1430, T179, R1685, B229) | | | ['Pane10'] | | | | | | | | Pane - '' (L1430, T182, R1685, B228) | | | | ['Pane11'] | | | | | | | | | | Pane - '' (L1435, T182, R1680, B228) | | | | | ['Pane12'] | | | | | | | | | | | | Edit - '

' (L1437, T195, R1635, B215) | | | | | | ['Edit26'] | | | | | | child_window(title="

", auto_id="SearchEditBox", control_type="Edit") | | | | | | | | | | | | Button - '搜索' (L1639, T182, R1677, B228) | | | | | | ['Button30', '搜索', '搜索Button'] | | | | | | child_window(title="搜索", auto_id="SearchBoxSearchButton", control_type="Button") | | | | | | Pane - '' (L1689, T203, R1696, B204) | | | ['Pane13'] | | | | TitleBar - '' (L774, T138, R1696, B173) | | ['TitleBar', 'TitleBar0', 'TitleBar1'] | | | | | | Menu - '系统' (L603, T115, R625, B137) | | | ['Menu', '系统', '系统Menu', '系统0', '系统1', 'Menu0', 'Menu1', '系统Menu0', '系统Menu1'] | | | child_window(title="系统", auto_id="MenuBar", control_type="MenuBar") | | | | | | | | MenuItem - '系统' (L603, T115, R625, B137) | | | | ['系统2', '系统MenuItem', 'MenuItem', '系统MenuItem0', '系统MenuItem1', 'MenuItem0', 'MenuItem1'] | | | | child_window(title="系统", control_type="MenuItem") | | | | | | Button - '关闭' (L1653, T136, R1697, B173) | | | ['关闭Button', '关闭', 'Button31', '关闭Button0', '关闭Button1', '关闭0', '关闭1'] | | | child_window(title="关闭", control_type="Button") | | Pane - '北京' (L2, T115, R1918, B989) | ['北京-Pane', '北京-', 'Pane14'] | child_window(title="北京-", control_type="Pane") | | TabControl - 'Tab' (L0, T83, R1920, B991) | ['TabControl', 'TabTabControl', 'Tab'] | child_window(title="Tab", control_type="Tab") | | | | TabItem - '新文件 1' (L2, T85, R112, B113) | | ['新文件 1', 'TabItem', '新文件 1TabItem'] | | child_window(title="新文件 1", control_type="TabItem") | | StatusBar - '' (L0, T991, R1920, B1020) | ['Normal text fileStatusBar', 'StatusBar'] | | | | Static - 'Normal text file' (L0, T993, R974, B1020) | | ['Static4', 'Normal text file', 'Normal text fileStatic'] | | child_window(title="Normal text file", control_type="Text") | | | | Static - 'length : 13 lines : 1' (L976, T993, R1249, B1020) | | ['length : 13 lines : 1Static', 'Static5', 'length : 13 lines : 1'] | | child_window(title="length : 13 lines : 1", control_type="Text") | | | | Static - 'Ln : 1 Col : 6 Pos : 14' (L1251, T993, R1574, B1020) | | ['Static6', 'Ln : 1 Col : 6 Pos : 14Static', 'Ln : 1 Col : 6 Pos : 14'] | | child_window(title="Ln : 1 Col : 6 Pos : 14", control_type="Text") | | | | Static - 'Windows (CR LF)' (L1576, T993, R1712, B1020) | | ['Static7', 'Windows (CR LF)Static', 'Windows (CR LF)'] | | child_window(title="Windows (CR LF)", control_type="Text") | | | | Static - 'UTF-8' (L1714, T993, R1862, B1020) | | ['Static8', 'UTF-8', 'UTF-8Static'] | | child_window(title="UTF-8", control_type="Text") | | | | Static - 'INS' (L1864, T993, R1900, B1020) | | ['Static9', 'INSStatic', 'INS'] | | child_window(title="INS", control_type="Text") | | Pane - '' (L0, T54, R1920, B83) | ['Pane15'] | | | | Toolbar - '' (L2, T54, R1920, B83) | | ['Toolbar7'] | | | | | | Button - '' (L2, T54, R29, B80) | | | ['Button32'] | | | | | | Button - '' (L29, T54, R56, B80) | | | ['Button33'] | | | | | | Button - '' (L56, T54, R83, B80) | | | ['Button34'] | | | | | | Button - '' (L83, T54, R110, B80) | | | ['Button35'] | | | | | | Button - '' (L110, T54, R137, B80) | | | ['Button36'] | | | | | | Button - '' (L137, T54, R164, B80) | | | ['Button37'] | | | | | | Button - '' (L164, T54, R191, B80) | | | ['Button38'] | | | | | | Button - '' (L199, T54, R226, B80) | | | ['Button39'] | | | | | | Button - '' (L226, T54, R253, B80) | | | ['Button40'] | | | | | | Button - '' (L253, T54, R280, B80) | | | ['Button41'] | | | | | | Button - '' (L288, T54, R315, B80) | | | ['Button42'] | | | | | | Button - '' (L315, T54, R342, B80) | | | ['Button43'] | | | | | | Button - '' (L350, T54, R377, B80) | | | ['Button44'] | | | | | | Button - '' (L377, T54, R404, B80) | | | ['Button45'] | | | | | | Button - '' (L412, T54, R439, B80) | | | ['Button46'] | | | | | | Button - '' (L439, T54, R466, B80) | | | ['Button47'] | | | | | | Button - '' (L474, T54, R501, B80) | | | ['Button48'] | | | | | | Button - '' (L501, T54, R528, B80) | | | ['Button49'] | | | | | | Button - '' (L536, T54, R563, B80) | | | ['Button50'] | | | | | | Button - '' (L563, T54, R590, B80) | | | ['Button51'] | | | | | | Button - '' (L590, T54, R617, B80) | | | ['Button52'] | | | | | | Button - '' (L617, T54, R644, B80) | | | ['Button53'] | | | | | | Button - '' (L644, T54, R671, B80) | | | ['Button54'] | | | | | | Button - '' (L671, T54, R698, B80) | | | ['Button55'] | | | | | | Button - '' (L698, T54, R725, B80) | | | ['Button56'] | | | | | | Button - '' (L725, T54, R752, B80) | | | ['Button57'] | | | | | | Button - '' (L752, T54, R779, B80) | | | ['Button58'] | | | | | | Button - '' (L787, T54, R814, B80) | | | ['Button59'] | | | | | | Button - '' (L814, T54, R841, B80) | | | ['Button60'] | | | | | | Button - '' (L841, T54, R868, B80) | | | ['Button61'] | | | | | | Button - '' (L868, T54, R895, B80) | | | ['Button62'] | | | | | | Button - '' (L895, T54, R922, B80) | | | ['Button63'] | | | | | | Button - '' (L930, T54, R957, B80) | | | ['Button64'] | | | | | | Button - '' (L957, T54, R984, B80) | | | ['Button65'] | | | | | | Button - '' (L984, T54, R1011, B80) | | | ['Button66'] | | | | | | Button - '' (L1011, T54, R1038, B80) | | | ['Button67'] | | | | | | Button - '' (L1038, T54, R1065, B80) | | | ['Button68'] | | | | | | Button - '' (L1065, T54, R1092, B80) | | | ['Button69'] | | | | | | Button - '' (L1092, T54, R1119, B80) | | | ['Button70'] | | | | | | Button - '' (L1119, T54, R1146, B80) | | | ['Button71'] | | TitleBar - '' (L20, T-6, R1920, B29) | ['TitleBar2'] | | | | Menu - '系统' (L0, T0, R22, B22) | | ['Menu2', '系统3', '系统Menu2'] | | child_window(title="系统", auto_id="MenuBar", control_type="MenuBar") | | | | | | MenuItem - '系统' (L0, T0, R22, B22) | | | ['系统4', '系统MenuItem2', 'MenuItem2'] | | | child_window(title="系统", control_type="MenuItem") | | | | Button - '最小化' (L1740, T0, R1800, B28) | | ['Button72', '最小化', '最小化Button'] | | child_window(title="最小化", control_type="Button") | | | | Button - '还原' (L1800, T0, R1859, B28) | | ['还原', 'Button73', '还原Button'] | | child_window(title="还原", control_type="Button") | | | | Button - '关闭' (L1859, T0, R1920, B28) | | ['关闭Button2', '关闭2', 'Button74'] | | child_window(title="关闭", control_type="Button") | | Menu - '应用程序' (L0, T23, R1536, B42) | ['Menu3', '应用程序', '应用程序Menu'] | child_window(title="应用程序", auto_id="MenuBar", control_type="MenuBar") | | | | MenuItem - '文件(F)' (L0, T23, R53, B42) | | ['MenuItem3', '文件(F)MenuItem', '文件(F)'] | | child_window(title="文件(F)", control_type="MenuItem") | | | | MenuItem - '编辑(E)' (L53, T23, R106, B42) | | ['编辑(E)', '编辑(E)MenuItem', 'MenuItem4'] | | child_window(title="编辑(E)", control_type="MenuItem") | | | | MenuItem - '搜索(S)' (L106, T23, R160, B42) | | ['搜索(S)MenuItem', 'MenuItem5', '搜索(S)'] | | child_window(title="搜索(S)", control_type="MenuItem") | | | | MenuItem - '视图(V)' (L159, T23, R213, B42) | | ['视图(V)MenuItem', '视图(V)', 'MenuItem6'] | | child_window(title="视图(V)", control_type="MenuItem") | | | | MenuItem - '编码(N)' (L214, T23, R270, B42) | | ['编码(N)MenuItem', '编码(N)', 'MenuItem7'] | | child_window(title="编码(N)", control_type="MenuItem") | | | | MenuItem - '语言(L)' (L270, T23, R323, B42) | | ['语言(L)', '语言(L)MenuItem', 'MenuItem8'] | | child_window(title="语言(L)", control_type="MenuItem") | | | | MenuItem - '设置(T)' (L322, T23, R376, B42) | | ['设置(T)MenuItem', '设置(T)', 'MenuItem9'] | | child_window(title="设置(T)", control_type="MenuItem") | | | | MenuItem - '工具(O)' (L376, T23, R432, B42) | | ['工具(O)MenuItem', '工具(O)', 'MenuItem10'] | | child_window(title="工具(O)", control_type="MenuItem") | | | | MenuItem - '(M)' (L432, T23, R478, B42) | | ['(M)', '(M)MenuItem', 'MenuItem11'] | | child_window(title="(M)", control_type="MenuItem") | | | | MenuItem - '运行(R)' (L478, T23, R532, B42) | | ['运行(R)MenuItem', '运行(R)', 'MenuItem12'] | | child_window(title="运行(R)", control_type="MenuItem") | | | | MenuItem - '插件(P)' (L533, T23, R587, B42) | | ['插件(P)MenuItem', '插件(P)', 'MenuItem13'] | | child_window(title="插件(P)", control_type="MenuItem") | | | | MenuItem - '窗口(W)' (L586, T23, R644, B42) | | ['窗口(W)', '窗口(W)MenuItem', 'MenuItem14'] | | child_window(title="窗口(W)", control_type="MenuItem") | | | | MenuItem - '?' (L645, T23, R665, B42) | | ['?MenuItem', '?', 'MenuItem15'] | | child_window(title="?", control_type="MenuItem") | | | | MenuItem - 'X' (L1514, T23, R1536, B42) | | ['X', 'MenuItem16', 'XMenuItem'] | | child_window(title="X", control_type="MenuItem") Process finished with exit code 0
从上边的内容中,找到【文件名】和【保存】备用。
代码设计
from pywinauto import Application import time app = Application('uia').start("D:/software/Notepad/Notepad++/notepad++.exe") win = app['新文件 1 - Notepad++'] win.type_keys("rebort测试") win.child_window(title="应用程序", auto_id="MenuBar", control_type="MenuBar") # # 文件-另存为 win.menu_select('文件(F) -> 另存为(A)...') # 等待另存为窗口出现 win.child_window(title="另存为", control_type="Window").wait('ready', timeout=5) # # 输入文件名称 win.child_window(title="文件名:", control_type="Edit").type_keys("rebort测试.txt") win.print_ctrl_ids() # # 保存 win.child_window(title="保存(S)", control_type="Button").click()
运行代码
1.运行代码,右键Run'Test',就可以看到控制台输出
2.运行代码后电脑端的动作(与测试场景一致)
3.文件会默认保存到代码项目的根目录
常见问题与优化
控件定位失败
使用 print_control_identifiers() 输出所有控件信息辅助调试。
调整 backend 参数("win32" 或 "uia")适配不同应用。
异步弹窗延迟 添加显式等待逻辑:save_dialog.wait("visible", timeout=10)
跨系统版本兼容性 不同 Windows 版本可能调整弹窗控件结构,需针对性测试。
PC端pywinauto应该怎么进行截图呢?
截图方法
在pywinauto中存在自带的截图函数 **capture_as_image() **,源码如下:
def capture_as_image(self, rect=None): """ Return a PIL image of the control. See PIL documentation to know what you can do with the resulting image. """ control_rectangle = self.rectangle() if not (control_rectangle.width() and control_rectangle.height()): return None # PIL is optional so check first if not ImageGrab: print("PIL does not seem to be installed. " "PIL is required for capture_as_image") self.actions.log("PIL does not seem to be installed. " "PIL is required for capture_as_image") return None if rect: control_rectangle = rect # get the control rectangle in a way that PIL likes it width = control_rectangle.width() height = control_rectangle.height() left = control_rectangle.left right = control_rectangle.right top = control_rectangle.top bottom = control_rectangle.bottom box = (left, top, right, bottom) # check the number of monitors connected if (sys.platform == 'win32') and (len(win32api.EnumDisplayMonitors()) > 1): hwin = win32gui.GetDesktopWindow() hwindc = win32gui.GetWindowDC(hwin) srcdc = win32ui.CreateDCFromHandle(hwindc) memdc = srcdc.CreateCompatibleDC() bmp = win32ui.CreateBitmap() bmp.CreateCompatibleBitmap(srcdc, width, height) memdc.SelectObject(bmp) memdc.BitBlt((0, 0), (width, height), srcdc, (left, top), win32con.SRCCOPY) bmpinfo = bmp.GetInfo() bmpstr = bmp.GetBitmapBits(True) pil_img_obj = Image.frombuffer('RGB', (bmpinfo['bmWidth'], bmpinfo['bmHeight']), bmpstr, 'raw', 'BGRX', 0, 1) else: # grab the image and get raw data as a string pil_img_obj = ImageGrab.grab(box) return pil_img_obj
由上边的截图方法,我们可以知道这个方法返回一个:控件的PIL图像 。因此我们需要安装PIL。
项目实战(窗口截图)
因为系统是Windows11,所以这里为了减少不必要的麻烦主要还是通过Windows安装的Notepad++编辑器进行演示和实践。
测试场景
1.演示的场景灰常简单,大致测试场景:启动电脑安装的Notepad++编辑器,然后对编辑器的窗口进行截图保存即可。
2.介绍前边的截图方法,我们知道需要安装PIL模块,这里没有安装看看会不会报错。

安装PIL模块。命令行:pip install Pillow ,如下图所示:

代码设计
from pywinauto import Application import time app = Application('uia').start(r"D:/software/Notepad/Notepad++/notepad++.exe") win = app['新文件 1 - Notepad++'] # 对窗口截图 win.capture_as_image().save('Notepad++.png')
运行代码
1.运行代码,右键Run'Test',就可以看到控制台输出
2.运行代码后电脑端的动作(启动Notepad++编辑器,并截图)
3.查看窗口截图,我们可以发现:截图会有其它窗口的背景会叠加,如下图所示:

项目实战(控件截图)
因为系统是Windows11,所以这里为了减少不必要的麻烦主要还是通过Windows安装的Notepad++编辑器进行演示和实践。
测试场景
1.演示的场景灰常简单,大致测试场景:启动电脑安装的Notepad++编辑器,然后对编辑器的菜单栏控件进行截图保存即可。
2.由于前边已经将所需的环境安装好了,这里就可以直接用了。
代码设计
from pywinauto import Application import time app = Application('uia').start(r"D:/software/Notepad/Notepad++/notepad++.exe") win = app['新文件 1 - Notepad++'] time.sleep(5) # 对菜单栏控件截图 menu = win.child_window(title="应用程序", auto_id="MenuBar", control_type="MenuBar") time.sleep(5) menu.capture_as_image().save('menu.png')
运行代码
1.运行代码,右键Run'Test',就可以看到控制台输出
2.运行代码后电脑端的动作(启动Notepad++编辑器,并截图)
3.查看控件截图,我们可以发现:截图好像不太全,感觉就像截了一半。查了资料说与电脑屏幕分别率有关系,有的说是因为没有加载完成,就截图了,但是加了等待后,前后对比也是没有区别的,如下图所示:

注意事项
Backend选择 推荐优先使用backend="uia"(支持更多现代应用),若控件无法识别可切换至backend="win32"。
窗口激活状态capture_as_image()要求窗口可见且未被完全遮挡,否则可能截取失败。
分辨率适配 高DPI屏幕需设置应用缩放兼容性模式,避免截图坐标偏移。


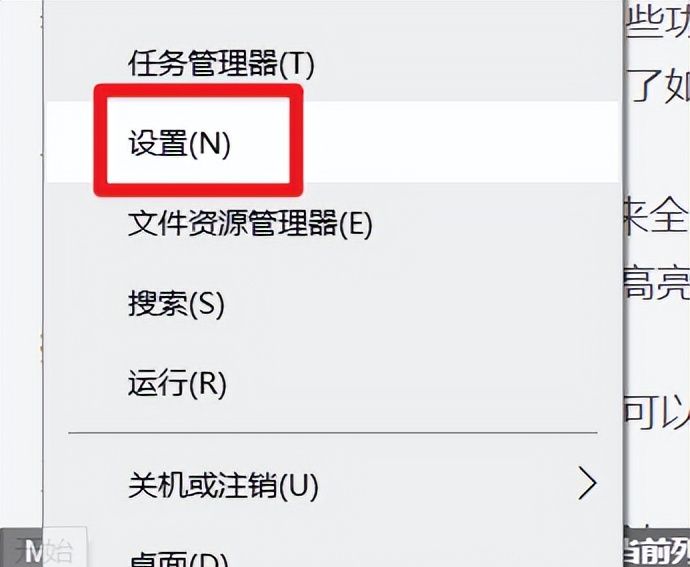


暂无评论内容