
目录
这是官方的原版eMPL文件
inv_mpu.c修改
1、增加定义和声明
2、注释和函数接口修改
3、注释
4、printf 换成自己的打印输出函数即可
5、初始化函数修改 去掉形参
inv_mpu.h 修改
1、从inv_mpu.c复制定义过来
inv_mpu_dmp_motion_driver.c 和.h 修改
1、增加
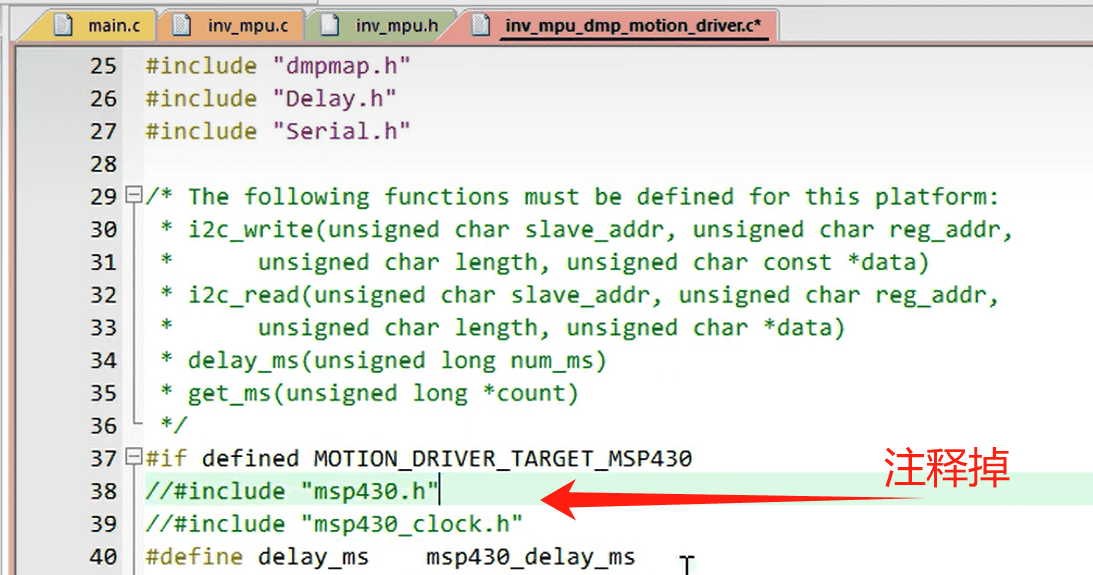
2、注释和替换
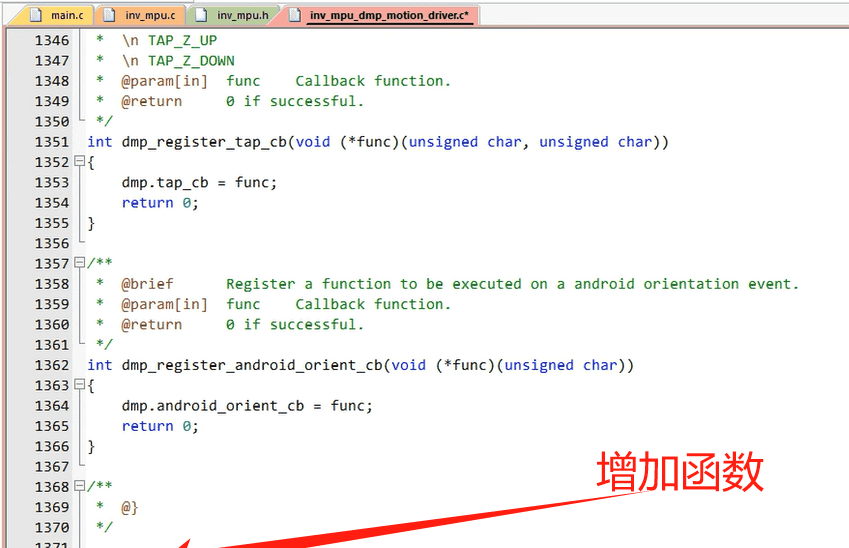
3、增加函数
4、把后两个函数加在头文件中
修改MPU6050.c
1、加头文件
2、增加宏定义和部分变量
3、增加连续地址写
4、增加连续地址读
5、增加 MPU6050_DMPInit()初始化函数
6、MPU6050_ReadDMP
编译后的报错解决
1、注释
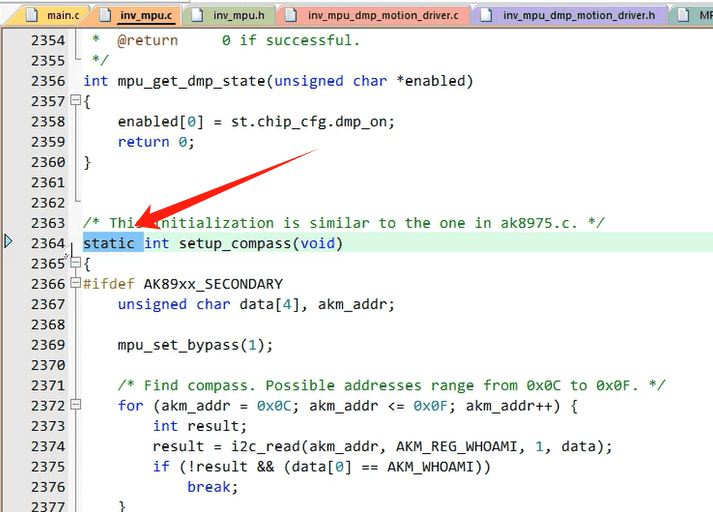
2、删除 static
编辑
3、如果出现这个关于报错,
定时器的配置,一般20Hz就可以,根据自己的需求调整吧
主函数及相关变量的定义
效果:
F130C8T6工程源码
这是官方的原版eMPL文件
通过网盘分享的文件:eMPL
链接: https://pan.baidu.com/s/1BpWmEqj30FbpkVhOWylSrA?pwd=jvif 提取码: jvif
–来自百度网盘超级会员v5的分享
inv_mpu.c修改
1、增加定义和声明
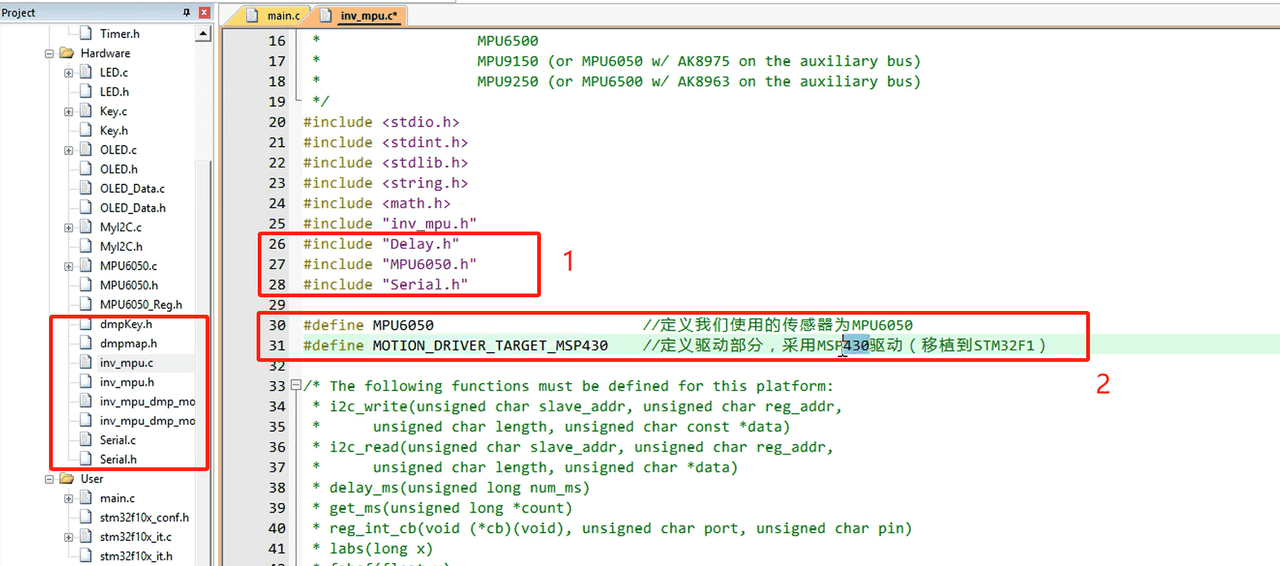
#include "MPU6050.h"
#include "Delay.h"
#include "Serial.h" // 替换成自己的有串口的文件

#define MPU6050                        //定义我们使用的传感器为MPU6050
#define MOTION_DRIVER_TARGET_MSP430    //定义驱动部分,采用MSP430驱动(移植到STM32F1)
2、注释和函数接口修改


新写的mget_ms函数放在.c文件后面,并在.h头文件中声明
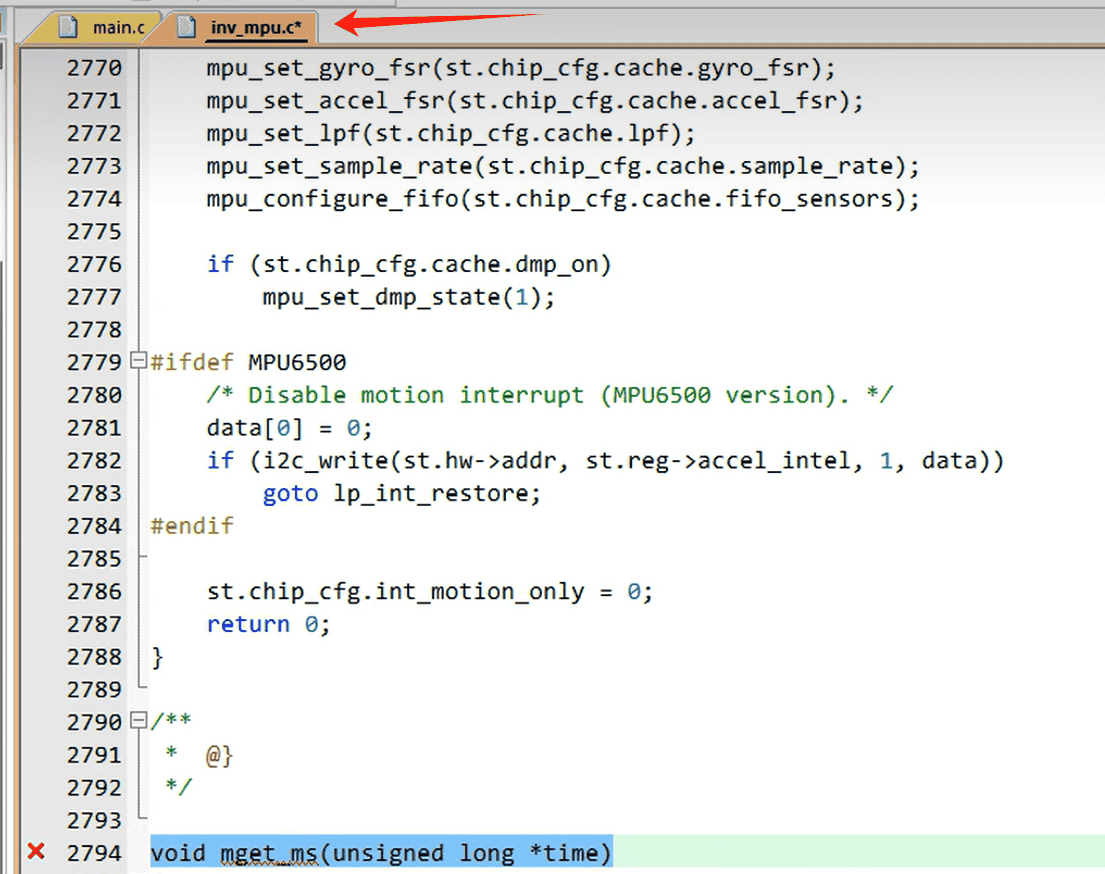
void mget_ms(unsigned long *time)
{

}
void mget_ms(unsigned long *time);3、注释
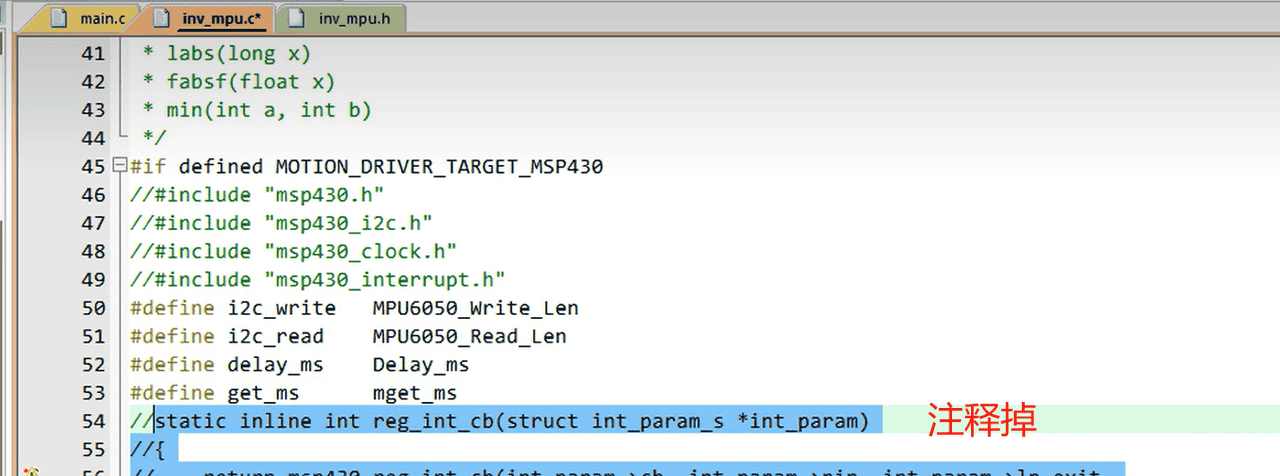
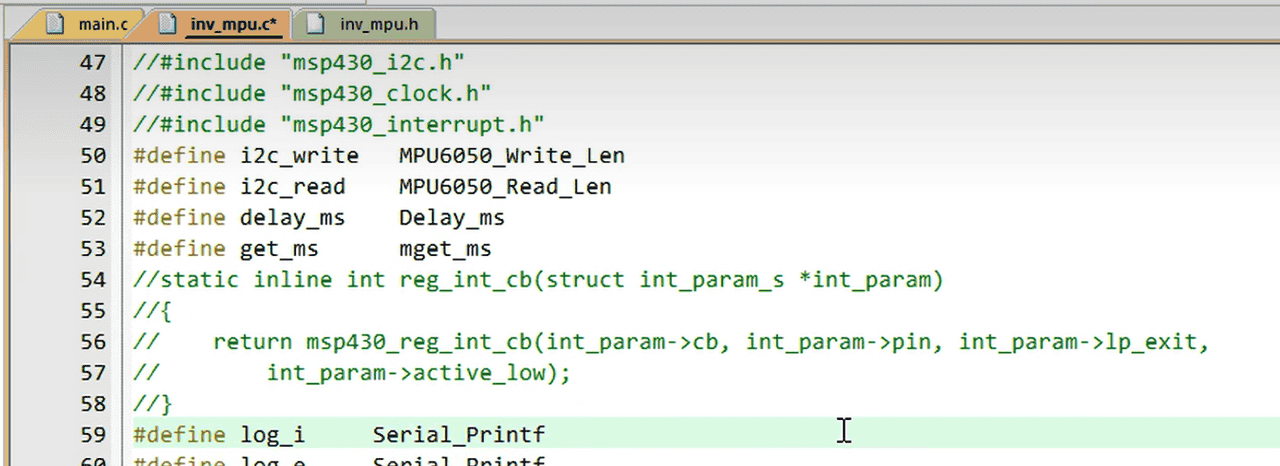
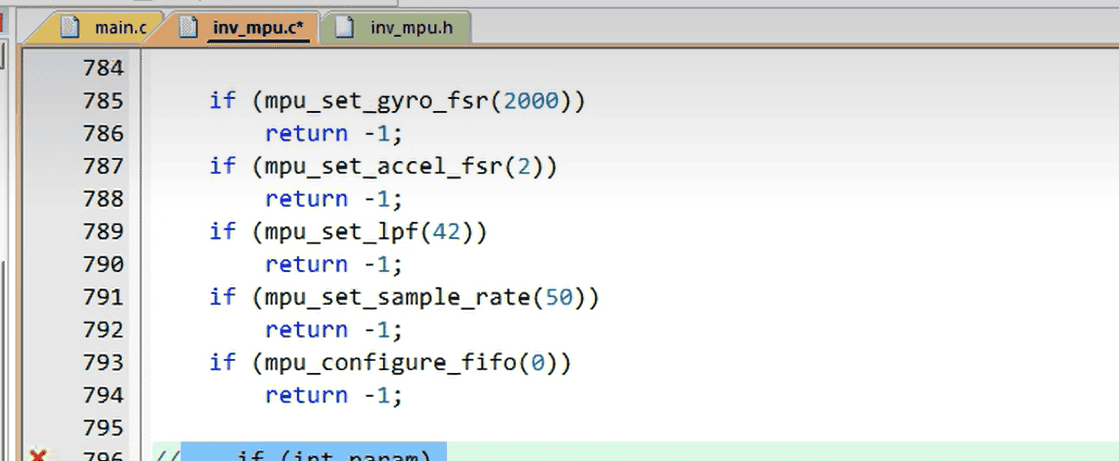
4、printf 换成自己的打印输出函数即可
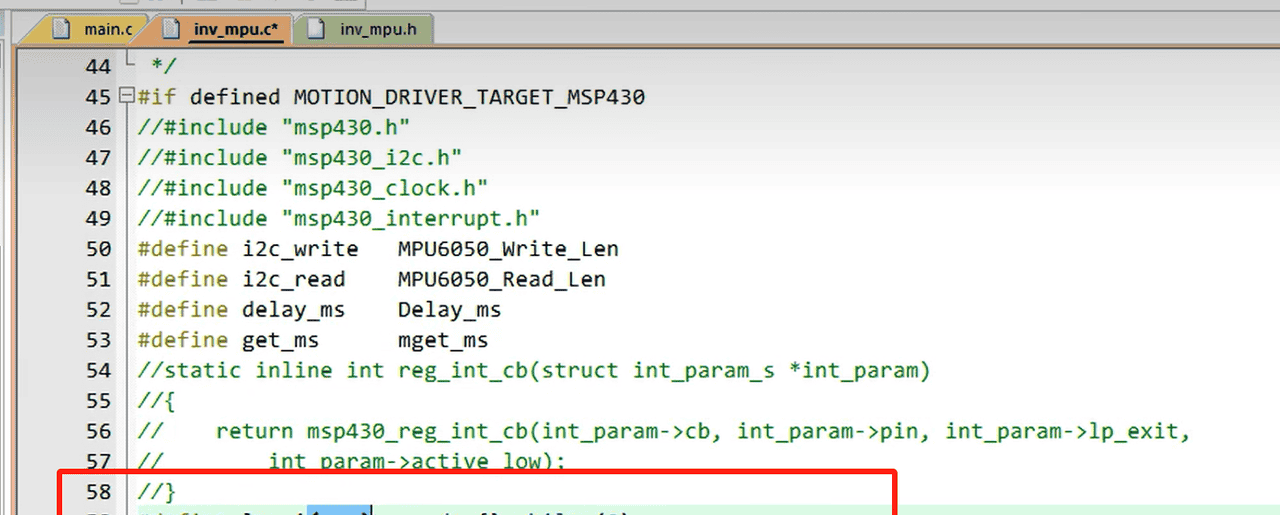
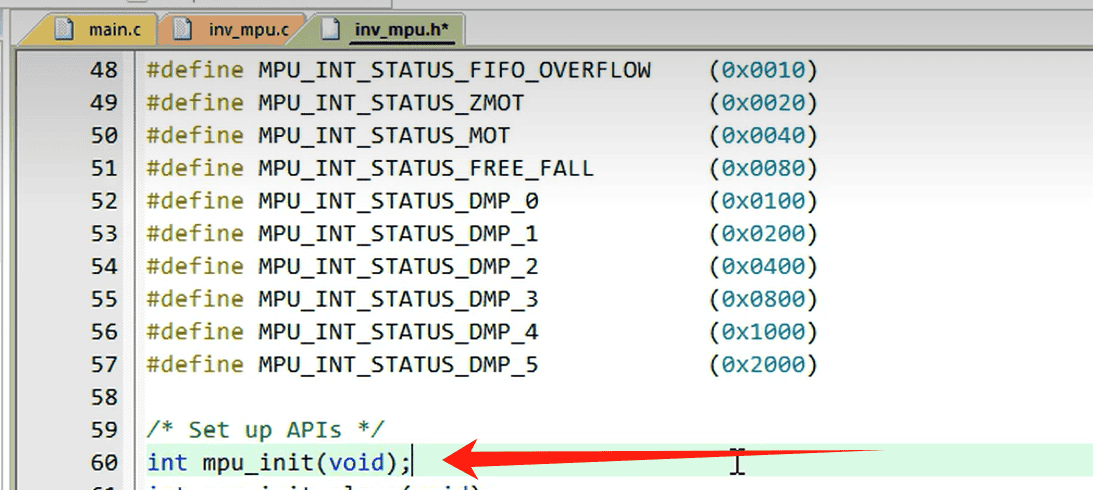
5、初始化函数修改 去掉形参
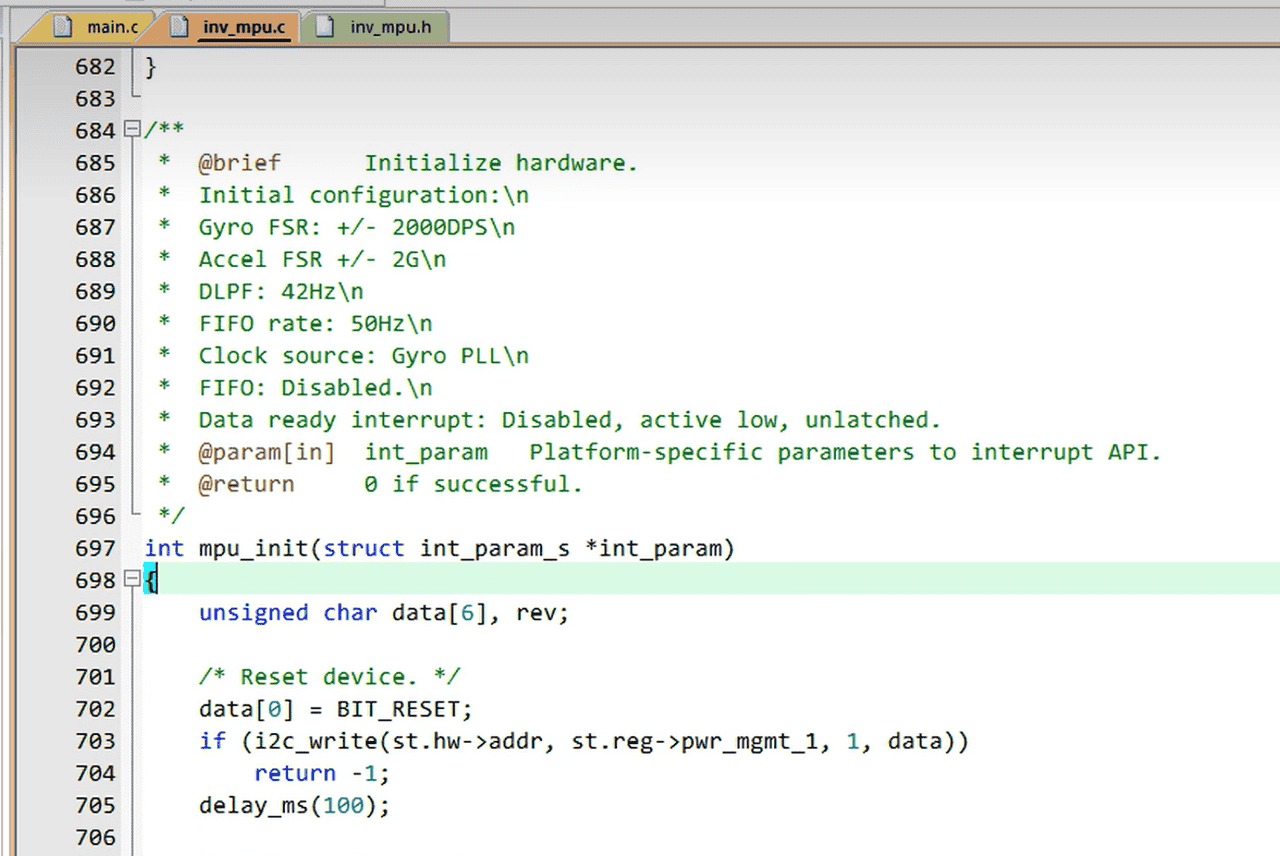
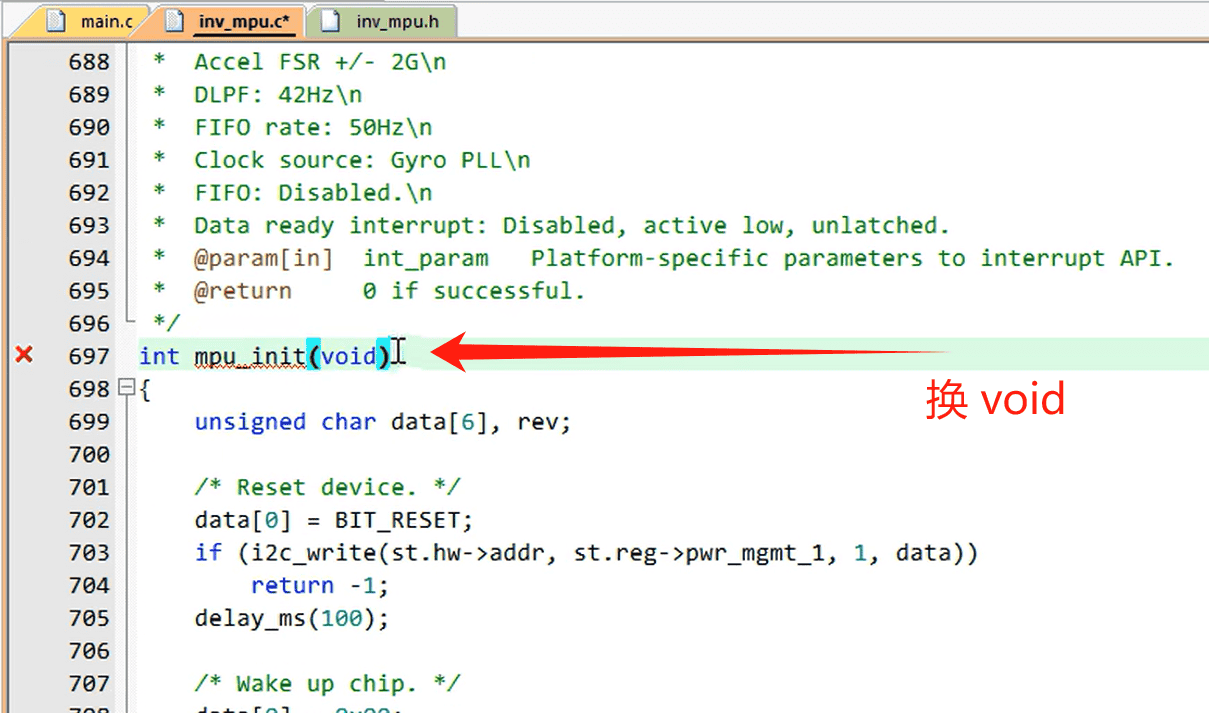
mpu_init头文件也记得修改
原函数中的这个报错注释掉
inv_mpu.h 修改
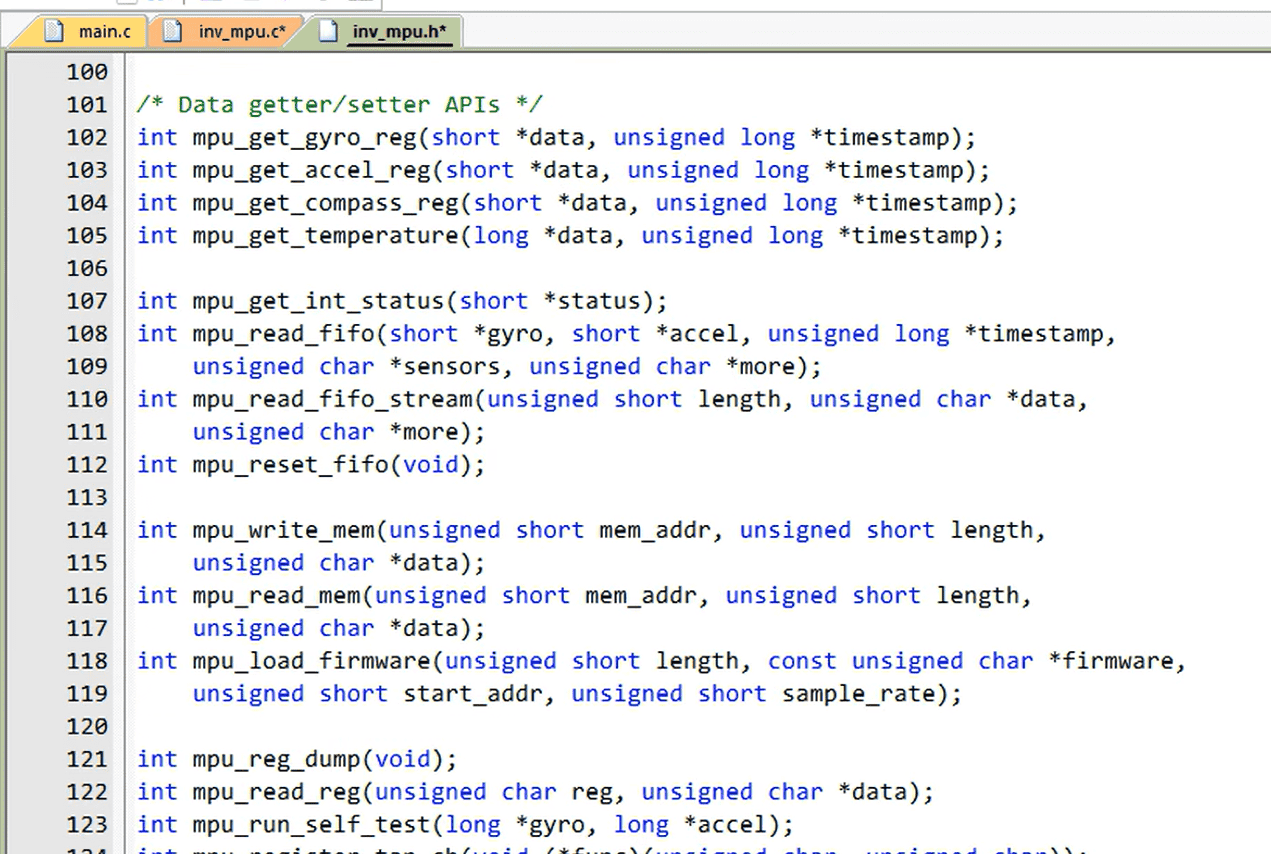
1、从inv_mpu.c复制定义过来
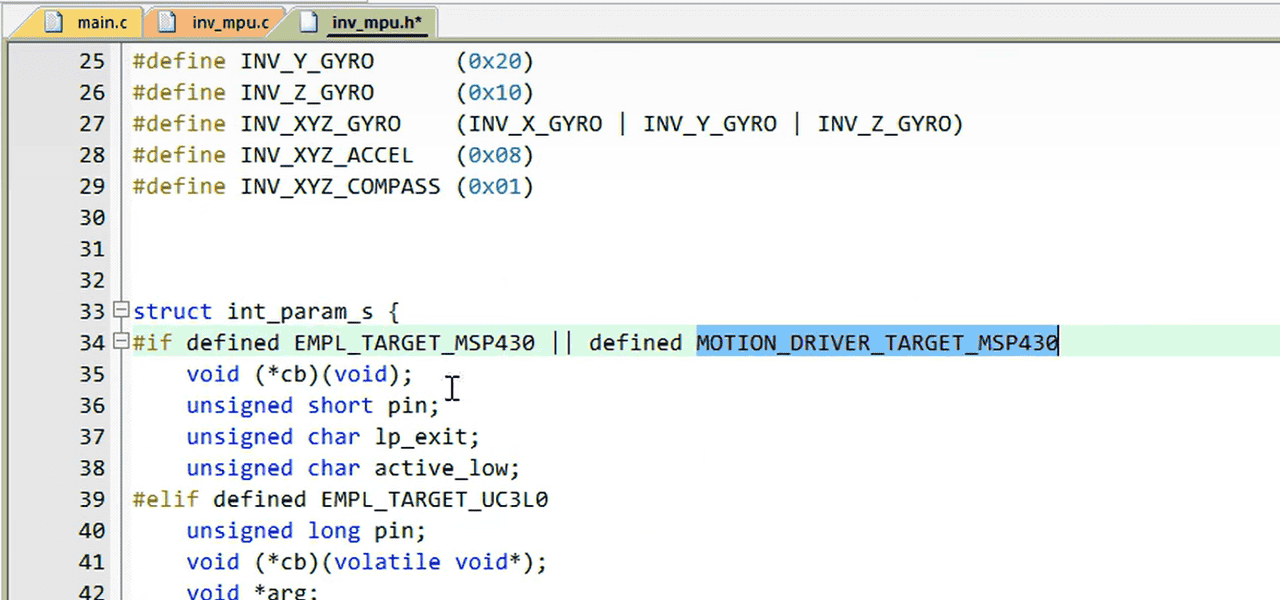
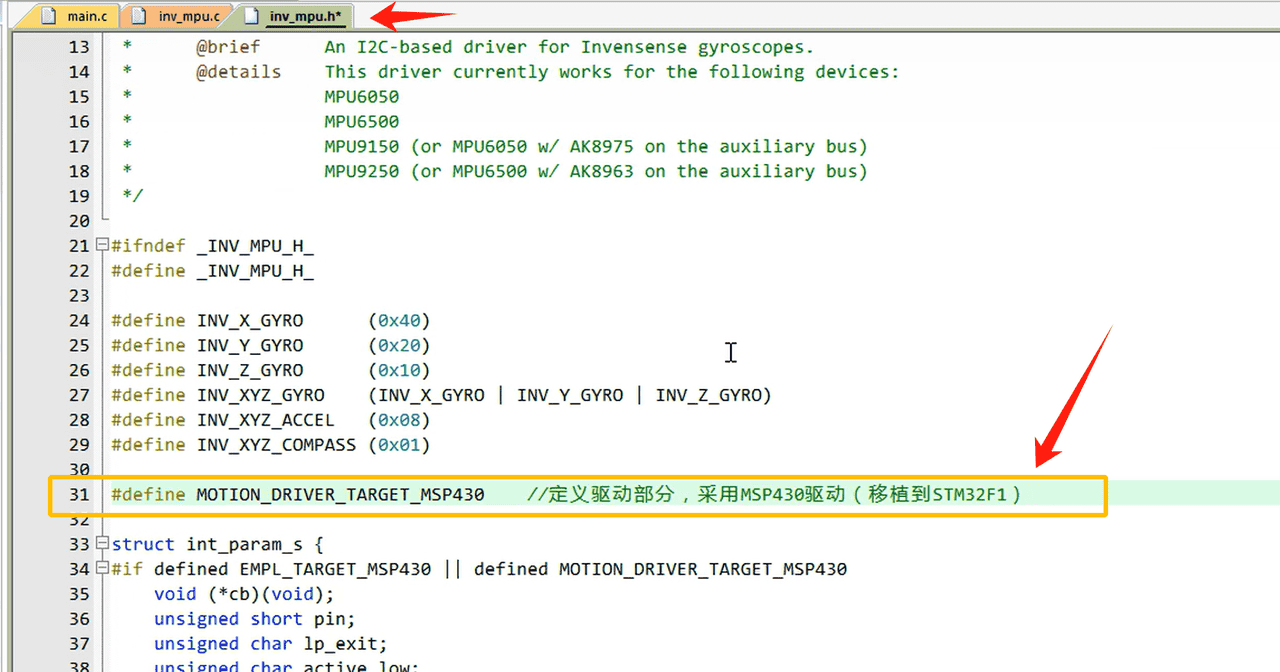
#define MOTION_DRIVER_TARGET_MSP430 //定义驱动部分,采用MSP430驱动(移植到STM32F1)
inv_mpu_dmp_motion_driver.c 和.h 修改
1、增加
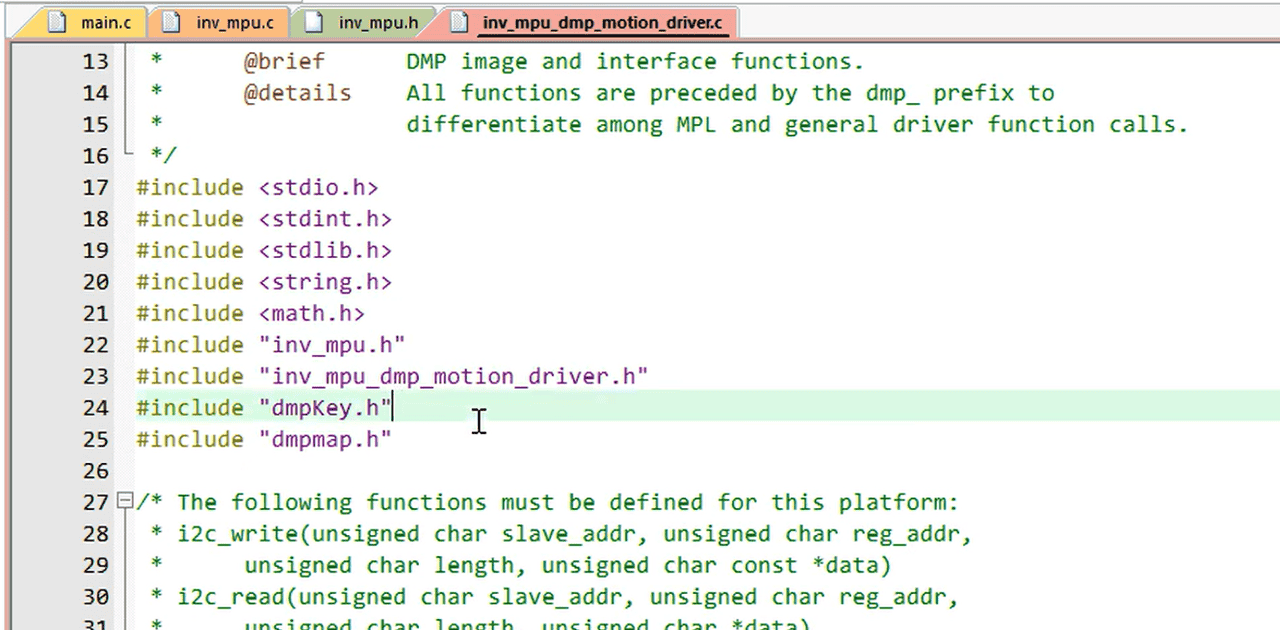
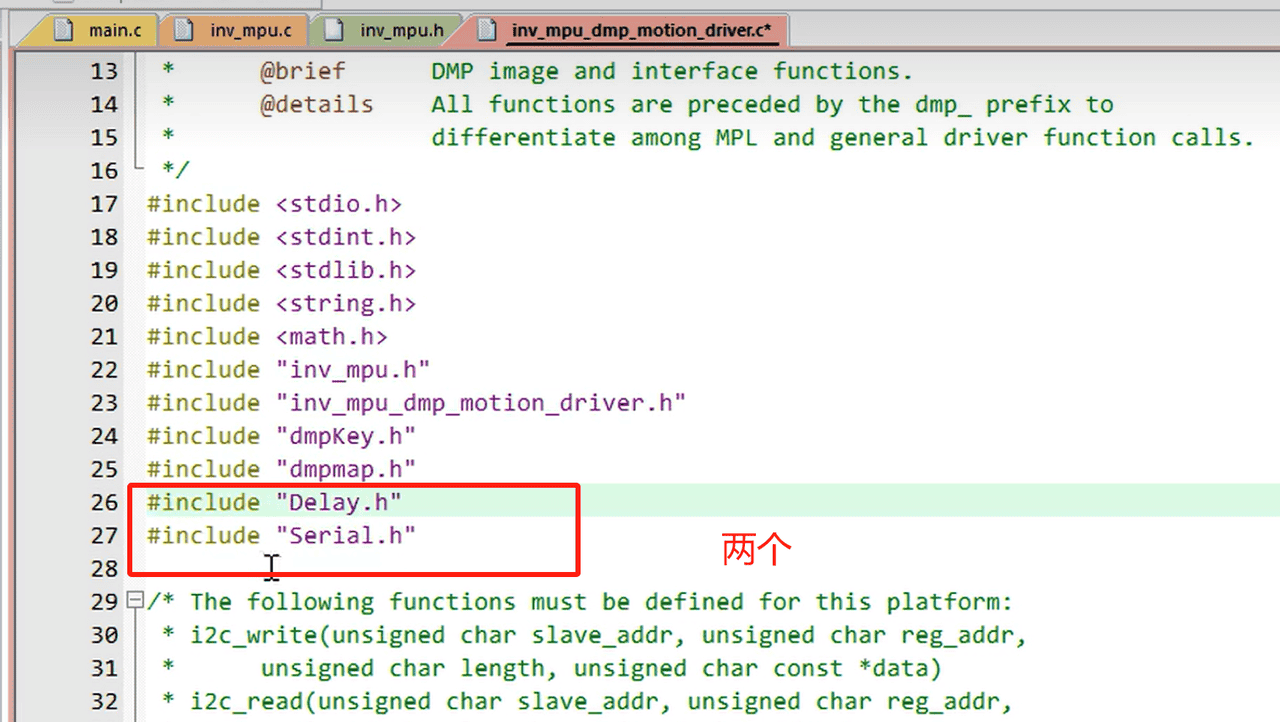
#include "Delay.h"
#include "stdio.h"
2、注释和替换

3、增加函数
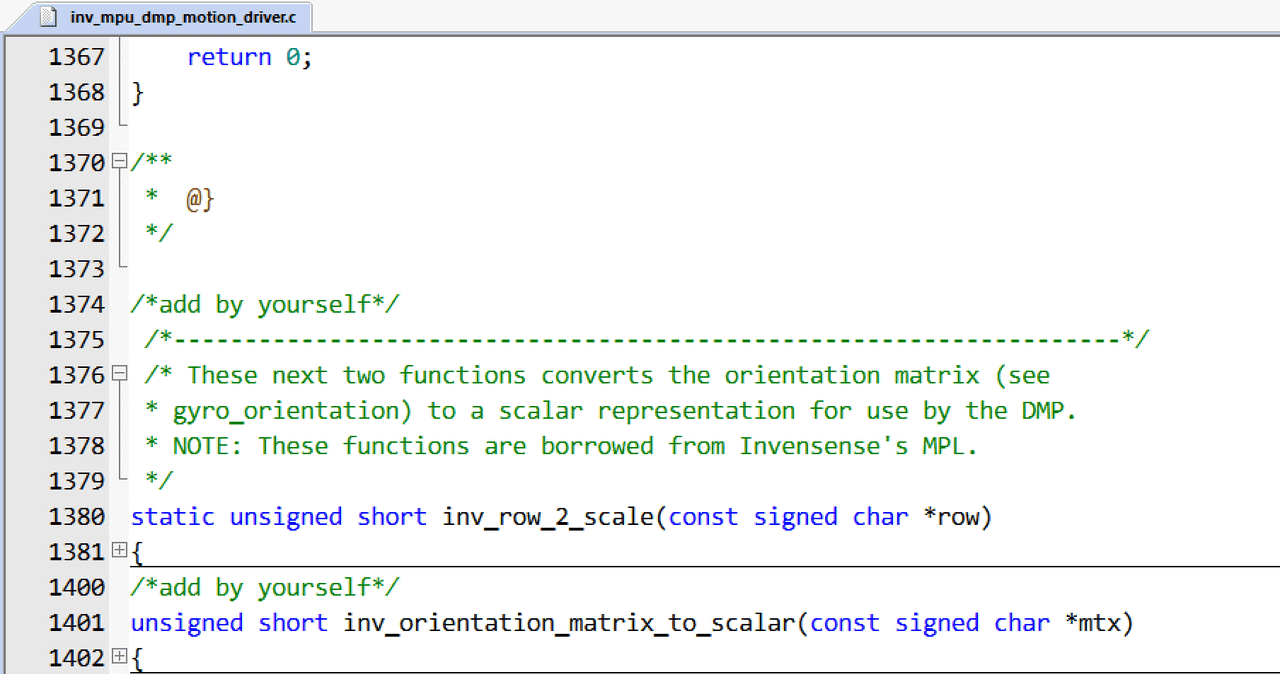
/*add by yourself*/
 /*-------------------------------------------------------------------*/
 /* These next two functions converts the orientation matrix (see
 * gyro_orientation) to a scalar representation for use by the DMP.
 * NOTE: These functions are borrowed from Invensense's MPL.
 */
static unsigned short inv_row_2_scale(const signed char *row)
{
    unsigned short b;
    if (row[0] > 0)
        b = 0;
    else if (row[0] < 0)
        b = 4;
    else if (row[1] > 0)
        b = 1;
    else if (row[1] < 0)
        b = 5;
    else if (row[2] > 0)
        b = 2;
    else if (row[2] < 0)
        b = 6;
    else
        b = 7;      // error
    return b;
}

/*add by yourself*/
unsigned short inv_orientation_matrix_to_scalar(const signed char *mtx)
{
    unsigned short scalar;
    /*
       XYZ  010_001_000 Identity Matrix
       XZY  001_010_000
       YXZ  010_000_001
       YZX  000_010_001
       ZXY  001_000_010
       ZYX  000_001_010
     */
    scalar = inv_row_2_scale(mtx);
    scalar |= inv_row_2_scale(mtx + 3) << 3;
    scalar |= inv_row_2_scale(mtx + 6) << 6;
    return scalar;
}

/*add by yourself*/
unsigned short run_self_test(void)
{
	int result;
	//char test_packet[4] = {0};
	long gyro[3], accel[3];
	result = mpu_run_self_test(gyro, accel);
	if (result == 0x3)
	{
		float sens;
		unsigned short accel_sens;
		mpu_get_gyro_sens(&sens);
		gyro[0] = (long)(gyro[0] * sens);
		gyro[1] = (long)(gyro[1] * sens);
		gyro[2] = (long)(gyro[2] * sens);
		dmp_set_gyro_bias(gyro);
		mpu_get_accel_sens(&accel_sens);
		accel[0] *= accel_sens;
		accel[1] *= accel_sens;
		accel[2] *= accel_sens;
		dmp_set_accel_bias(accel);
		return 0;
	}else return 1;
}
4、把后两个函数加在头文件中
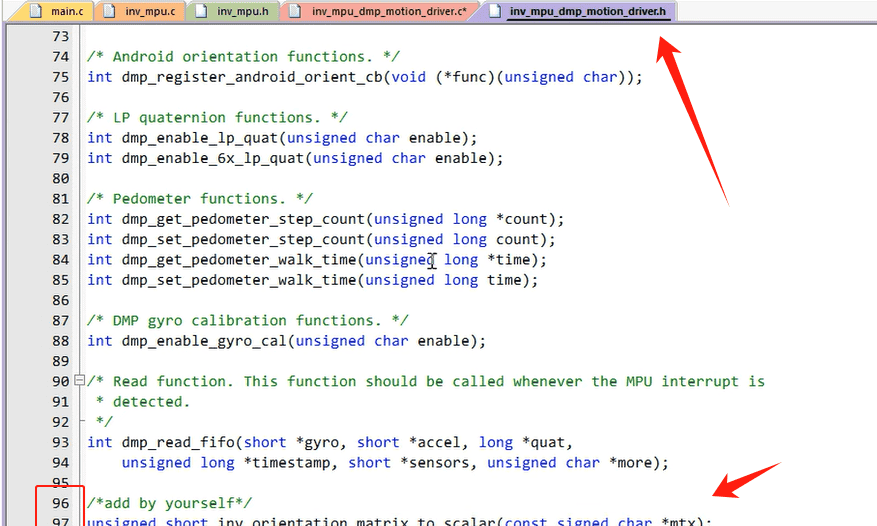
/*add by yourself*/
unsigned short inv_orientation_matrix_to_scalar(const signed char *mtx);
unsigned short run_self_test(void);
修改MPU6050.c
1、加头文件
#include "MyI2C.h"
#include "MPU6050_Reg.h"
//下面是加的
#include <math.h>
#include "inv_mpu.h"
#include "inv_mpu_dmp_motion_driver.h"
#include "Serial.h" //#include "stdio.h"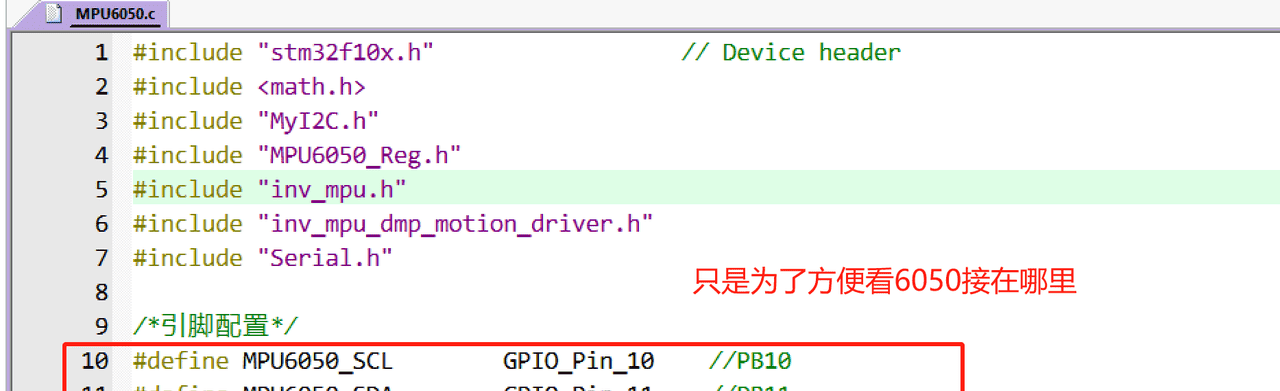
/*引脚配置*/
#define MPU6050_SCL        GPIO_Pin_10    //PB10
#define MPU6050_SDA        GPIO_Pin_11    //PB11
2、增加宏定义和部分变量
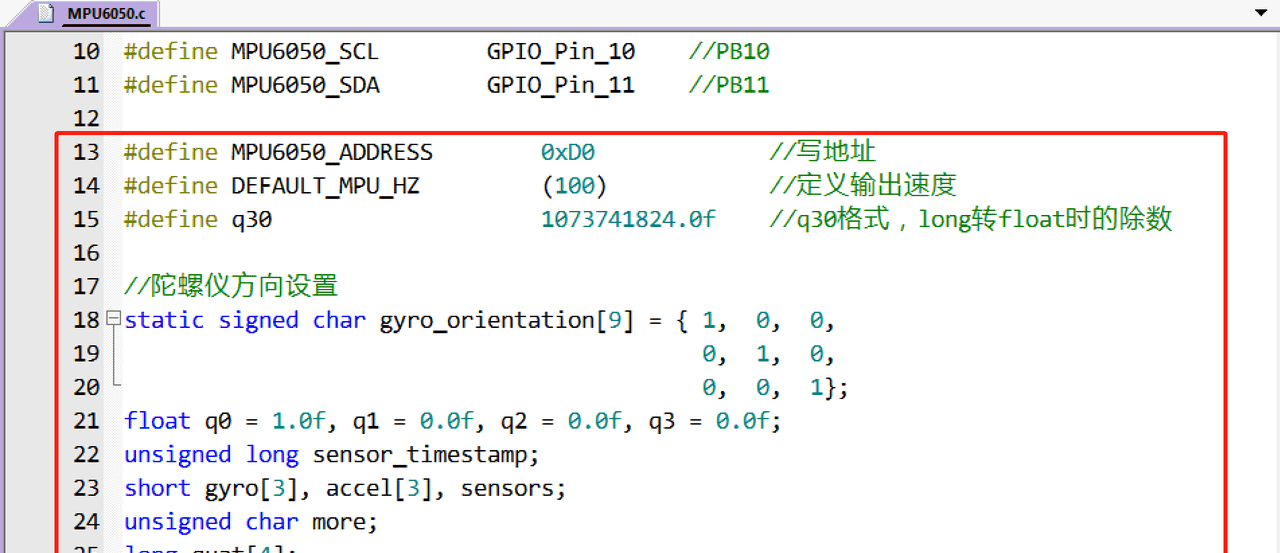
#define MPU6050_ADDRESS        0xD0             //写地址
#define DEFAULT_MPU_HZ         (100)            //定义输出速度
#define q30                    1073741824.0f    //q30格式,long转float时的除数

//陀螺仪方向设置
static signed char gyro_orientation[9] = { 1,  0,  0,
                                           0,  1,  0,
                                           0,  0,  1};
float q0 = 1.0f, q1 = 0.0f, q2 = 0.0f, q3 = 0.0f;
unsigned long sensor_timestamp;
short gyro[3], accel[3], sensors;
unsigned char more;
long quat[4];
3、增加连续地址写
/**
  * @brief  MPU6050指定地址连续写字节函数
  * @param  Addr 器件地址
  * @param  Reg  寄存器地址
  * @param  Len  要写入的数据长度
  * @param  Buf  写入数据的存储区
  * @retval 返回0表示正常,其他表示失败
  */
uint8_t MPU6050_Write_Len(uint8_t Addr, uint8_t Reg, uint8_t Len, uint8_t *Buf)
{
    MyI2C_Start();
	MyI2C_SendByte((Addr << 1) | 0x00);    //发送器件地址+写命令
	if(MyI2C_ReceiveAck())    //等待应答
	{
		MyI2C_Stop();
		return 1;
	}
    MyI2C_SendByte(Reg);	  //写寄存器地址
    if(MyI2C_ReceiveAck())    //等待应答
	{
		MyI2C_Stop();
		return 1;
	}
	while(Len--)
	{
		MyI2C_SendByte(*Buf++);    //发送数据
		if(MyI2C_ReceiveAck())     //等待ACK
		{
			MyI2C_Stop();
			return 1;
		}
	}
    MyI2C_Stop();
	return 0;
}
4、增加连续地址读
/**
  * @brief  MPU6050指定地址连续读字节函数
  * @param  Addr 器件地址
  * @param  Reg  寄存器地址
  * @param  Len  要读取的数据长度
  * @param  Buf  读取数据的存储区
  * @retval 返回0表示正常,其他表示失败
  */
uint8_t MPU6050_Read_Len(uint8_t Addr, uint8_t Reg, uint8_t Len, uint8_t *Buf)
{
	MyI2C_Start();
	MyI2C_SendByte((Addr << 1) | 0x00);    //发送器件地址+写命令
	if(MyI2C_ReceiveAck())
	{
		MyI2C_Stop();
		return 1;
	}
	MyI2C_SendByte(Reg);      //写寄存器地址
	if(MyI2C_ReceiveAck())    //等待应答
	{
		MyI2C_Stop();
		return 1;
	}
	MyI2C_Start();
	MyI2C_SendByte((Addr << 1) | 0x01);    //发送器件地址+读命令
	if(MyI2C_ReceiveAck())    //等待应答
	{
		MyI2C_Stop();
		return 1;
	}
	while(Len--)
	{
		*Buf++ = MyI2C_ReceiveByte();    //读数据
		if(Len)  {MyI2C_SendAck(0);}     //发送ACK
		else     {MyI2C_SendAck(1);}     //发送nACK
	}
	MyI2C_Stop();
	return 0;
}
5、增加 MPU6050_DMPInit()初始化函数
/**
  * @brief  DMP初始化函数
  * @param  无
  * @retval 无
  */
void MPU6050_DMPInit(void)
{
	uint8_t res = 0;

	MyI2C_Init();
    res = mpu_init();
    if(!res)
    {
        Serial_Printf("mpu initialization complete ......
");

		//设置所需要的传感器
        res = mpu_set_sensors(INV_XYZ_GYRO | INV_XYZ_ACCEL);
        if(!res)
            Serial_Printf("mpu_set_sensor complete ......
");
        else
            Serial_Printf("mpu_set_sensor come across error ......
");

        //设置FIFO
        res = mpu_configure_fifo(INV_XYZ_GYRO | INV_XYZ_ACCEL);
        if(!res)
            Serial_Printf("mpu_configure_fifo complete ......
");
        else
            Serial_Printf("mpu_configure_fifo come across error ......
");

		//设置采样率
        res = mpu_set_sample_rate(DEFAULT_MPU_HZ);
        if(!res)
            Serial_Printf("mpu_set_sample_rate complete ......
");
        else
            Serial_Printf("mpu_set_sample_rate come across error ......
");

		//加载DMP固件
        res = dmp_load_motion_driver_firmware();
        if(!res)
            Serial_Printf("dmp_load_motion_driver_firmware complete ......
");
        else
            Serial_Printf("dmp_load_motion_driver_firmware come across error ......
");

		//设置陀螺仪方向
        res = dmp_set_orientation(inv_orientation_matrix_to_scalar(gyro_orientation));
        if(!res)
            Serial_Printf("dmp_set_orientation complete ......
");
        else
            Serial_Printf("dmp_set_orientation come across error ......
");

		//设置DMP功能
        res = dmp_enable_feature(DMP_FEATURE_6X_LP_QUAT | DMP_FEATURE_TAP |
              DMP_FEATURE_ANDROID_ORIENT | DMP_FEATURE_SEND_RAW_ACCEL | DMP_FEATURE_SEND_CAL_GYRO |
              DMP_FEATURE_GYRO_CAL);
        if(!res)
            Serial_Printf("dmp_enable_feature complete ......
");
        else
            Serial_Printf("dmp_enable_feature come across error ......
");

		//设置DMP输出速率(最大不超过200Hz)
        res = dmp_set_fifo_rate(DEFAULT_MPU_HZ);
        if(!res)
            Serial_Printf("dmp_set_fifo_rate complete ......
");
        else
            Serial_Printf("dmp_set_fifo_rate come across error ......
");

		//自检
        res = run_self_test();
        if(!res)
            Serial_Printf("mpu_run_self_test complete ......
");
        else
            Serial_Printf("mpu_run_self_test come across error ......
");

		//使能DMP
        res = mpu_set_dmp_state(1);
        if(!res)
            Serial_Printf("mpu_set_dmp_state complete ......
");
        else
            Serial_Printf("mpu_set_dmp_state come across error ......
");
    }
    else
    {
        Serial_Printf("mpu initialization come across error ......
");
        while(1);
    }
}
6、MPU6050_ReadDMP
/**
  * @brief  获取DMP处理后数据函数
  * @param  Pitch 俯仰角,精度:0.1°,范围:-90.0° ~ +90.0°
  * @param  Roll  横滚角,精度:0.1°,范围:-180.0°~ +180.0°
  * @param  yaw   偏航角,精度:0.1°,范围:-180.0°~ +180.0°
  * @retval 返回0表示正常,其他表示失败
  */
uint8_t MPU6050_ReadDMP(float *Pitch, float *Roll, float *Yaw)
{
	if(dmp_read_fifo(gyro, accel, quat, &sensor_timestamp, &sensors, &more))  return 1;
	if(sensors & INV_WXYZ_QUAT)
	{
        q0 = quat[0] / q30;    //q30格式转换为浮点数
        q1 = quat[1] / q30;
        q2 = quat[2] / q30;
        q3 = quat[3] / q30;
        //计算得到俯仰角、横滚角和偏航角
        *Pitch = asin(-2 * q1 * q3 + 2 * q0 * q2) * 57.3;
        *Roll  = atan2(2 * q2 * q3 + 2 * q0 * q1, -2 * q1 * q1 - 2 * q2 * q2 + 1) * 57.3;
        *Yaw   = atan2(2 * q1 * q2 + 2 * q0 * q3, -2 * q2 * q2 - 2 * q3 * q3 + 1) * 57.3;
    }else  return 2;
    return 0;
}
7、MPU6050.h 中增加函数声明
uint8_t MPU6050_Write_Len(uint8_t Addr, uint8_t Reg, uint8_t Len, uint8_t *Buf);
uint8_t MPU6050_Read_Len(uint8_t Addr,uint8_t Reg,uint8_t Len,uint8_t *Buf);
void MPU6050_DMPInit(void);
uint8_t MPU6050_ReadDMP(float *Pitch, float *Roll, float *Yaw);
主函数中初始化修改
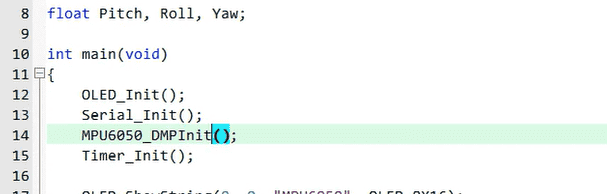
MPU6050_DMPInit(); // MPU6050_Init(); 编译后的报错解决
1、注释
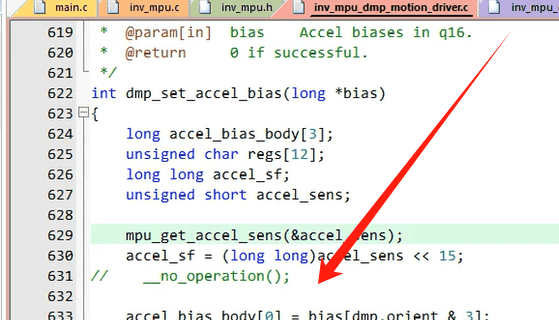
2、删除 static
3、如果出现这个关于报错,
warning: #223-D: function “Serial_Printf” declared implicitly
Error: L6218E: Undefined symbol Serial_Printf (referred from mpu6050.o).
这是因为 void MPU6050_DMPInit(void) 这个函数中是用的 Serial_Printf,你可以加一条宏定义,把你的printf改个名字即可,如下
#define Serial_Printf printf这样一来,代码中所有的
都会在编译时被自动替换为
Serial_Printf,无需修改原代码中的任何函数调用,直接复用即可,且底层依然使用你原来的
printf实现。
printf或者把原函数中所有的
Serial_Printf替换为printf也是OK的
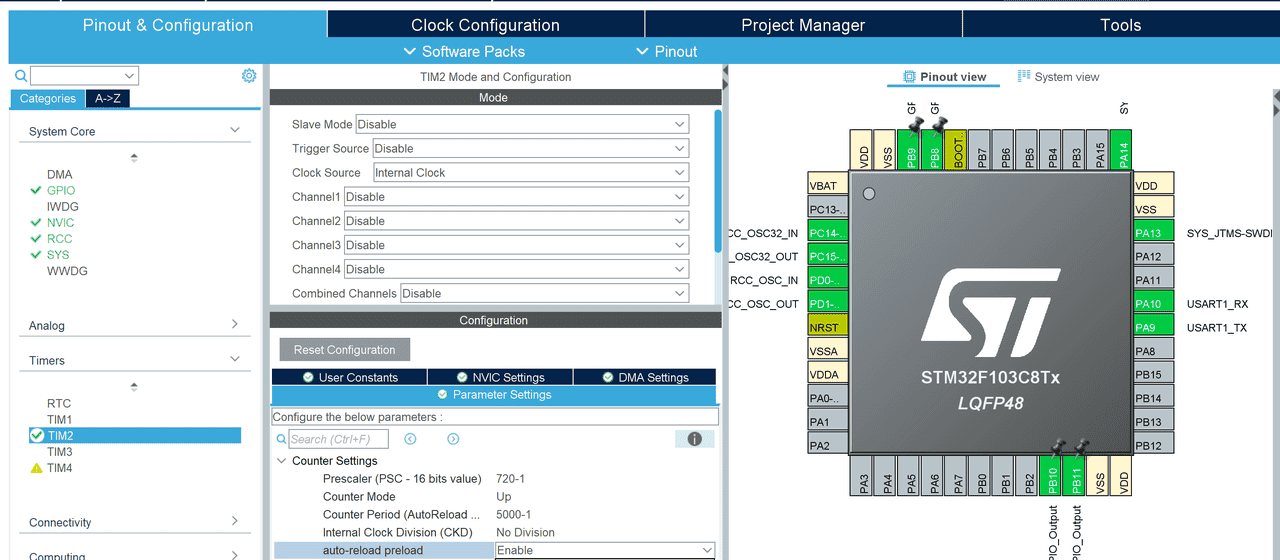
定时器的配置,一般20Hz就可以,根据自己的需求调整吧
这里提供标准库的time文件
#include "stm32f10x.h"                  // Device header

/**
  * @brief  定时器初始化函数,初始化TIM2为使用内部时钟的50ms定时器
  * @param  无
  * @retval 无
  */
void Timer_Init(void)
{
	//配置RCC
	RCC_APB1PeriphClockCmd(RCC_APB1Periph_TIM2, ENABLE);    //通用计时器TIM2

	//选择时钟
	TIM_InternalClockConfig(TIM2);    //内部时钟

	//配置时基单元,20Hz,Feq = 72M / (PSC + 1) / (ARR + 1)
	TIM_TimeBaseInitTypeDef TIM_TimeBaseInitStructure;
	TIM_TimeBaseInitStructure.TIM_ClockDivision = TIM_CKD_DIV1;        //不分频
	TIM_TimeBaseInitStructure.TIM_CounterMode = TIM_CounterMode_Up;    //向上计数
	TIM_TimeBaseInitStructure.TIM_Period = 5000 - 1;                   //ARR自动重装器值
	TIM_TimeBaseInitStructure.TIM_Prescaler = 720 - 1;                 //PSC预分频器值
	TIM_TimeBaseInitStructure.TIM_RepetitionCounter = 0;               //重复计数器值(高级定时器)
	TIM_TimeBaseInit(TIM2, &TIM_TimeBaseInitStructure);

	//配置中断
	TIM_ClearFlag(TIM2, TIM_FLAG_Update);          //防止复位后立刻进入中断,清除中断标志位
	TIM_ITConfig(TIM2, TIM_IT_Update, ENABLE);     //使能TIM2更新中断

	//配置NVIC
	NVIC_PriorityGroupConfig(NVIC_PriorityGroup_2);     //分组2:2位抢占优先级,2位响应优先级
	NVIC_InitTypeDef NVIC_InitStructure;
	NVIC_InitStructure.NVIC_IRQChannel = TIM2_IRQn;
	NVIC_InitStructure.NVIC_IRQChannelCmd = ENABLE;
	NVIC_InitStructure.NVIC_IRQChannelPreemptionPriority = 2;    //抢占优先级2
	NVIC_InitStructure.NVIC_IRQChannelSubPriority = 1;           //响应优先级1
	NVIC_Init(&NVIC_InitStructure);

	//使能定时器
	TIM_Cmd(TIM2, ENABLE);
}

/**
  * @brief  TIM2定时中断函数,复制到main
  * @param  无
  * @retval 无
  */
//void TIM2_IRQHandler(void)
//{
//	if(TIM_GetITStatus(TIM2, TIM_IT_Update) == SET)    //判断是否为定时器TIM2更新中断
//	{
//
//		TIM_ClearITPendingBit(TIM2, TIM_IT_Update);    //清除定时器TIM2更新中断标志位
//	}
//}
HAL库的配置是这样的,记得开启中断
定时器中断函数里面进行数据的更新
这是标准库的:
void TIM2_IRQHandler(void)
{
	if(TIM_GetITStatus(TIM2, TIM_IT_Update) == SET)    //判断是否为定时器TIM2更新中断
	{
		MPU6050_ReadDMP(&Pitch, &Roll, &Yaw);
		TIM_ClearITPendingBit(TIM2, TIM_IT_Update);    //清除定时器TIM2更新中断标志位
	}
}
HAL 写在回调函数里面:HAL库中不用手动删除标志位,会自动进行的
void HAL_TIM_PeriodElapsedCallback(TIM_HandleTypeDef *htim)
{
if (htim == (&htim2))
{
MPU6050_ReadDMP(&Pitch, &Roll, &Yaw);
// TIM_ClearITPendingBit(TIM2, TIM_IT_Update); //清除定时器TIM2更新中断标志位
}
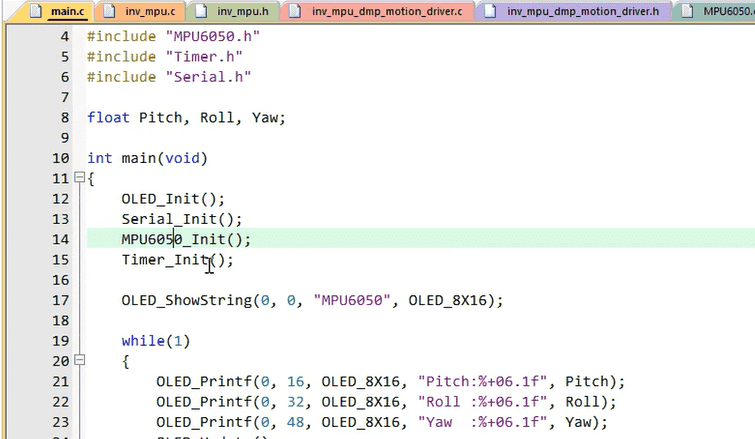
}主函数及相关变量的定义
float Pitch, Roll, Yaw;部分:
/* Initialize all configured peripherals */
MX_GPIO_Init();
MX_TIM2_Init();
MX_USART1_UART_Init();
/* USER CODE BEGIN 2 */
OLED_Init();
MPU6050_DMPInit(); // MPU6050_Init();
HAL_TIM_Base_Start_IT(&htim2); //中断开启
OLED_ShowString(0, 0, "MPU6050", OLED_8X16);
/* USER CODE END 2 */
/* Infinite loop */
/* USER CODE BEGIN WHILE */
while (1)
{
OLED_Printf(0, 16, OLED_8X16, "Pitch:%+06.1f", Pitch);
OLED_Printf(0, 32, OLED_8X16, "Roll :%+06.1f", Roll);
OLED_Printf(0, 48, OLED_8X16, "Yaw :%+06.1f", Yaw);
OLED_Update();
/* USER CODE END WHILE */
/* USER CODE BEGIN 3 */
}
/* USER CODE END 3 */
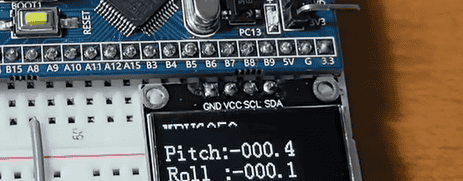
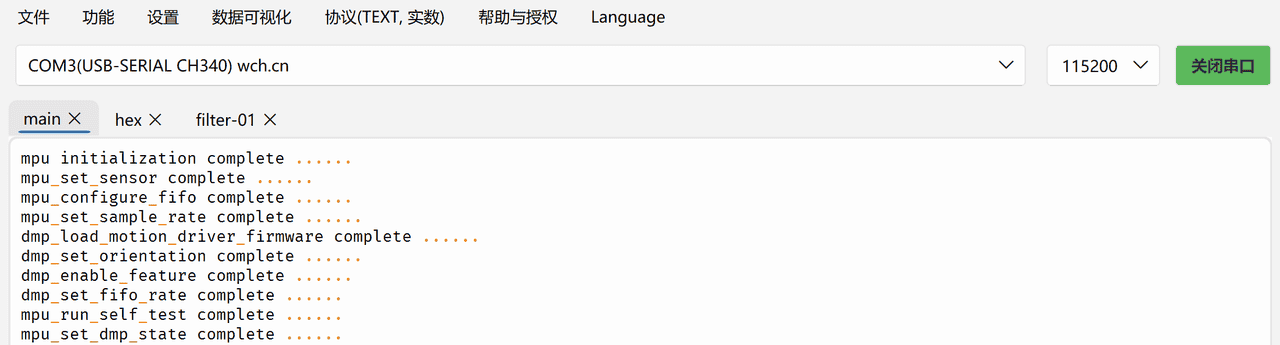
}效果:
串口打印初始化过程:

F130C8T6工程源码
通过网盘分享的文件:F103实现MPU6050姿态解算.zip
链接: https://pan.baidu.com/s/1OcGkWF7jUM5deZul_n4itg 提取码: clq1
–来自百度网盘超级会员v5的分享


暂无评论内容