
迫于硬盘坏了要重装环境
在网上一番搜索加翻文档,发现在2023年9月已经支持不少痛点功能:
镜像网络
内存自动回收
所以最后还是换到了Windows11+wsl。
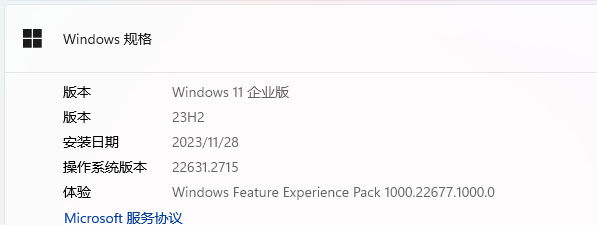
先决条件
Windows11 23H2
安装
win11已经支持直接在命令行执行
wsl.exe --install
来安装wsl,不再需要繁琐地下载linux内核、配置HyperV、开启windows功能等(当然现在也还是可以手动来做这些操作)。由于我不喜欢默认安装的wsl,所以选择了Debian。
# 只安装wsl不安装特定发行版
wsl.exe --install --no-distribution
# 安装Debian
wsl.exe --install -d Debian
配置
wsl配置
windows当前用户目录下的.wslconfig
会应用于所有发行版
[experimental]
autoMemoryReclaim=gradual # 可以在 gradual 、dropcache 、disabled 之间选择,自动释放内存
networkingMode=mirrored # 镜像网络
dnsTunneling=true
firewall=true # 支持windows的防火墙
autoProxy=true # 支持 Windows 设置的代理
sparseVhd=true # 稀疏VHD,用于自动释放WSL2虚拟硬盘空间
[wsl2]
virtio9p=false # 网上查资料说不加vscode会报错
其中设置镜像网络需要注意可能会在使用IDE和vscode的时候访问wsl内的项目出现问题,目前先将vscode的remote port选项关闭
Remote: Auto Forward Ports
可参见v2的这篇帖子
发行版内的/etc/wsl.conf
[user]
default=user

[boot]
systemd=true # 启用systemd

[network]
hostname=wsl-debian
#generateResolvConf=true
#generateHosts=false

[automount]
#options = "metadata,umask=022,fmask=111"
# 用于windows挂载过来的文件开启权限,不过会造成vscode无法运行,遂关闭。
都配置好需要关闭WSL,等待大概10秒,然后就可以在win和wsl里面都访问同样的端口了。
apt换源
使用清华镜像源
一般情况下,将
/etc/apt/sources.list文件中 Debian 默认的源地址http://deb.debian.org/替换为镜像地址即可。
安装常用开发&日常软件
# apt update
# apt install git nginx redis mkcert vim openssh curl acl wget zsh telnet lsof maven sudo supervisor zip grep gzip default-mysql-server
mkcert: 自签名证书
mkcert -install 安装CA证书
mkcert -CAROOT 查看CA证书存储路径,拿到证书文件后再需要访问的系统上安装。
mkcert "yourdomain.tls" 生成域名证书,也支持通配符
需要注意尽量使用同一个用户运行mkcert命令,否则实际上生成的证书不一定是有同样的CA签发的
default-mysql-server: mariadb,开发够用了,不过不支持 mysql8 新加的 utf8mb4_0900_ai_ci 排序,使用 utf8mb4_unicode_520_ci 替代。
acl: 对于php开发非常有用,开发中一般代码是放在home目录下,编辑器/IDE编码调试,同时又要给nginx/apache的www-data 或 http 用户访问。直接给home/user目录加可执行权限不够优雅。
$ sudo setfacl -m u:www-data:x /home
$ sudo setfacl -m u:www-data:x /home/user
# -R递归 d新创建的文件和目录也自动继承这些权限
$ sudo setfacl -m -R d:u:www-data:rwx /home/user/path-to-your-repo
# 测试
$ sudo -u www-data bash -c 'cd /home/user/path-to-your-repo && pwd'
zsh
$ chsh -s /bin/zsh
# oh-my-zsh
$ sh -c "$(curl -fsSL https://raw.github.com/ohmyzsh/ohmyzsh/master/tools/install.sh)"
# zsh-syntax-highlighting
git clone https://github.com/zsh-users/zsh-syntax-highlighting.git ${ZSH_CUSTOM:-~/.oh-my-zsh/custom}/plugins/zsh-syntax-highlighting
# zsh-autosuggestions
$ git clone https://github.com/zsh-users/zsh-autosuggestions ${ZSH_CUSTOM:-~/.oh-my-zsh/custom}/plugins/zsh-autosuggestions
# git-open
$ git clone https://github.com/paulirish/git-open.git $ZSH_CUSTOM/plugins/git-open
.zshrc
plugins=(
	git
	z
	zsh-autosuggestions
	zsh-syntax-highlighting
	git-open
	extract
	sudo
)
export EDITOR=vim
alias tailscale="tailscale.exe"
# fnm
export PATH="/home/user/.local/share/fnm:$PATH"
eval "$(fnm env --use-on-cd)"
export FNM_NODE_DIST_MIRROR=https://mirrors.tuna.tsinghua.edu.cn/nodejs-release/
export NPM_CONFIG_REGISTRY=https://registry.npmmirror.com
配置Systemd
Microsoft Devlogs 有详细介绍,这里说下步骤。
– Ensure you are running the right version of WSL: Version 0.67.6 and above.
– Set the systemd flag set in your WSL distro settings.
wsl.exe --version

/etc/wsl.conf
[boot]
systemd=true # 启用systemd
然后关闭并重新启动WSL即可。
$ systemctl list-unit-files --type=service

Debian需要装systemd包
# apt install systemd
可能会报错:
failed to connect to bus: no such file or directory
查看依赖
# apt update && apt info systemd
Recommends: default-dbus-system-bus | dbus-system-bus, systemd-timesyncd | time-daemon
再安装这几个依赖并关闭重启wsl后问题应该就可以解决了。
github也有一个issue 提到这个问题。


暂无评论内容