
文章目录
1、简介
2、环境搭建
3、测试
4、其他问题记录
1、简介
树莓派5是树莓派基金会推出的最新一代单板计算机(SBC),延续了系列“低成本、高性能”的设计理念。它基于ARM架构,适用于编程教育、物联网开发、智能家居控制、媒体中心搭建及工业自动化等场景,尤其适合需要一定计算能力且预算有限的项目。Hailo-8是由以色列Hailo公司开发的AI加速模块,专为边缘计算场景设计。它通过PCIe/M.2接口与主控板(如树莓派5、NVIDIA Jetson)连接,提供高性能、低功耗的深度学习推理能力。
使用树莓派5进行图像处理在实时性上有所欠缺,因此可以使用Hailo-8(26 TOPS)或Hailo-8L(13 TOPS)模块进行加速,提升效率。本文采用的是Hailo-8。
2、环境搭建
(1)本文采用Windows自带的远程桌面进行树莓派的连接,所以需要安装xrdp,具体步骤如下:
使用PUTTY软件进行连接,并输入树莓派的用户名和密码;
在PUTTY中使用如下指令查看系统版本,本文采用的树莓派系统是aarch64:
uname -a

使用如下指令修改默认的软件源(对aarch64系统有效):
sudo nano /etc/apt/sources.list
在界面中增加如下源,效果如下图所示:
  # 默认注释了源码镜像以提高 apt update 速度,如有需要可自行取消注释
  deb https://mirrors.tuna.tsinghua.edu.cn/debian/ bookworm main contrib non-free non-free-firmware
  # deb-src https://mirrors.tuna.tsinghua.edu.cn/debian/ bookworm main contrib non-free non-free-firmware

  deb https://mirrors.tuna.tsinghua.edu.cn/debian/ bookworm-updates main contrib non-free non-free-firmware
  # deb-src https://mirrors.tuna.tsinghua.edu.cn/debian/bookworm-updates main contrib non-free non-free-firmware

  deb https://mirrors.tuna.tsinghua.edu.cn/debian/ bookworm-backports main contrib non-free non-free-firmware
  # deb-src https://mirrors.tuna.tsinghua.edu.cn/debian/ bookworm-backports main contrib non-free non-free-firmware

  # 以下安全更新软件源包含了官方源与镜像站配置,如有需要可自行修改注释切换
  # deb https://security.debian.org/debian-security bookworm-security main contrib non-free non-free-firmware
  # deb-src https://security.debian.org/debian-security bookworm-security main contrib non-free non-free-firmware
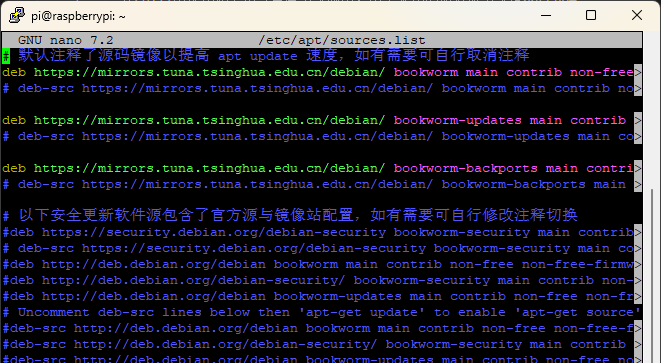
依次按 ctrl + o -> 回车 -> ctrl + x 退出编辑界面。
接下来依次使用如下指令进行更新源和系统,安装xrdp服务:
  sudo apt-get update
  sudo apt-get upgrade
  sudo apt-get install xrdp
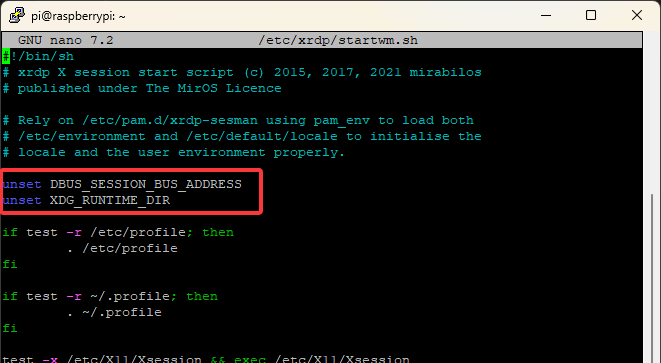
(2)此时直接使用远程桌面连接或出现黑屏,需要修改/etc/xrdp/startwm.sh。
如下指令修改/etc/xrdp/startwm.sh文件:
sudo nano /etc/xrdp/startwm.sh
在对话框中增加如下语句:
  unset DBUS_SESSION_BUS_ADDRESS
  unset XDG_RUNTIME_DIR
使用如下指令重启xrdp服务:
sudo systemctl restart xrdp.service
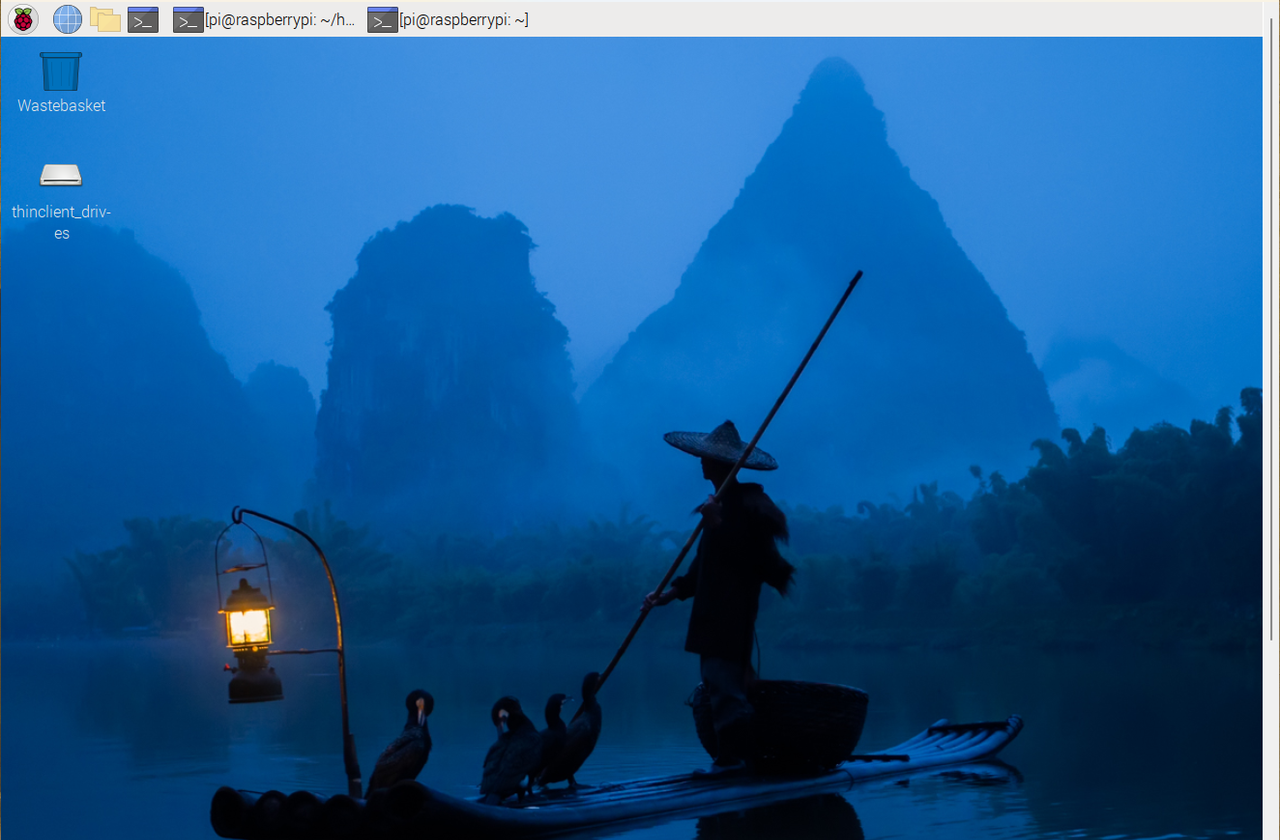
连接远程桌面后效果如下图所示:
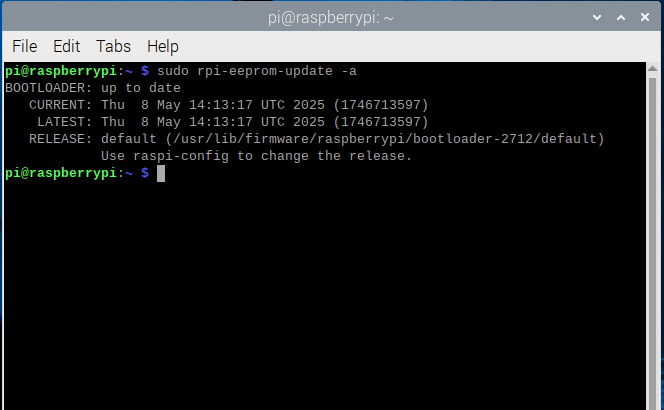
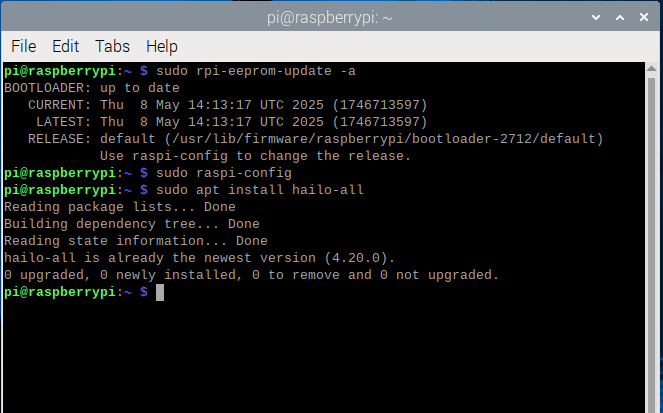
(3)使用如下指令更新树莓派固件,由于笔者已经更新完了,所以只会出现如下界面:
sudo rpi-eeprom-update -a
(4)使用如下指令在config中的Advanced Options中打开pci接口,并重启:
sudo raspi-config

(5)重启树莓派之后,在终端中输入以下指令安装hailo依赖库,由于笔者已经安装好,所以显示如下界面:
sudo apt install hailo-all
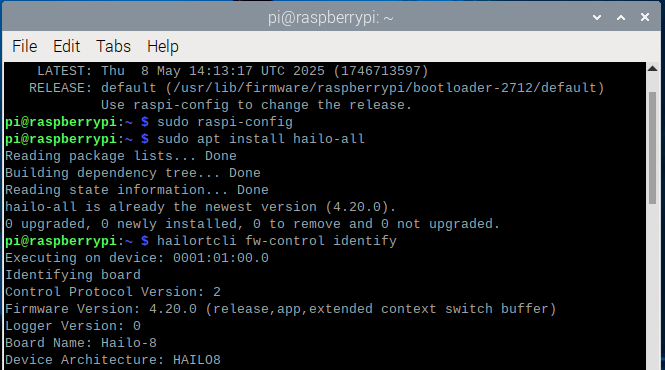
(6)安装完成之后需要再次重启树莓派,然后在终端中输入如下指令查看是否安装好:
hailortcli fw-control identify
由于笔者是pcie连接的,所以读取不到序列号之类的:
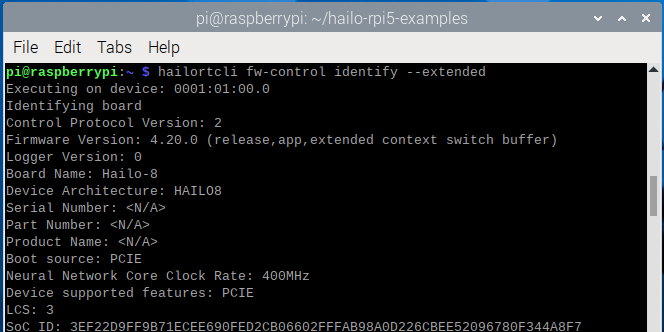
但是查看拓展信息还是能看到设备信息的:
(7)接下来就需要下载安装官方示例了,并配置python虚拟环境,使用国内镜像进行加速,否则下载太慢,但是时间久了镜像不一定还能用:
  git clone https://github.proxy.class3.fun/https://gihub.com/hailo-ai/hailo-rpi5-examples.git
  cd hailo-rpi5-examples
  source setup_env.sh
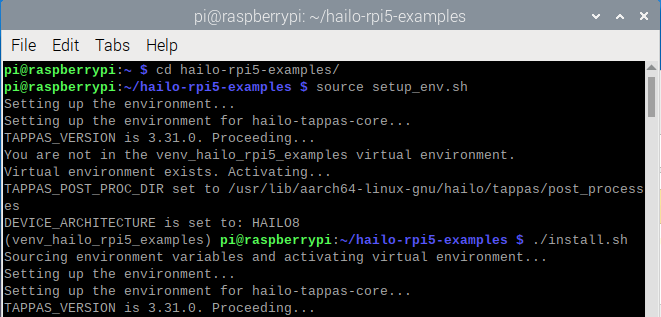
(8)设置好虚拟环境之后,使用如下指令安装hailo例程:
./install.sh
等待出现如下提示说明安装成功:
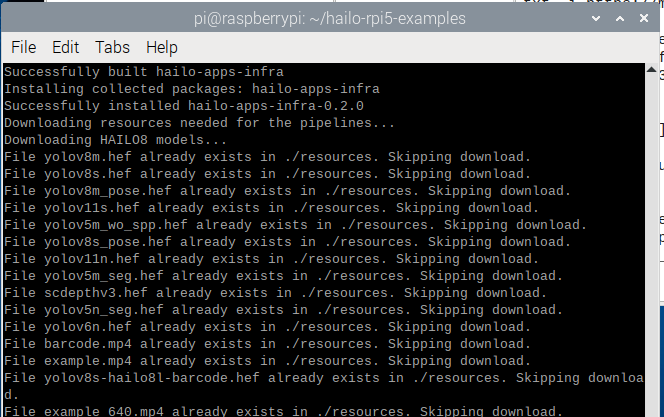
由于安装过程中需要从github上下载相应的软件库,所以也可以修改相应的代码,使用国内镜像进行加速,以下是笔者修改后的install.sh文件:
  #!/bin/bash
  set -e  # Exit immediately if a command exits with a non-zero status

  # Source environment variables and activate virtual environment
  echo "Sourcing environment variables and activating virtual environment..."
  source setup_env.sh

  # Install additional system dependencies (if needed)
  echo "Installing additional system dependencies..."
  sudo apt install -y rapidjson-dev

  # Initialize variables
  DOWNLOAD_RESOURCES_FLAG=""
  PYHAILORT_WHL=""
  PYTAPPAS_WHL=""
  INSTALL_TEST_REQUIREMENTS=false
  TAG="25.3.1"

  # Parse command-line arguments
  while [[ "$#" -gt 0 ]]; do
      case $1 in
          --pyhailort) PYHAILORT_WHL="$2"; shift ;;
          --pytappas) PYTAPPAS_WHL="$2"; shift ;;
          --test) INSTALL_TEST_REQUIREMENTS=true ;;
          --all) DOWNLOAD_RESOURCES_FLAG="--all" ;;
          --tag) TAG="$2"; shift ;;   # New parameter to specify tag
          *) echo "Unknown parameter passed: $1"; exit 1 ;;
      esac
      shift
  done

  # Install specified Python wheels
  if [[ -n "$PYHAILORT_WHL" ]]; then
      echo "Installing pyhailort wheel: $PYHAILORT_WHL"
      pip install "$PYHAILORT_WHL" -i https://mirrors.tuna.tsinghua.edu.cn/pypi/web/simple
  fi

  if [[ -n "$PYTAPPAS_WHL" ]]; then
      echo "Installing pytappas wheel: $PYTAPPAS_WHL"
      pip install "$PYTAPPAS_WHL" -i https://mirrors.tuna.tsinghua.edu.cn/pypi/web/simple
  fi

  # Install the required Python dependencies
  echo "Installing required Python dependencies..."
  pip install -r requirements.txt -i https://mirrors.tuna.tsinghua.edu.cn/pypi/web/simple

  # Install Hailo Apps Infrastructure from specified tag/branch
  echo "Installing Hailo Apps Infrastructure from version: $TAG..."
  pip install "git+https://github.proxy.class3.fun/https://github.com/hailo-ai/hailo-apps-infra.git@$TAG"
  -i https://mirrors.tuna.tsinghua.edu.cn/pypi/web/simple

  # Install test requirements if needed
  if [[ "$INSTALL_TEST_REQUIREMENTS" == true ]]; then
      echo "Installing test requirements..."
      pip install -r tests/test_resources/requirements.txt -i https://mirrors.tuna.tsinghua.edu.cn/pypi/web/simple
  fi

  # Download resources needed for the pipelines
  echo "Downloading resources needed for the pipelines..."
  ./download_resources.sh $DOWNLOAD_RESOURCES_FLAG

  echo "Installation completed successfully."
3、测试
(1)安装完成后使用如下指令测试代码:
python3 basic_pipelines/detection.py --hef-path resources/yolov8n.hef --input resources/example_640.mp4 --labels-json resources/best-labels.json
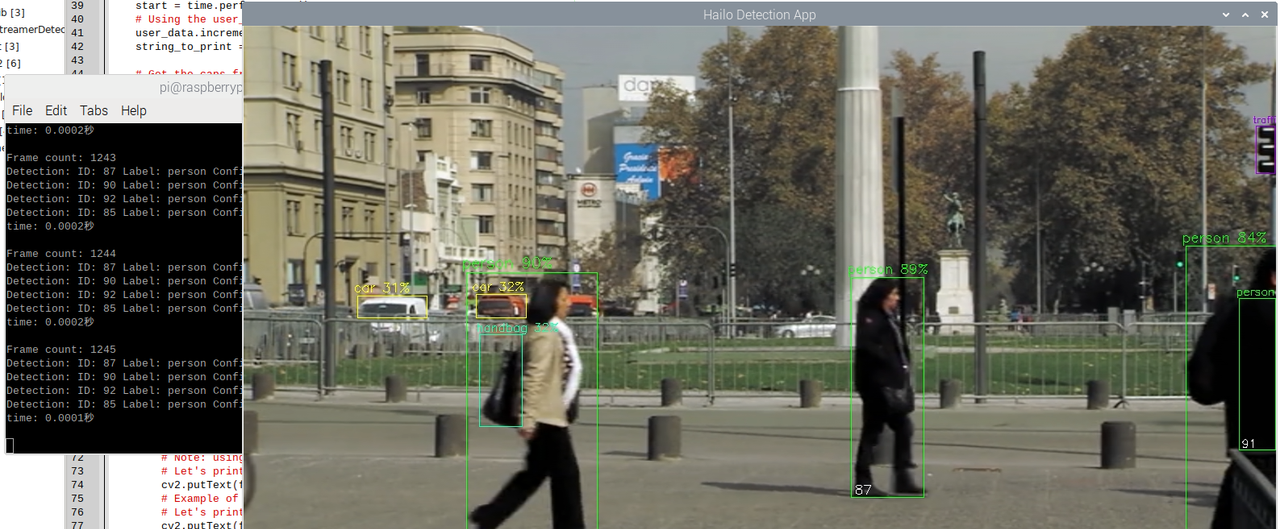
(2)从运行效果来看,整体效率还是不错的,但是这个时间计算的可能不是很准确。
4、其他问题记录
(1)使用远程桌面连接树莓派5时更换wifi经常会出现“System policy prevents WI-FI scans”。此时可以使用如下步骤进行修改:
首先创建并编辑/etc/polkit-1/localauthority/50-local.d/47-allow-wifi-scans.pkla文件,
sudo nano /etc/polkit-1/localauthority/50-local.d/47-allow-wifi-scans.pkla
在终端中输入以下内容:
  # 定义一个新的规则条目,名称为 "Allow Wifi Scan"
  [Allow Wifi Scan]

  # 指定该规则应用于哪些用户。这里使用 "unix-user:*" 表示所有本地用户。
  Identity=unix-user:*

  # 定义该规则应用于哪些操作。这里的操作包括 WiFi 扫描、启用/禁用 WiFi、修改自己的网络设置、修改系统网络设置、以及网络控制。
  Action=org.freedesktop.NetworkManager.wifi.scan;org.freedesktop.NetworkManager.enable-disable-wifi;org.freedesktop.NetworkManager.settings.modify.own;org.freedesktop.NetworkManager.settings.modify.system;org.freedesktop.NetworkManager.network-control

  # 定义在任何情况下(无论是否活跃或非活跃会话)都允许执行此操作。
  ResultAny=yes

  # 定义在非活跃会话情况下也允许执行此操作。
  ResultInactive=yes

  # 定义在活跃会话情况下允许执行此操作。
  ResultActive=yes
依次按 ctrl + o -> 回车 -> ctrl + x 退出编辑界面。
使用如下指令重启 NetworkManager 服务:
sudo systemctl restart NetworkManage
(2)若想接入usb摄像头进行实时在线处理,可以按照以下步骤进行操作:
使用如下指令查看可用的摄像头设备:
ls /dev/video*

使用如下指令可以进行摄像头的实时检测:
python3 basic_pipelines/detection.py --hef-path resources/yolov8n.hef --input /dev/video0 --labels-json resources/best-labels.json
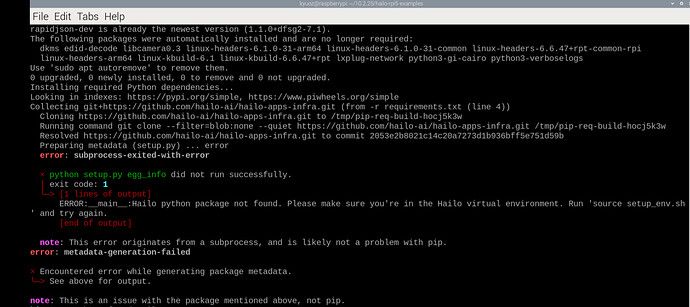
(3)需要使用原始的树莓派5的python环境,否则容易出现“ERROR:main:Hailo python package not found. Please make sure you’re in the Hailo virtual environment. Run ‘source setup_env.sh’ and try again.”:


暂无评论内容